
Home Cinema Room in Leicestershire
Your very own ‘best seat’ in the house…...
Immersive home cinema experience
A wonderful space where you can escape and truly immerse yourself watching your favourite movies.
We designed, installed and support the following home cinema sub-systems:
- Cinema Room Design
- Pre-wire cabling
- Timber Framing (for Stretch Fabric Wrap System)
- Acoustic Treatments
- Video Processor
- Video Sources
- Projector
- Projection Screen
- Projector Ceiling Mount
- Speakers
- Amplifiers
- Stretch Fabric Wrap System
- Smart Lighting
- THX Calibration
Initially we were introduced to the client via Suzi Wong of Grey Rose Architects, whom we had previously hosted at our Control4 show house, as the client had a specific requirement to build a dedicated home cinema room. At the start of the project the construction plans involved adding an additional wing, with an integrated large scale basement housing the cinema room, onto the structure of the building.
The client had several key initial requirements for the project:
- Seat 8 people comfortably
- The image and sound performance of the room was to take centre stage over the interior design features
- Full Dolby Atmos 3D sound
- A 4K projection screen that was as large as possible for the room
As per the requirements above, the client very much wanted the focus of the cinema room to be the image visible on the screen alongside with a great audible experience. To this end, they agreed with our preferred approach to minimise the inclusion of hard surfaces on the walls and ceilings. To this end, we recommended that all the walls and ceilings have a stretch fabric covering with all the speakers concealed behind the acoustically transparent fabric. To minimise the chance of light reflecting onto the projection screen the client also agreed to adopt a very dark colour tone in the room. We were able to provide the client with a black stretch fabric material to wrap all the walls and ceilings. The also ensured to select a black carpet for the room and platform.
We worked closely with the client to deliver to what we feel is an amazing place to escape too, where they can immerse themselves watching their favourite movies.
Contents of this case study:
- Key project statistics
- Home cinema room design
- 3D modelling of the home cinema room
- Site survey
- Project put on pause by client
- 1st fix sequence in home cinema room
- Cinema room 1st fix
- Cinema room 2nd fix
- Cinema room 3rd fix
- 360 degree sweep showing speakers and Space Frame installation
- Finished cinema room
- 360 degree sweep around finished home cinema room
- Smart lighting programmed sequence in home cinema room
- Summary of installed equipment
If you would like to discuss how we could help you with your specific project, click the following button and then complete the form for your free of charge consultation
Key project statistics
- 9.1.6 Dolby Atmos with 17 Individual Speaker Layout:
- 9 x Speakers at Ear Height
- 4 x Subwoofers
- 6 x Over Head
- 4m Wide Projection Screen:
- 2.4:1 Aspect Ratio
- Variety of pre-wire 1st fix cables:
- Speaker Cables
- HDMI Cables
- CAT6A Data Cables
- Coaxial Cables
- Control Cables
- Smart Lighting Cables
- Acoustic Treatments:
- Walls
- Ceiling
- Stretch Fabric Wrap:
- Walls
- Ceiling
Home cinema room design
After several meetings with the client, where we discussed some initial potential configurations of possible projection screen sizes and various seating layouts, we agreed the basic mechanics of the cinema room in the proposed basement e.g.,
- Room dimensions; 8.2m long, 6.2m wide & 3.3m high
- 9 x cinema seats across 2 rows:
- 5 seats in the rear row on primary floor level
- 4 seats in the front row on a lower floor level within the rooms with steps down
- 4m wide viewable image on projection screen
We created our standard home cinema room design documentation in line with the majority of the following cinema design standards;
- CEDIA CEB22 Home Theatre Recommended Practises; Audio Design
- CEDIA CEB23 Home Theatre Recommended Practises; Video Design
Cinema Design Document:
- Positional drawings for speakers
- Positional drawings for projection screen
- Positional drawings for cinema seating
- Positional drawings for 2nd axial resonance
- Positional drawings for acoustic treatment panels
- Appendix (Bulkhead for Projector, Wall Sections, etc.)
Cinema Design Considerations Document:
- CEDIA CEB22 Home Theatre Recommended Practises; Audio Design:
- Speaker Layout
- Seating Layout
- Low Frequency Room Optimisation
- Sound Isolation
- Interior Acoustical Treatment of Rooms
- Audio System Component Location and Installation
- Sound Pressure Level (SPL) Design Calculations
- CEDIA CEB23 A Home Theatre Recommended Practises; Video Design:
a. Optimising Room Layout & Environment
b. Image Performance Objectives & Specifications
c. Contrast ratio and black levels
d. Recommended Practices for Image Evaluation and Calibration
We were able to agree and formalise all the relevant design documents with the client.
3D modelling of the home cinema room
We created the following elements from our home cinema design within SketchUp 3D modelling software:
Project put on pause by client
Unfortunately, during some of the initial constructions works to establish a link between the existing building fabric to the new wing. It became apparent that substantial unexpected additional works would be required to make good some of the previous construction works on the existing building.
This significant adjustment to the project constructions costs caused a significant pause to the project whilst various options were considered. Of the options presented by the main contractor, the client eventually decided to not go ahead with the basement works and instead relocate the cinema room to the space that was in the location of the previous existing integrated garage.
We were able to redesign the cinema space to accommodate the new available space including a significantly reduced floor to ceiling height. This was important due to the fact that there was a desire from the client to have two rows of cinema seating and typically this requires a generous floor to ceiling height.
This change in the cinema room location meant a change in the following elements associated with the design:
- Room dimensions:
- 8.6m long
- 4.9m wide
- 2.5m high
- 8 x cinema seats across 2 rows:
- 4 seats in the rear row on a raised platform
- 4 seats in the front row in front of the raised platform
- 3.86m wide viewable image on projection screen
We also had to relocate the proposed location of the ‘Head End’ where all the technical equipment and communications/cables would terminate. This meant we had to update numerous other design documentation to accommodate the new location of the Head End.
The client also decided to commence the process of appointing a new main contractor to take over the works.
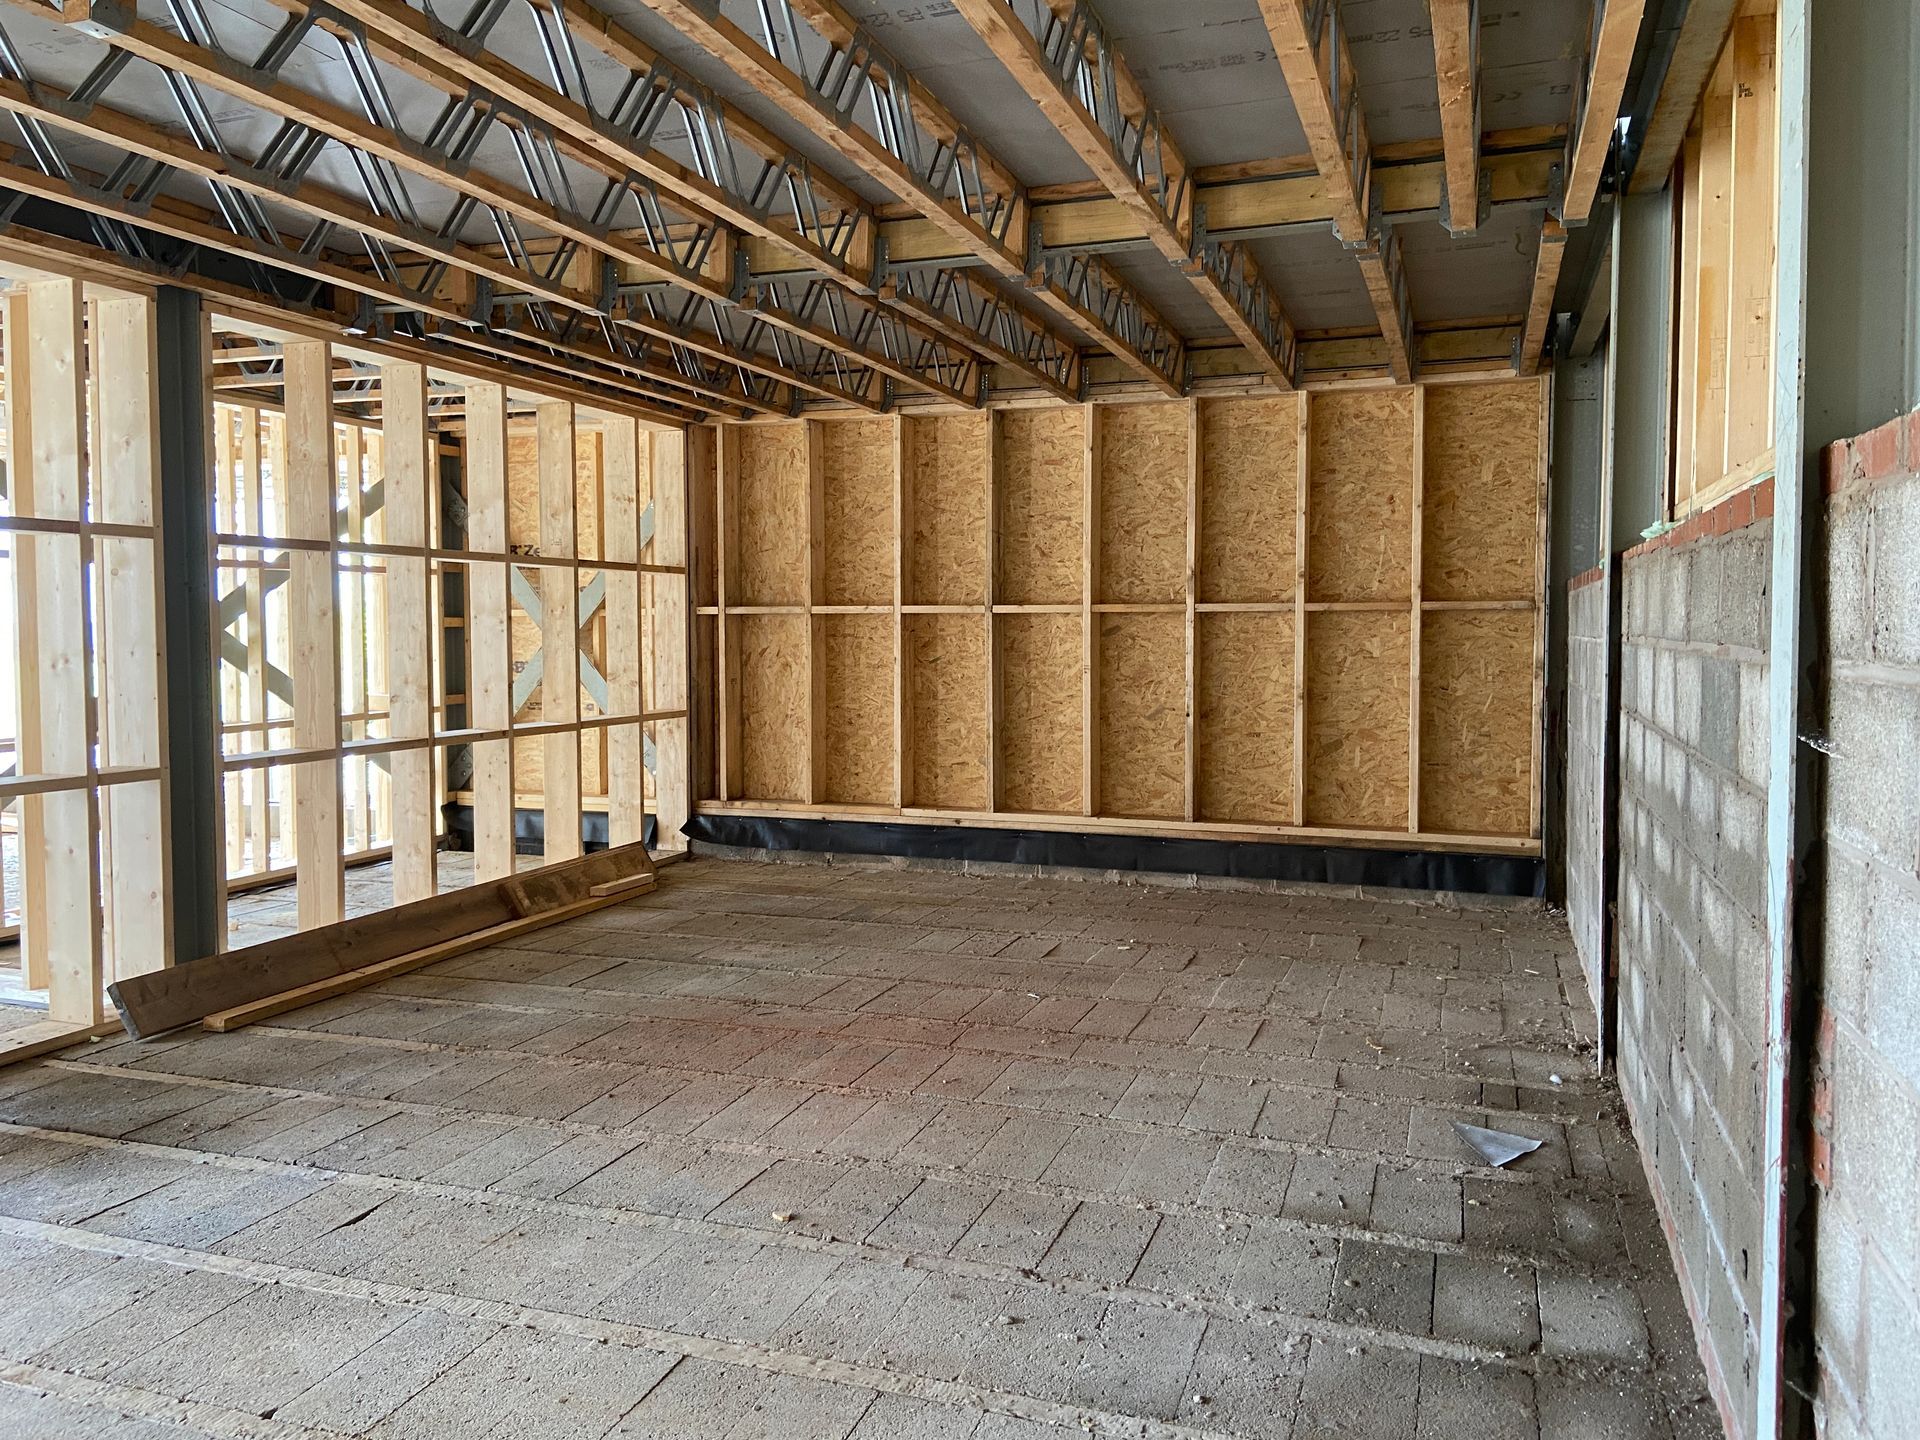
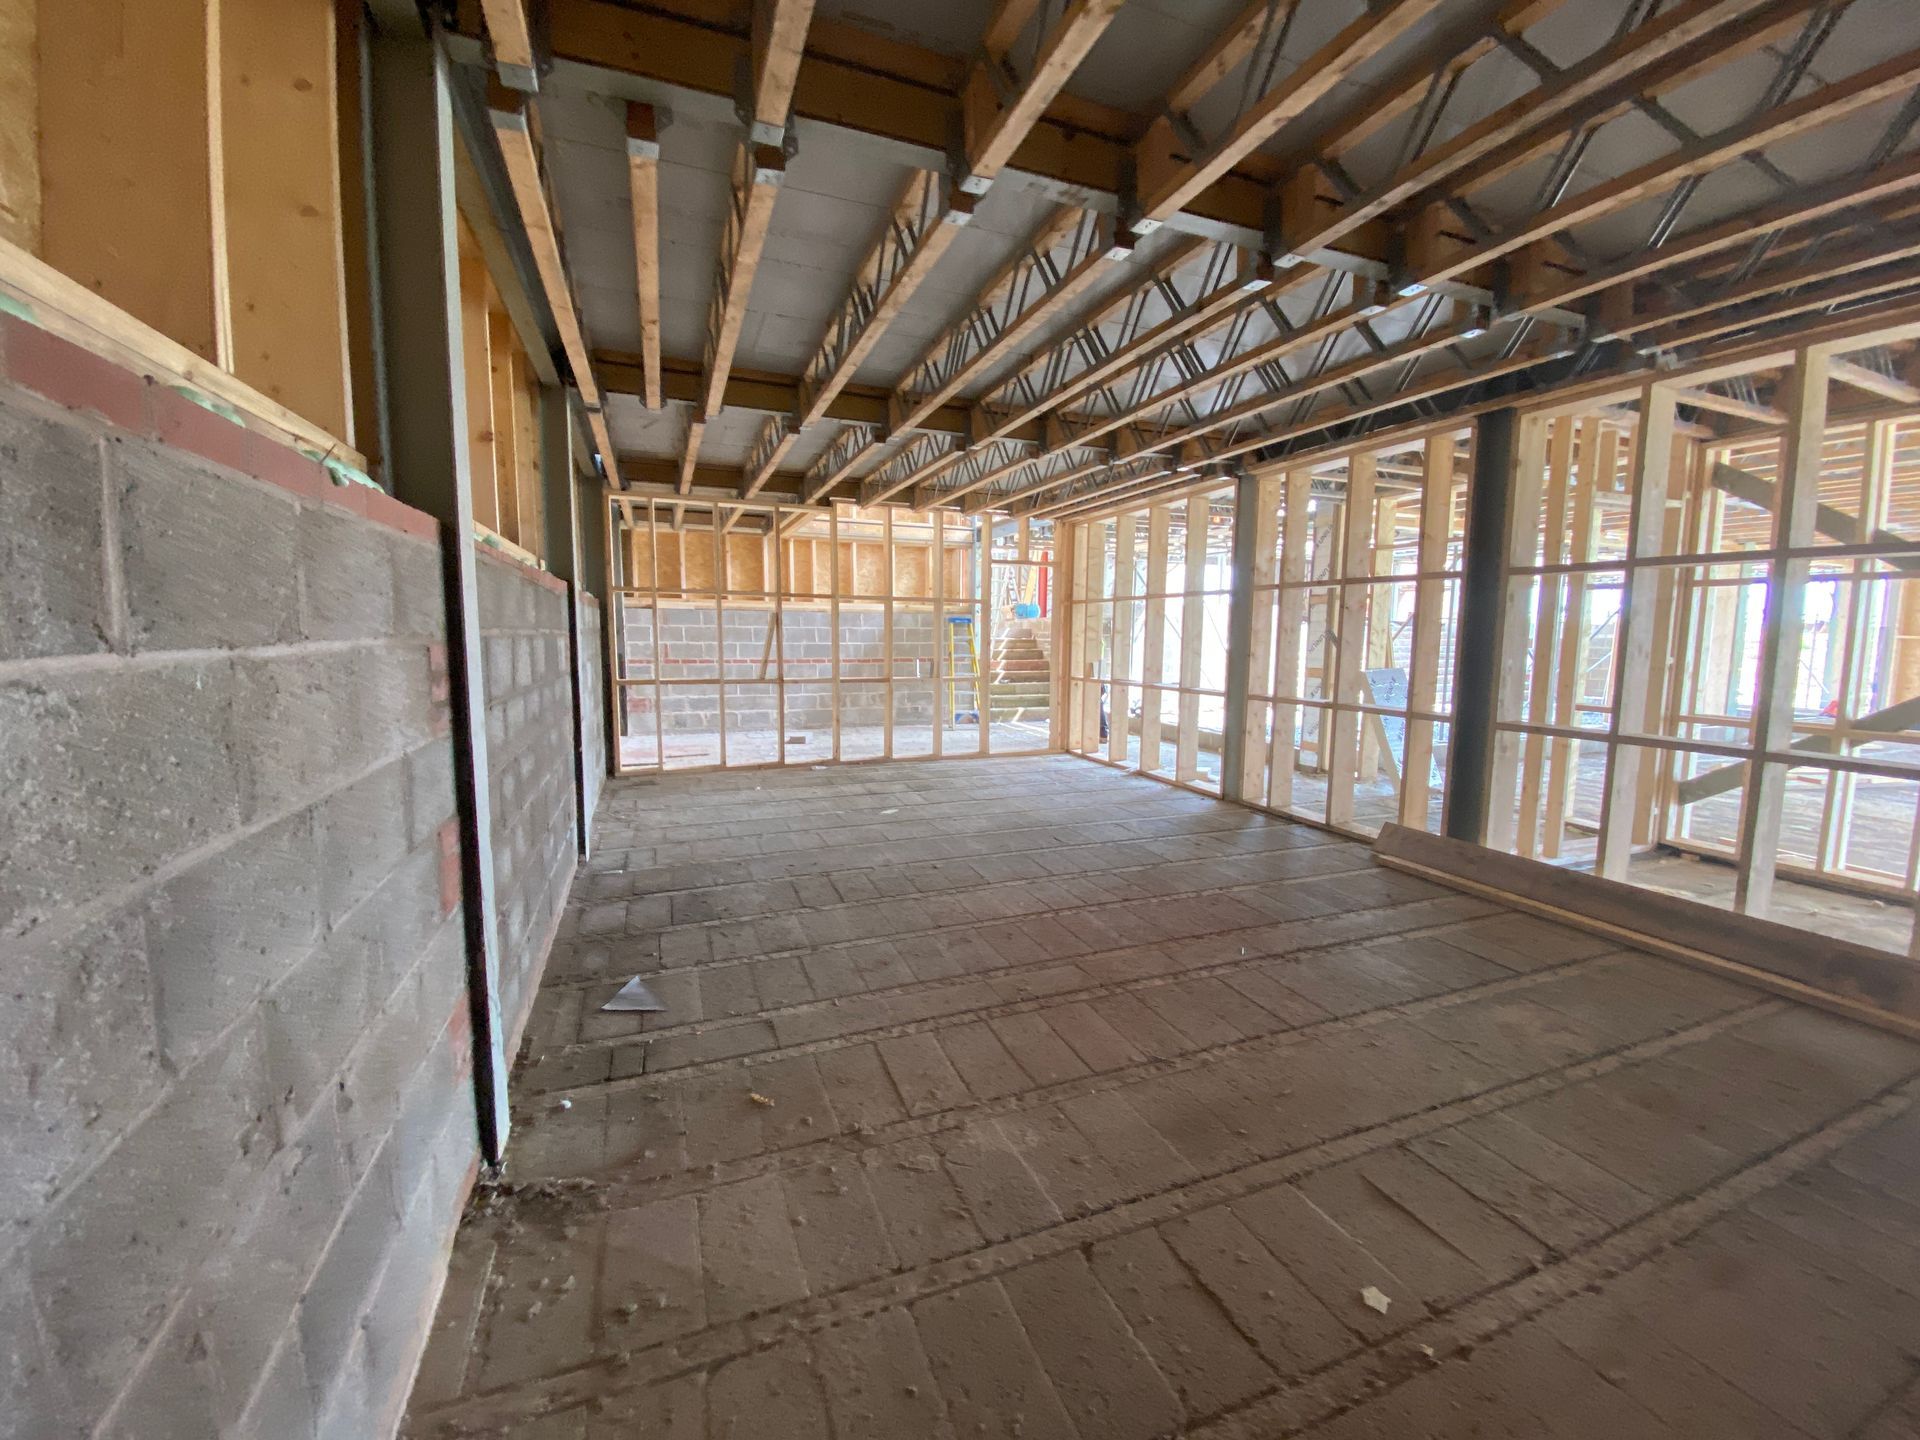
Site survey
Subsequent to the cinema room location being altered and the revised cinema room design accepted by the client, we attended site to carry out a detailed measurement of the construction of the new room’s location.
We were able to confirm that the actual built dimensions of the outer construction layers were very close to the dimensions of the architectural drawings. As such, we did not need to alter the revised the home cinema design any further to match the as-built environment.
With the walls and ceilings fully open we were able to identify the optimum routes for all the relevant 1st fix cables that would come from the various equipment that would be located in the Head End. We were fortunately that the Head End location was in a room adjacent to the Cinema Room.
The adjacent location of the Head End next to the Cinema Room provided several benefits:
- We were able to minimise the cable lengths for best data, audio and video transmission rates and least resistance
- We were also able to isolate the various audio and video equipment from being physically in the cinema room which minimised any distracting noises sources being audible in the background during any quiet scenes of movies
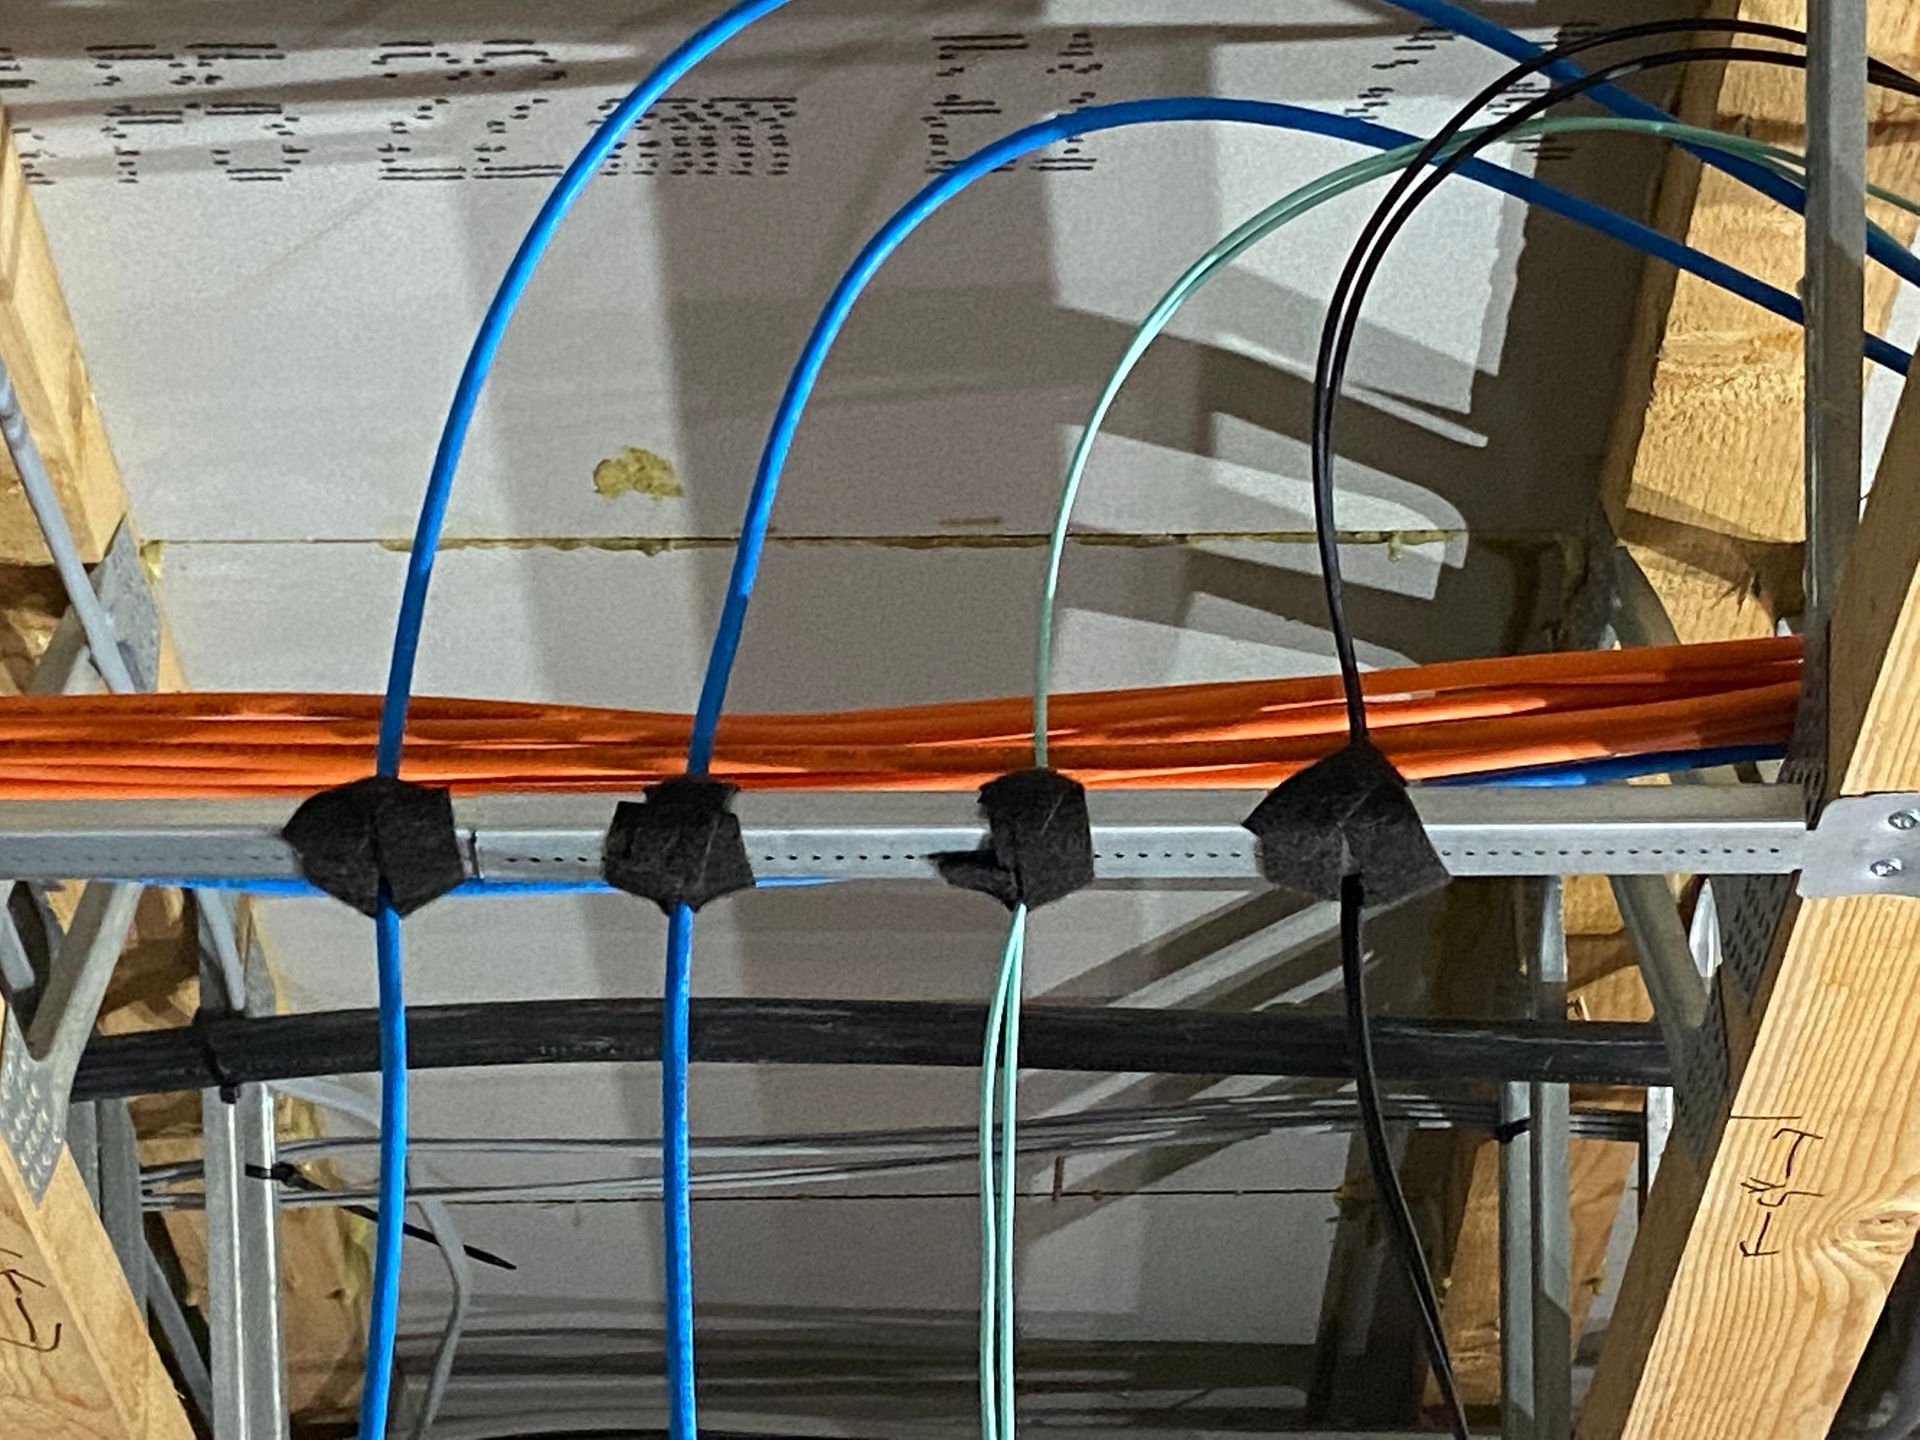
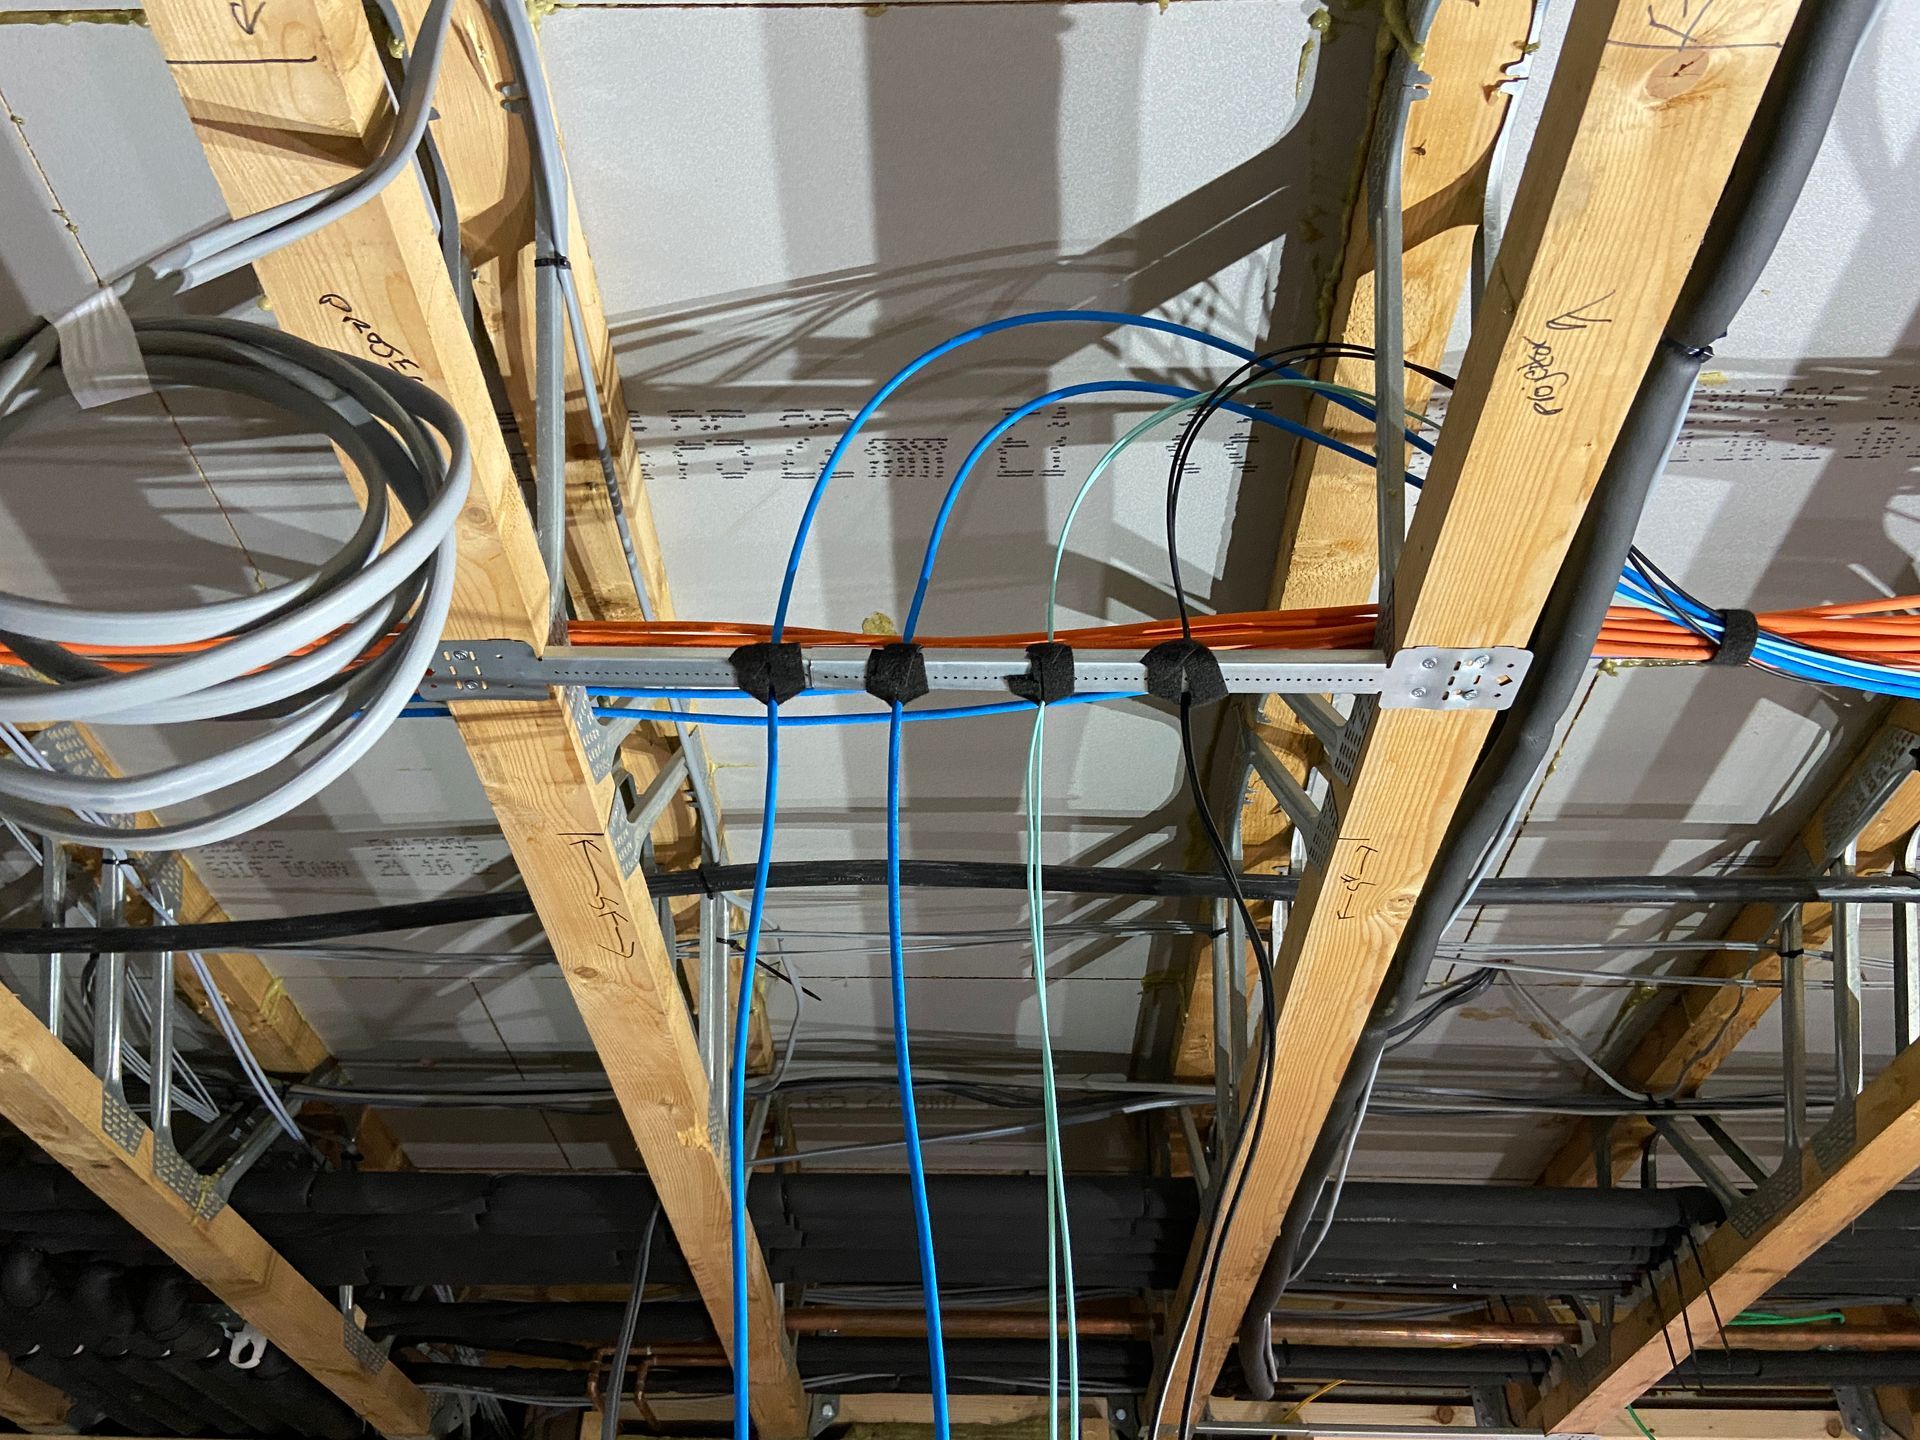
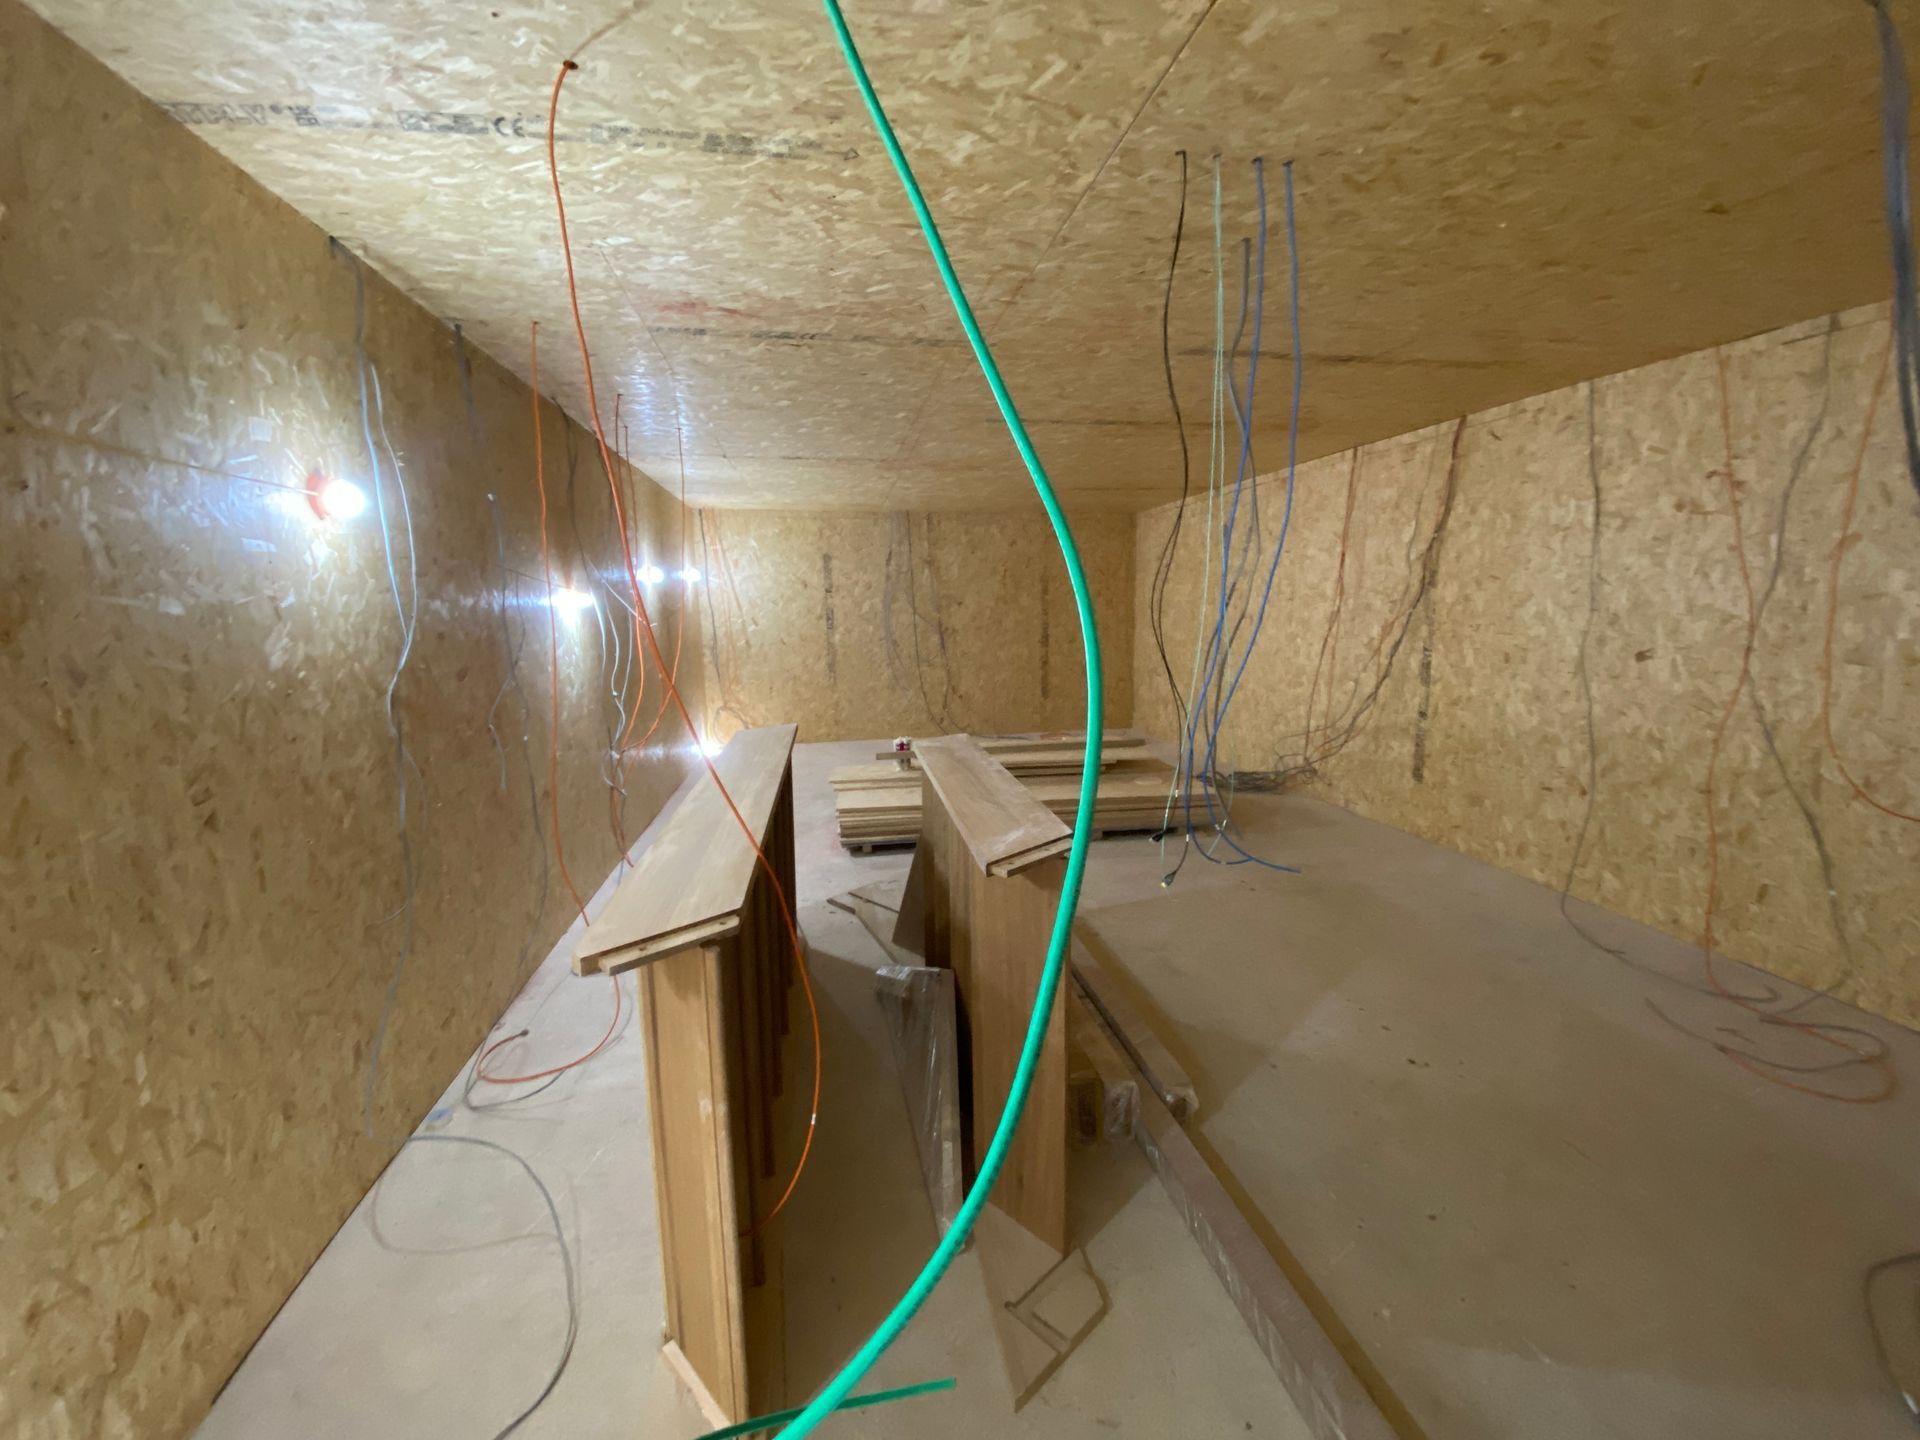
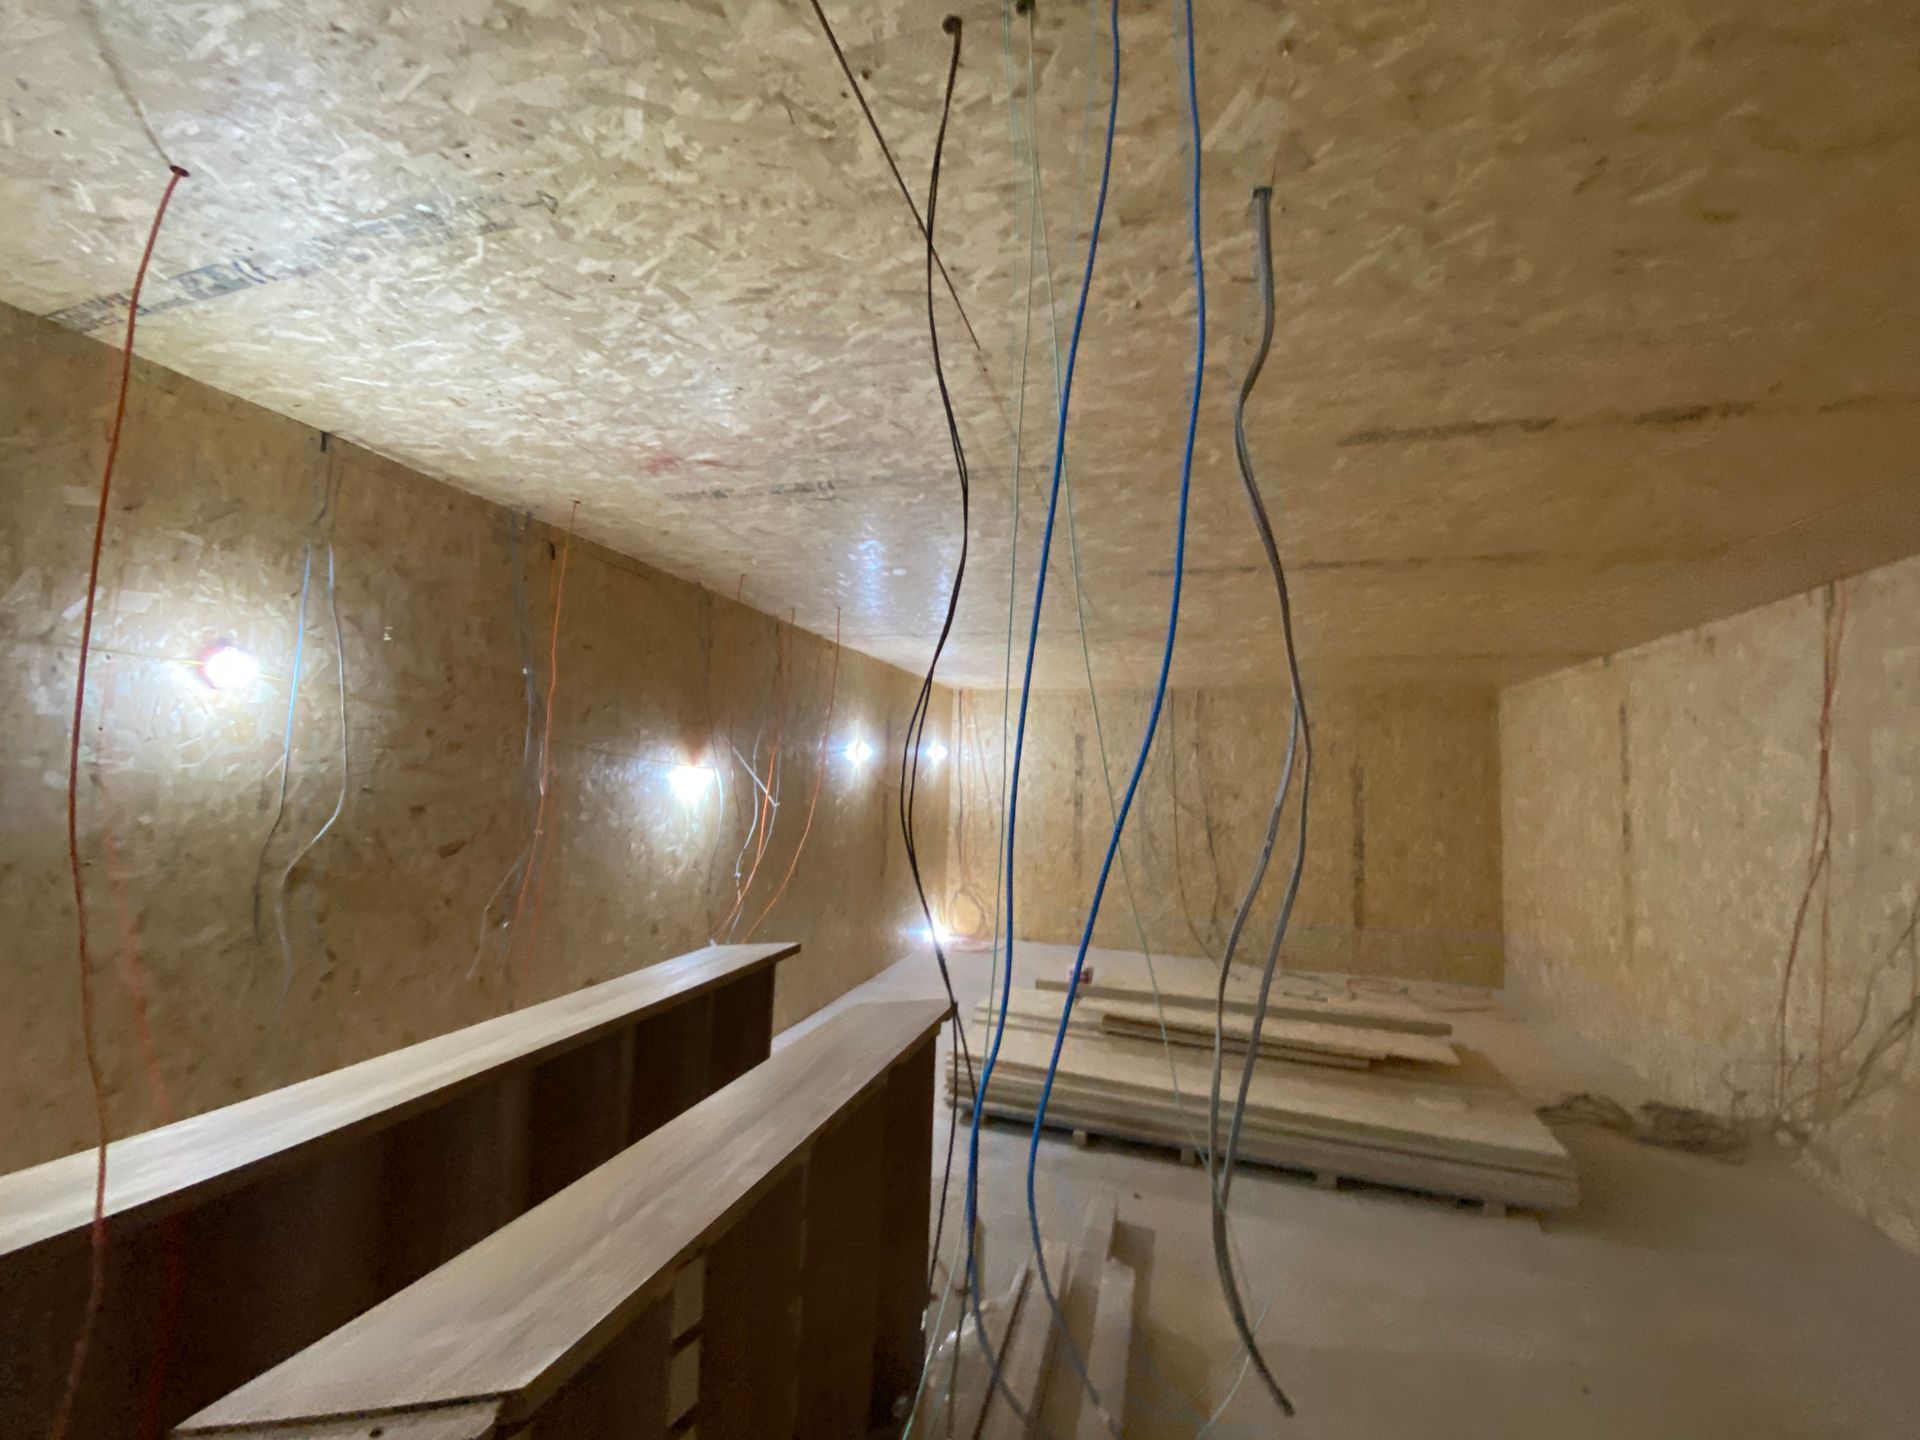
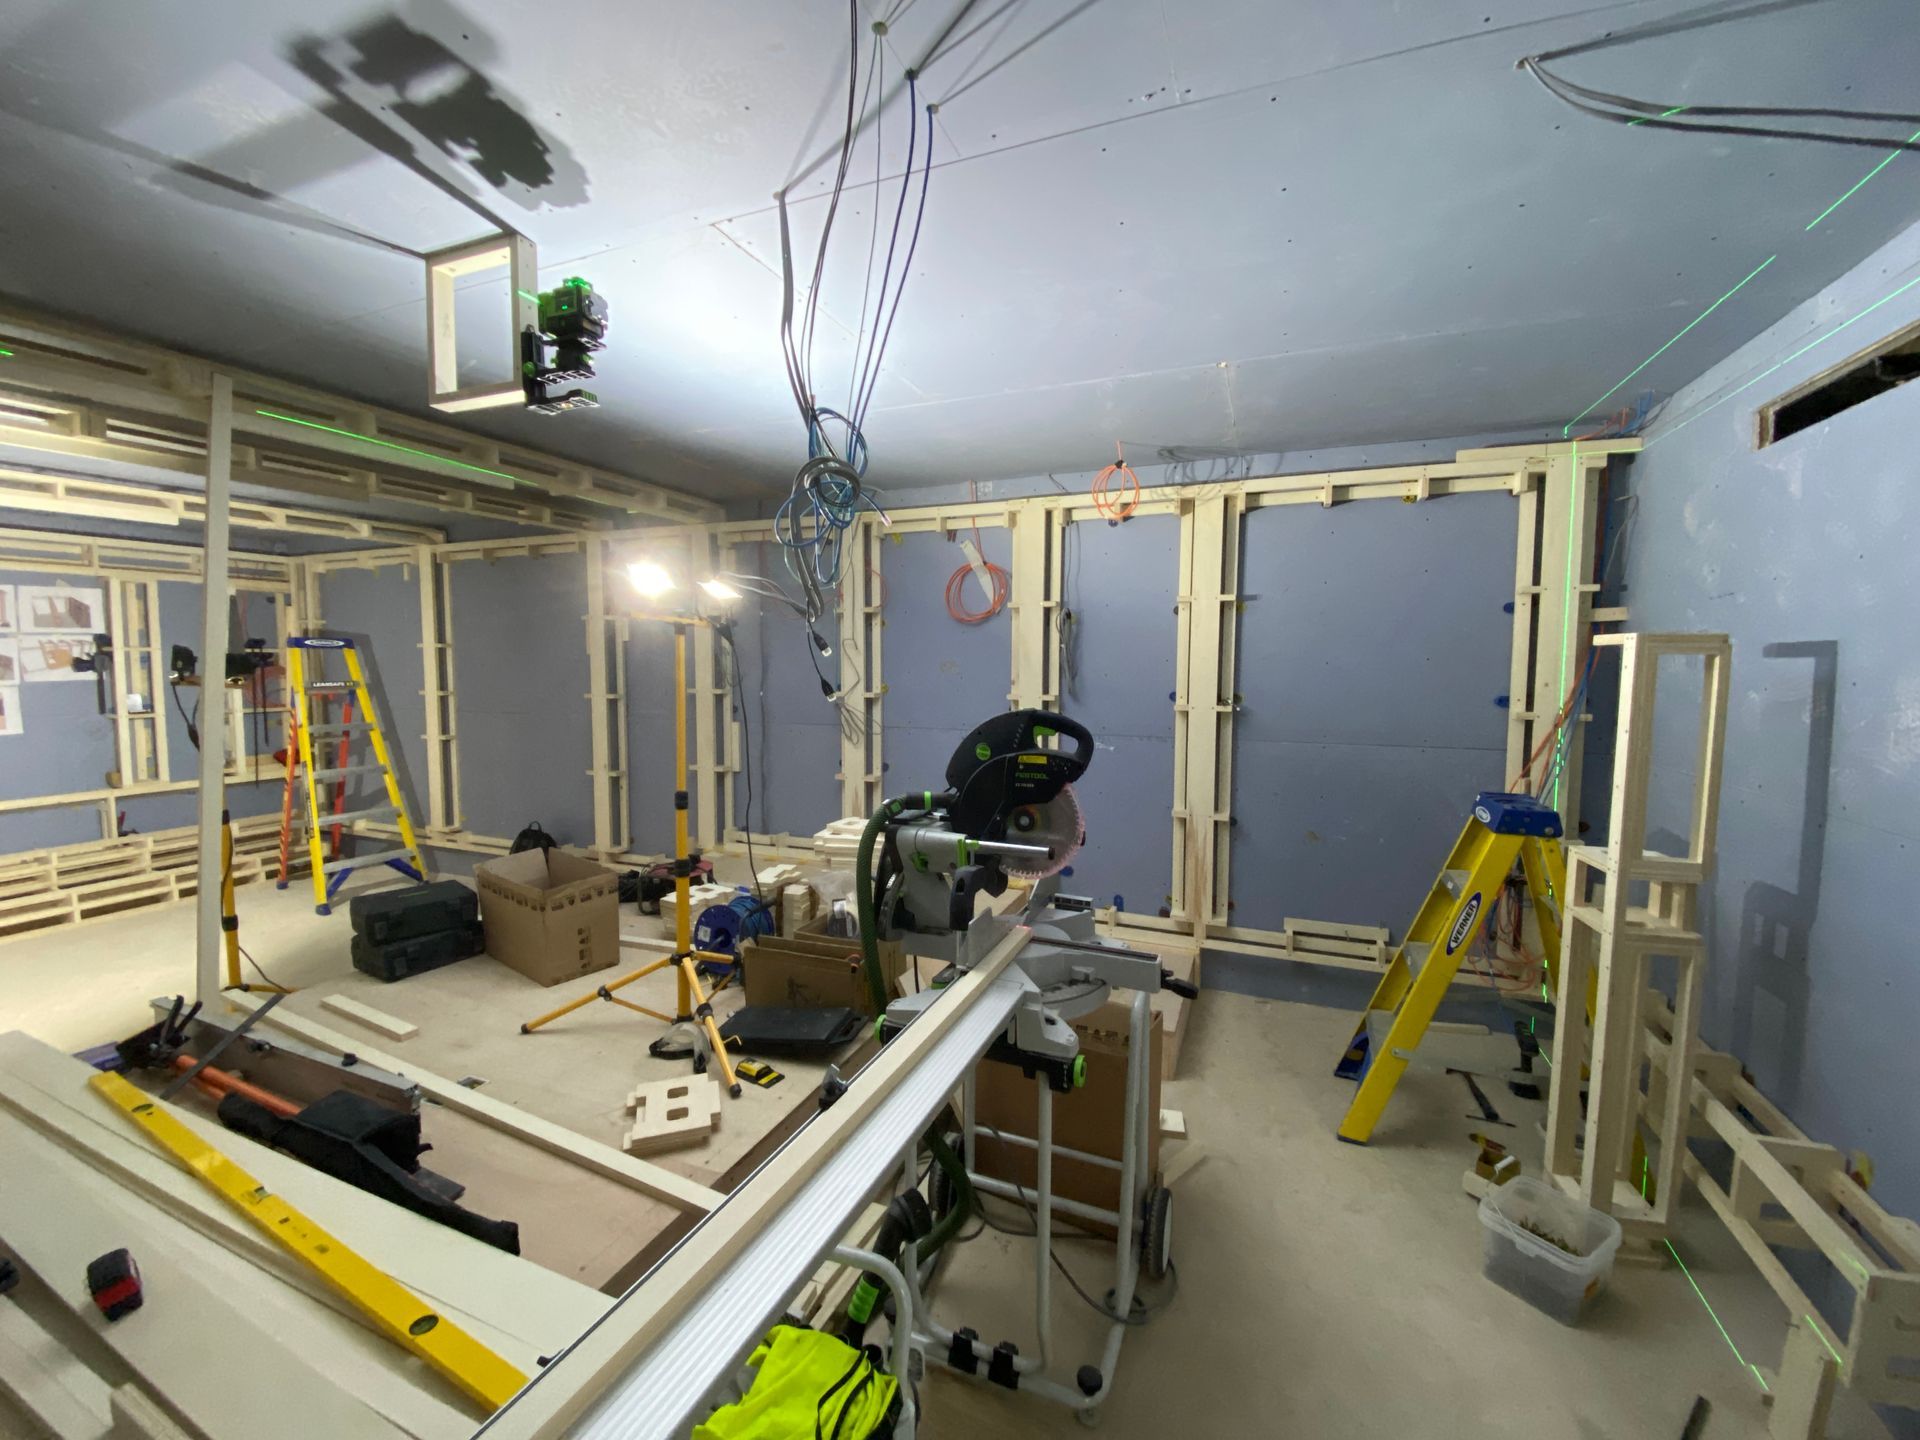
1st fix sequence in home cinema room
The video below shows some of the 1st fix sequencing from the home cinema room
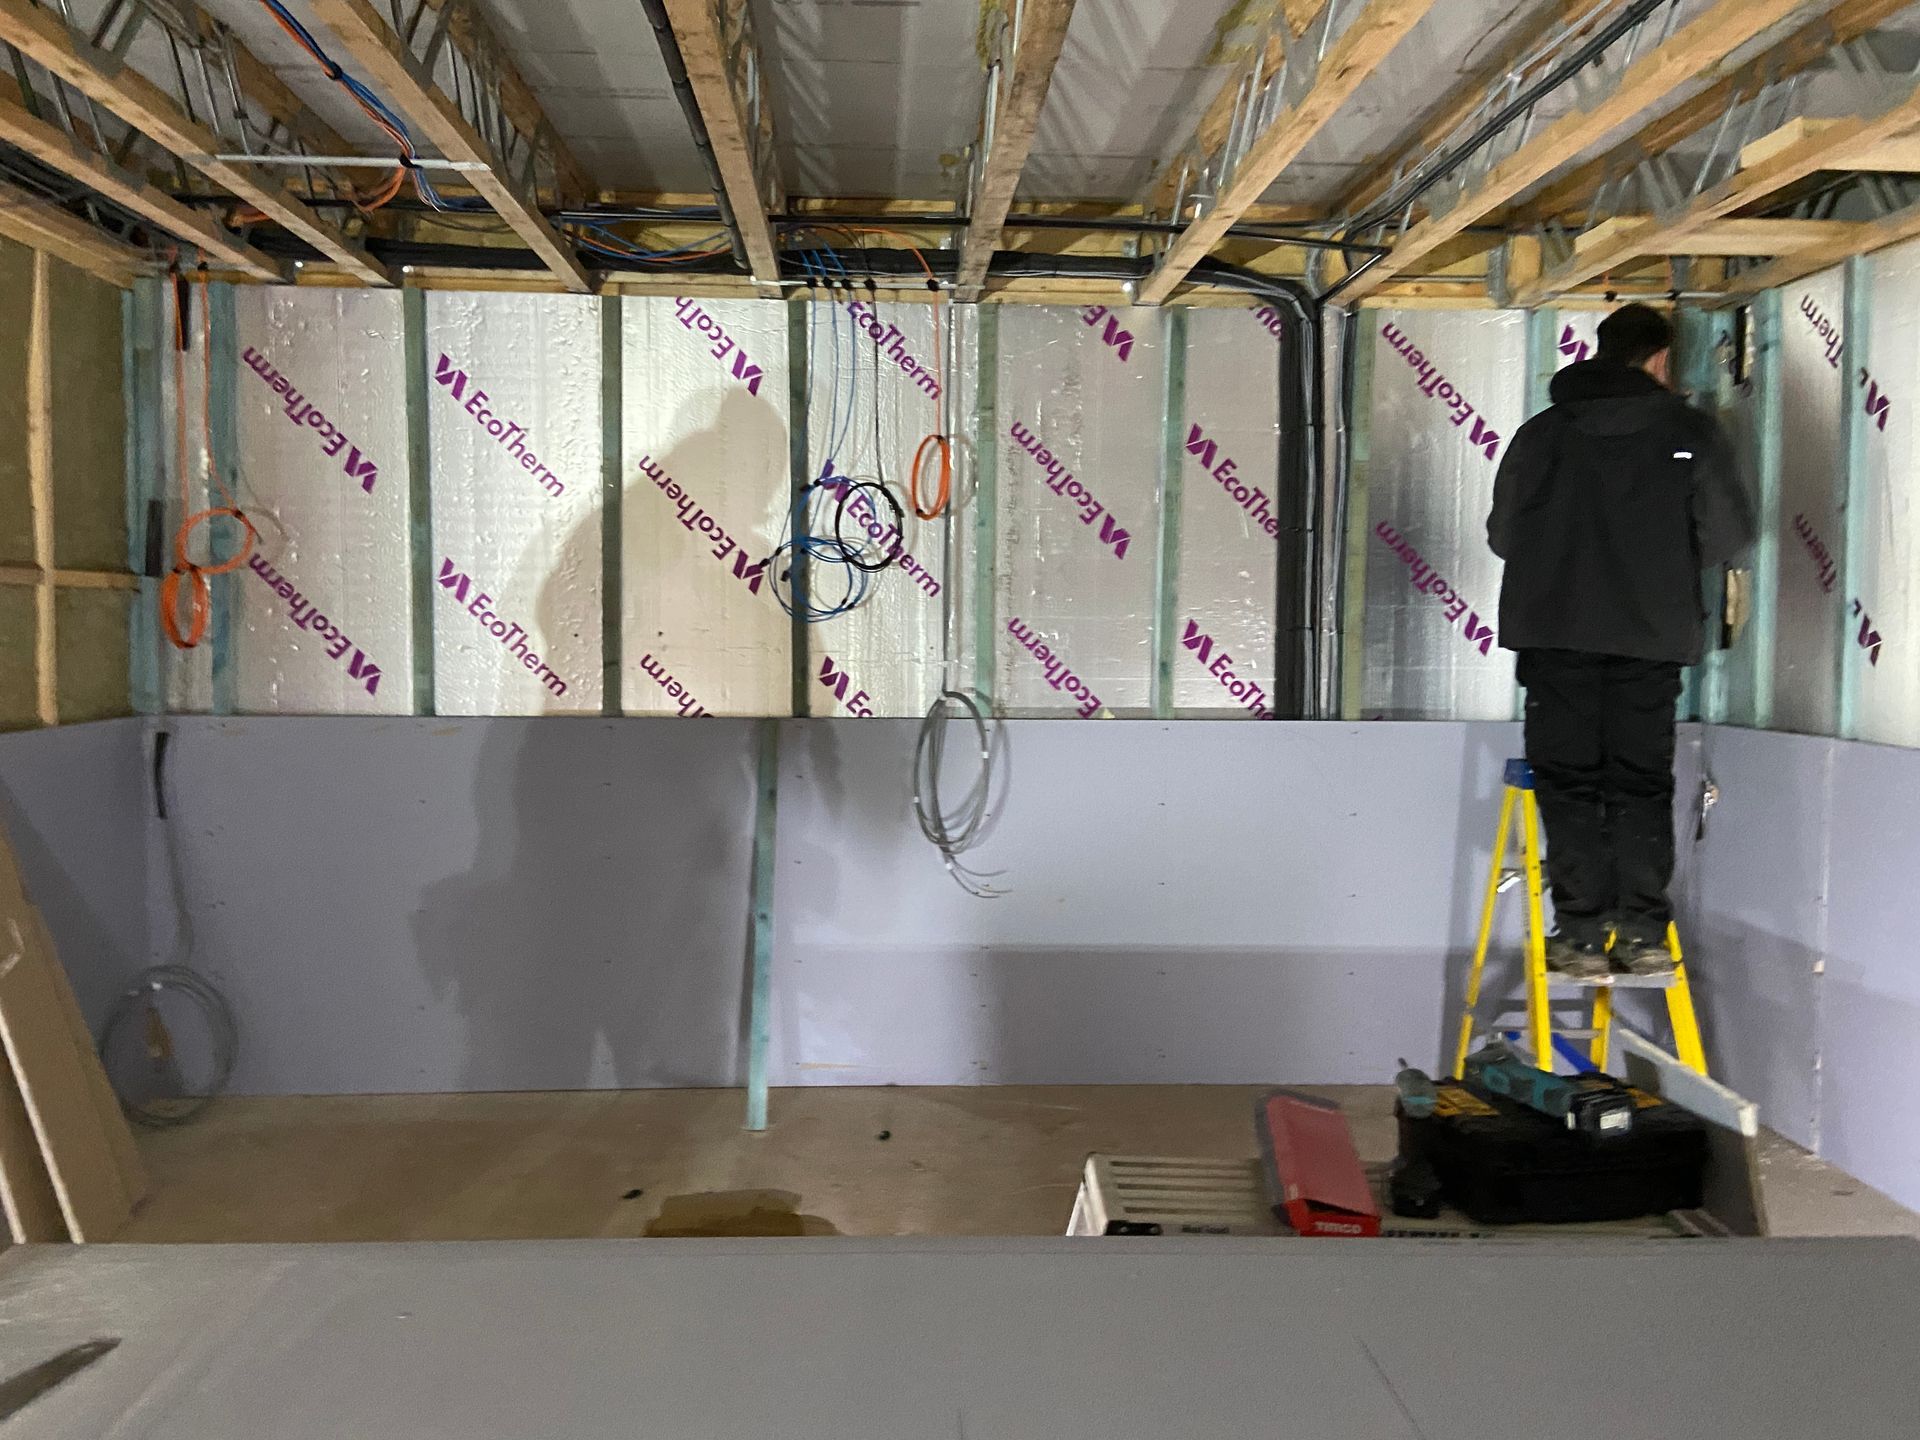


Cinema room 1st fix
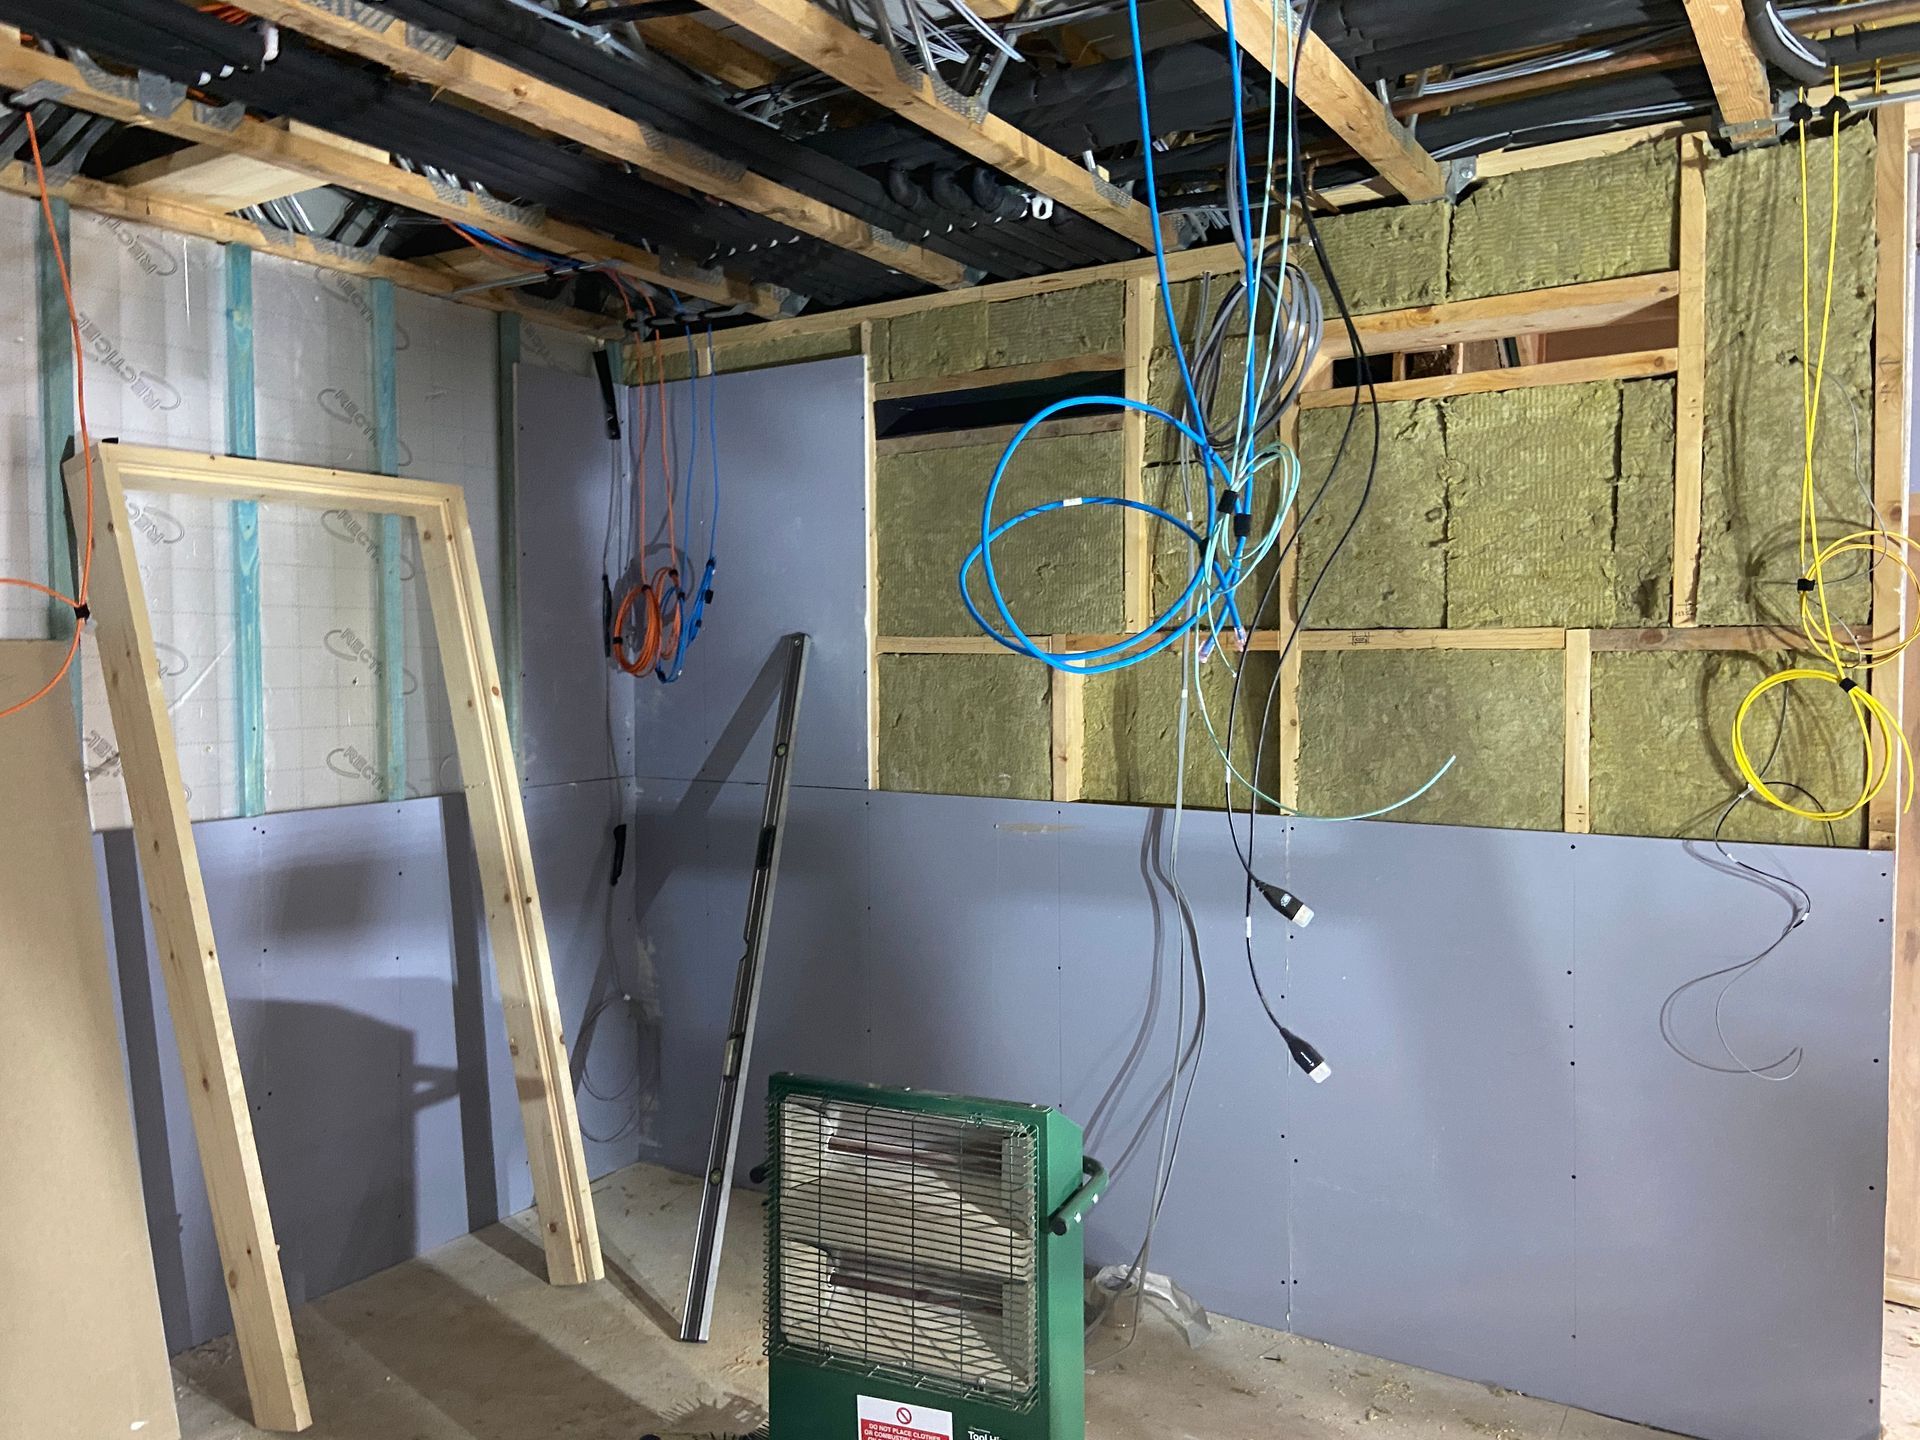
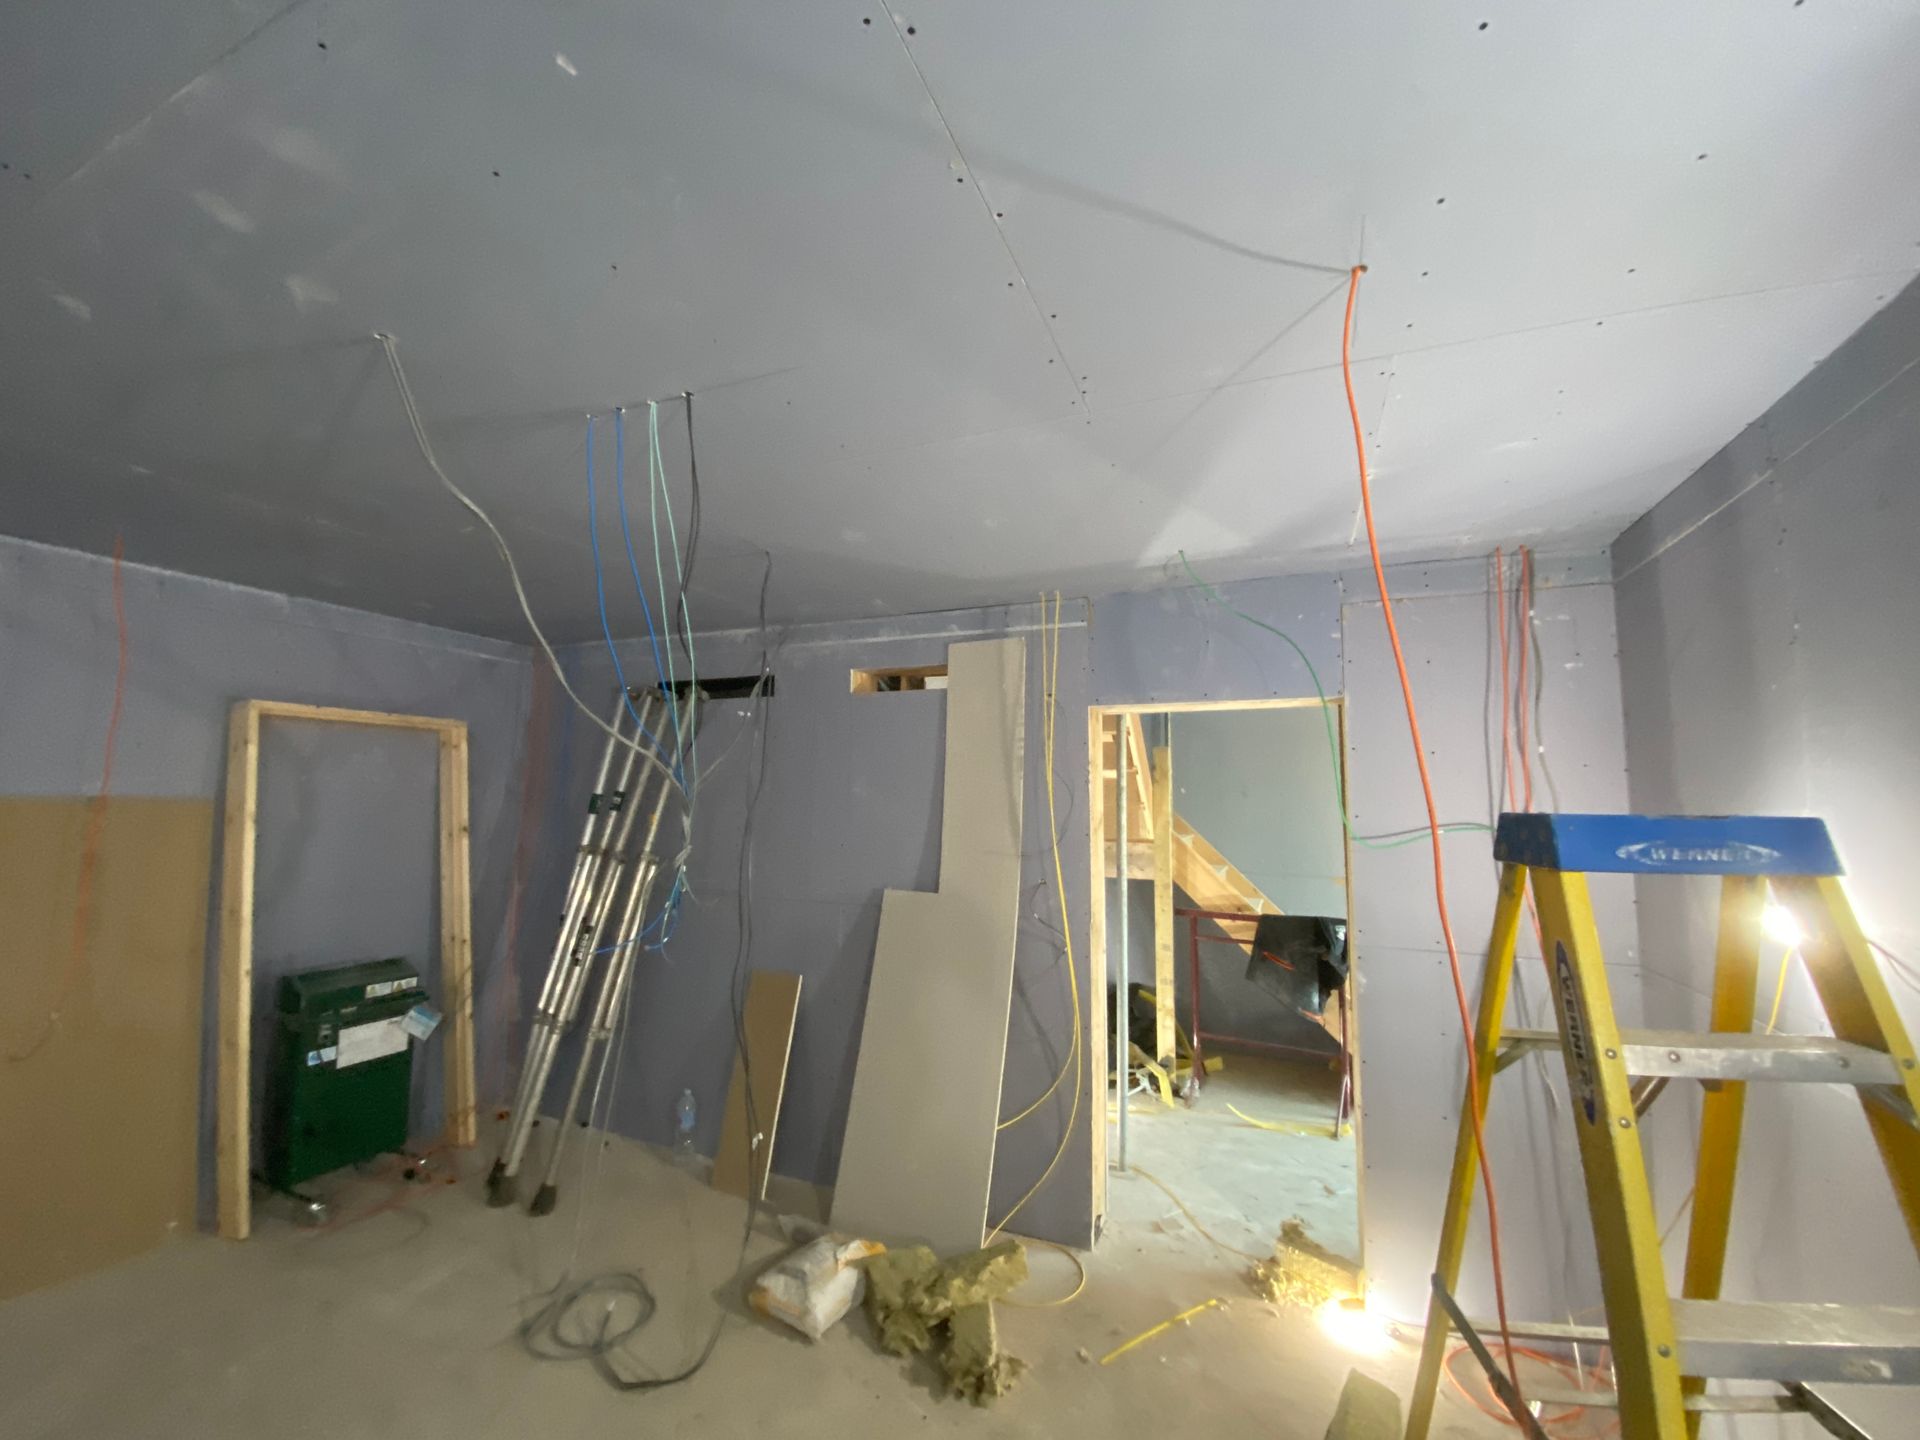
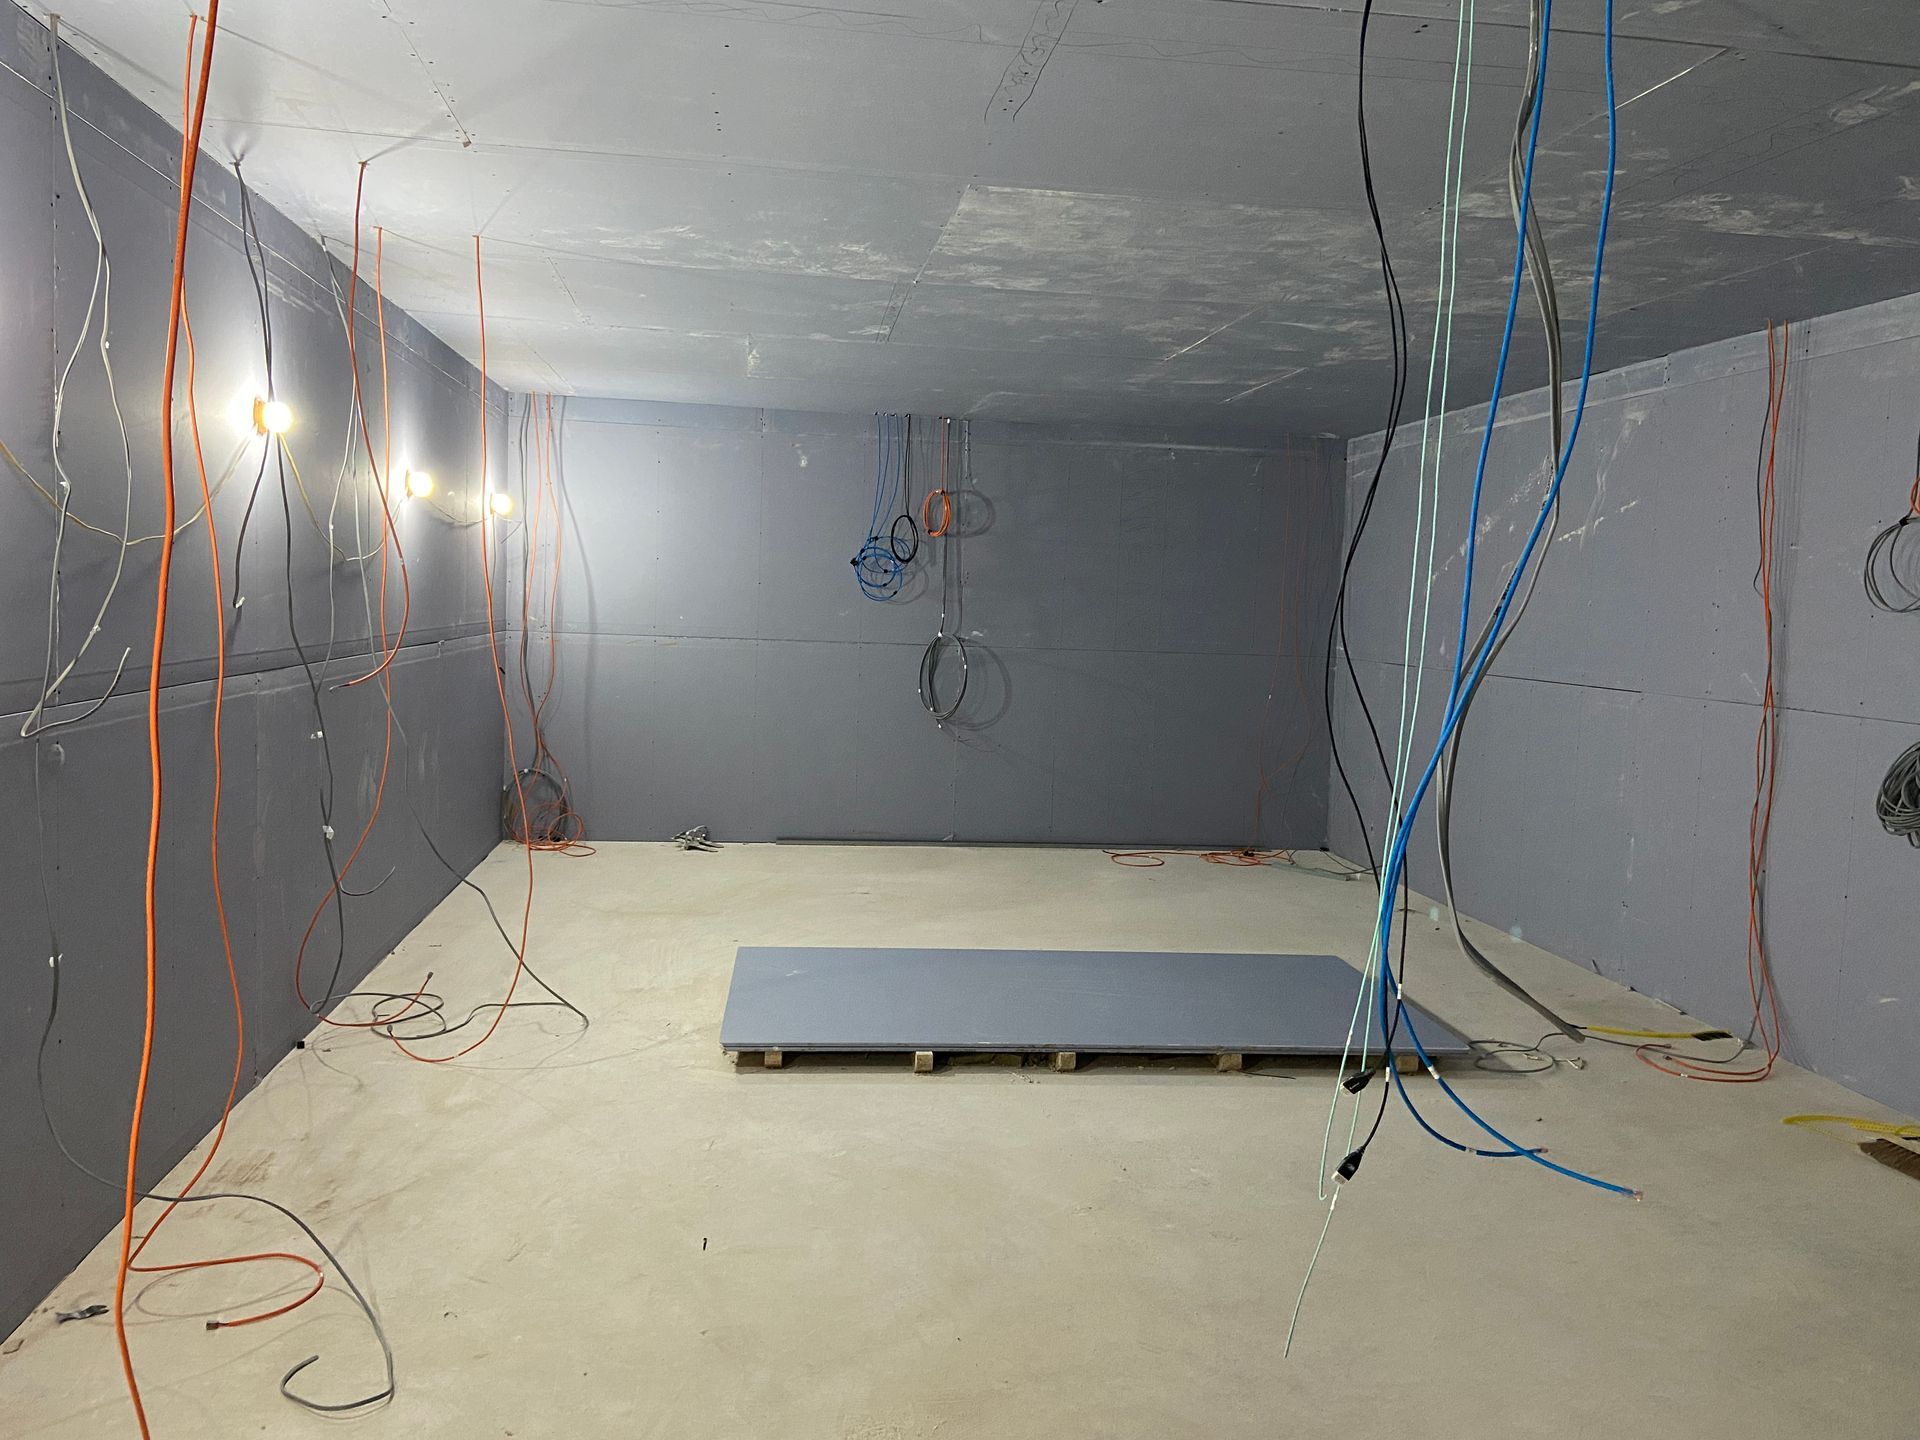
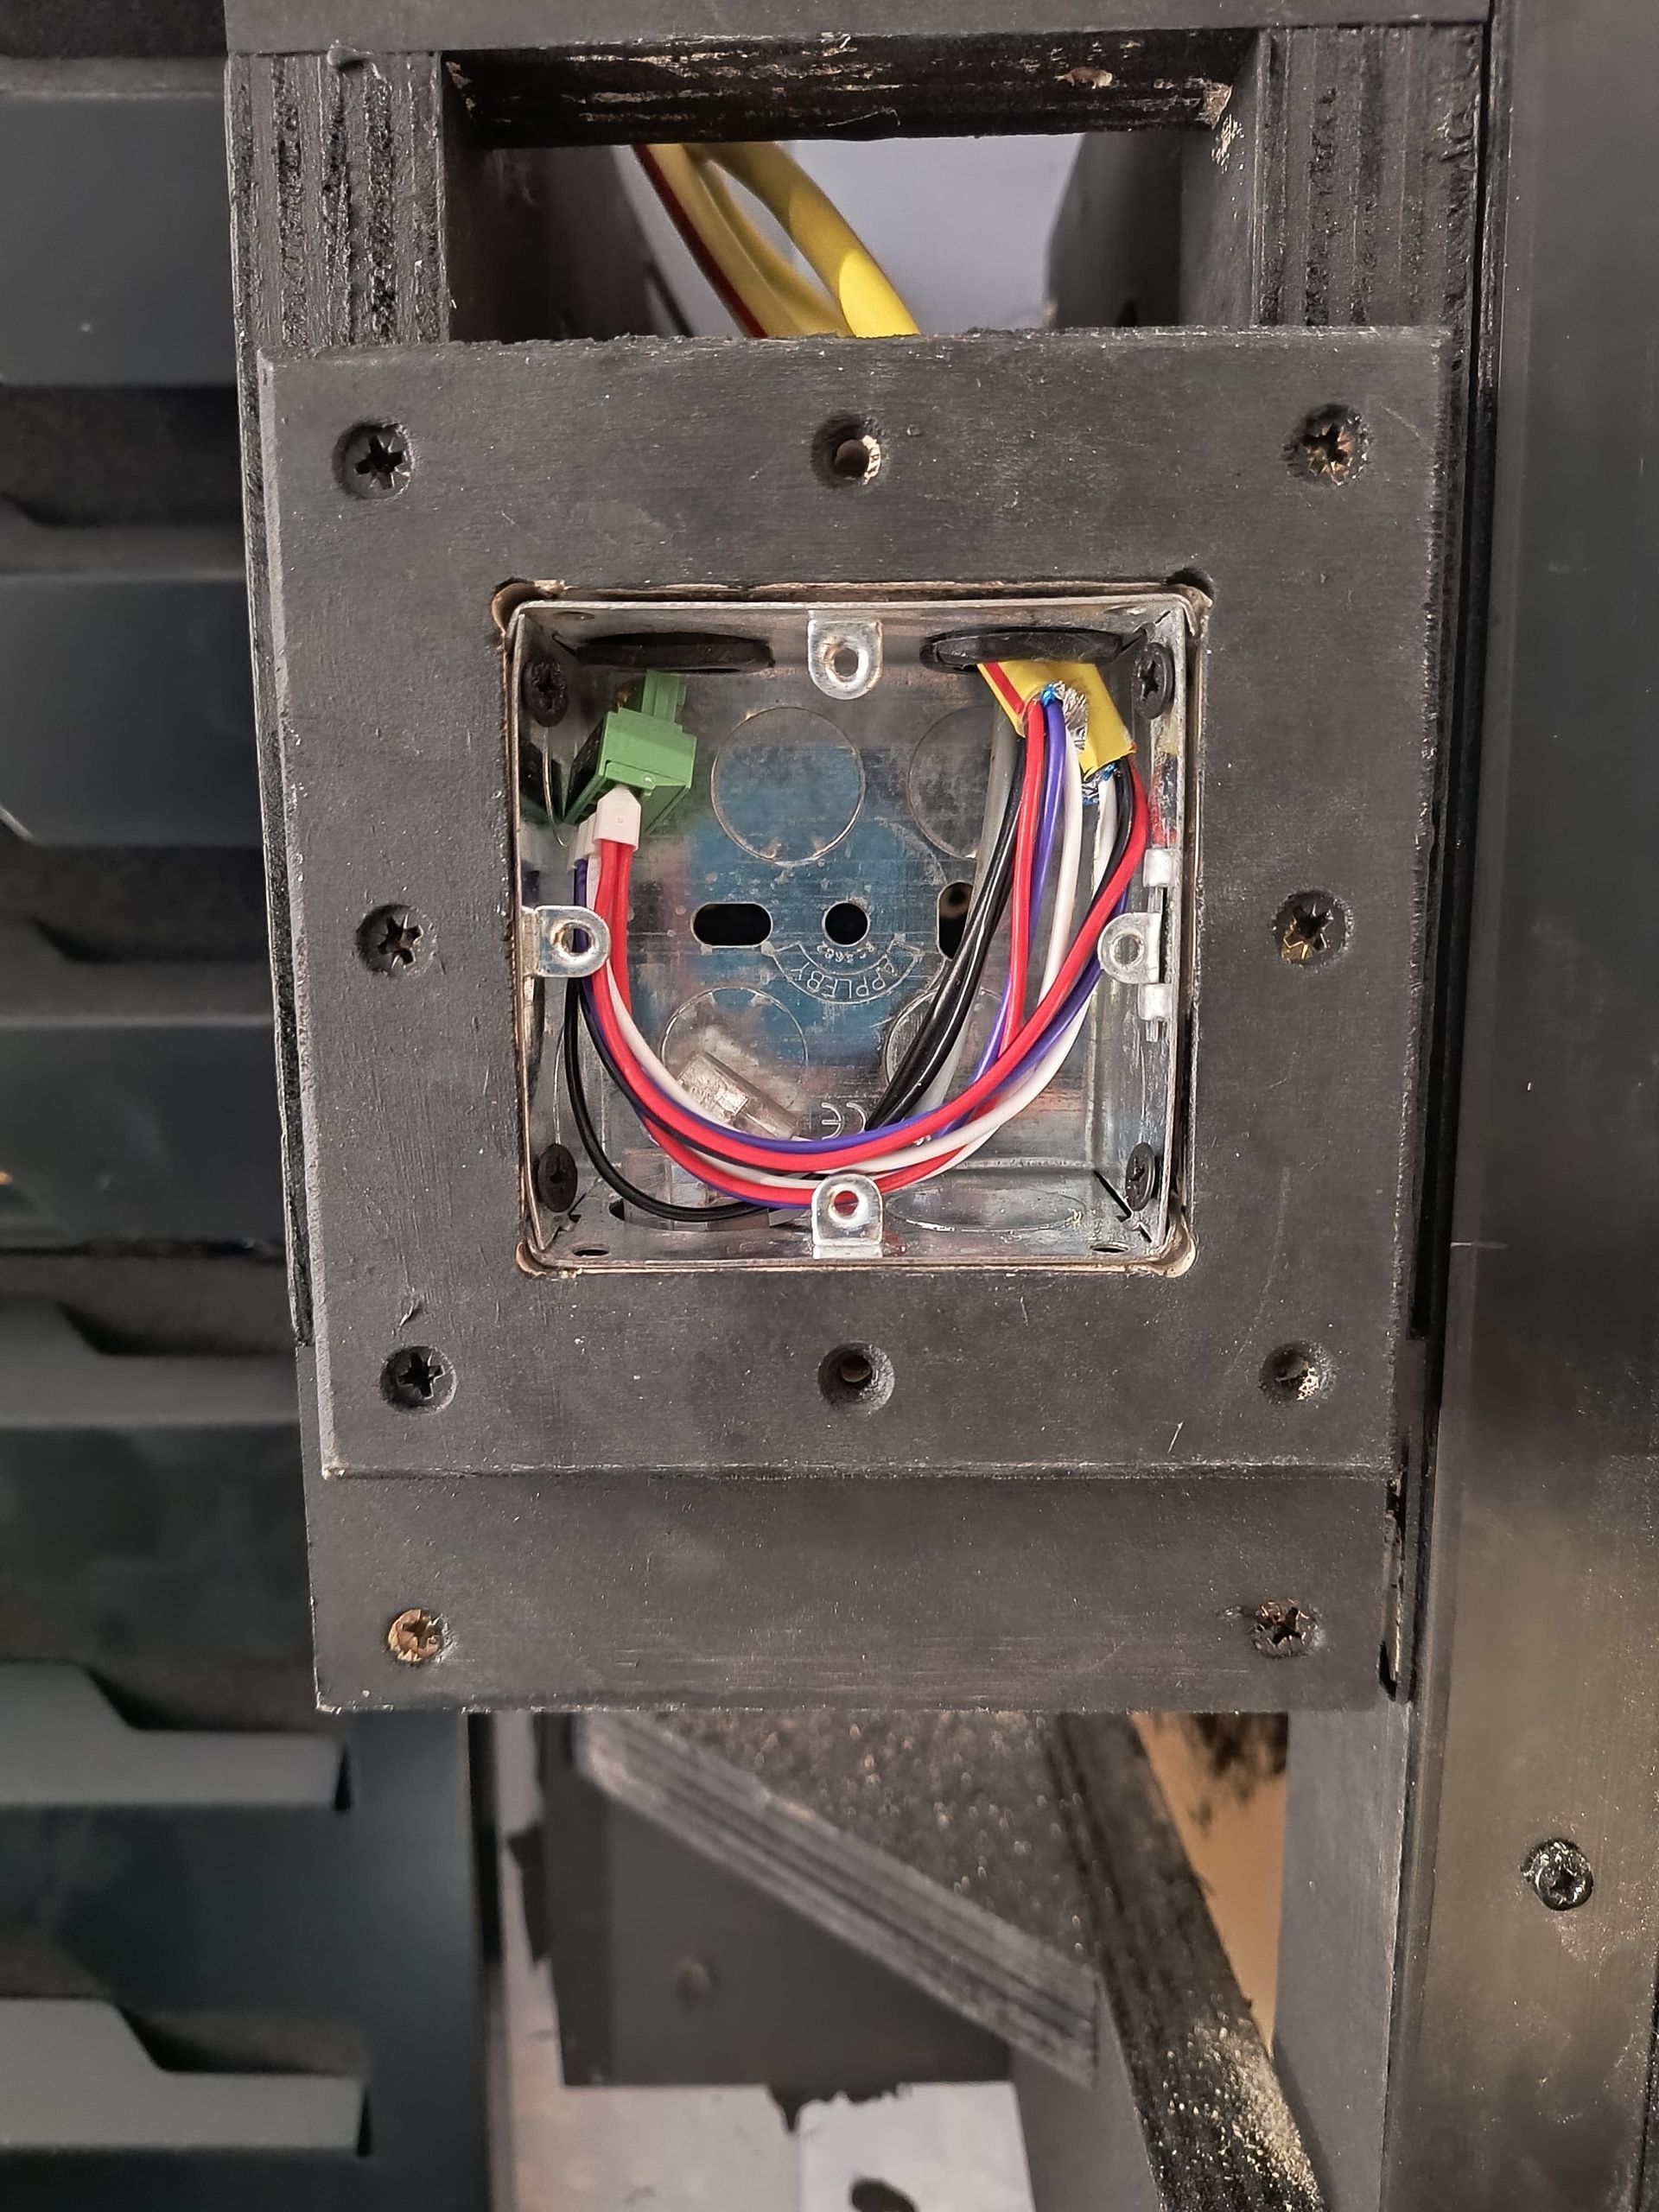
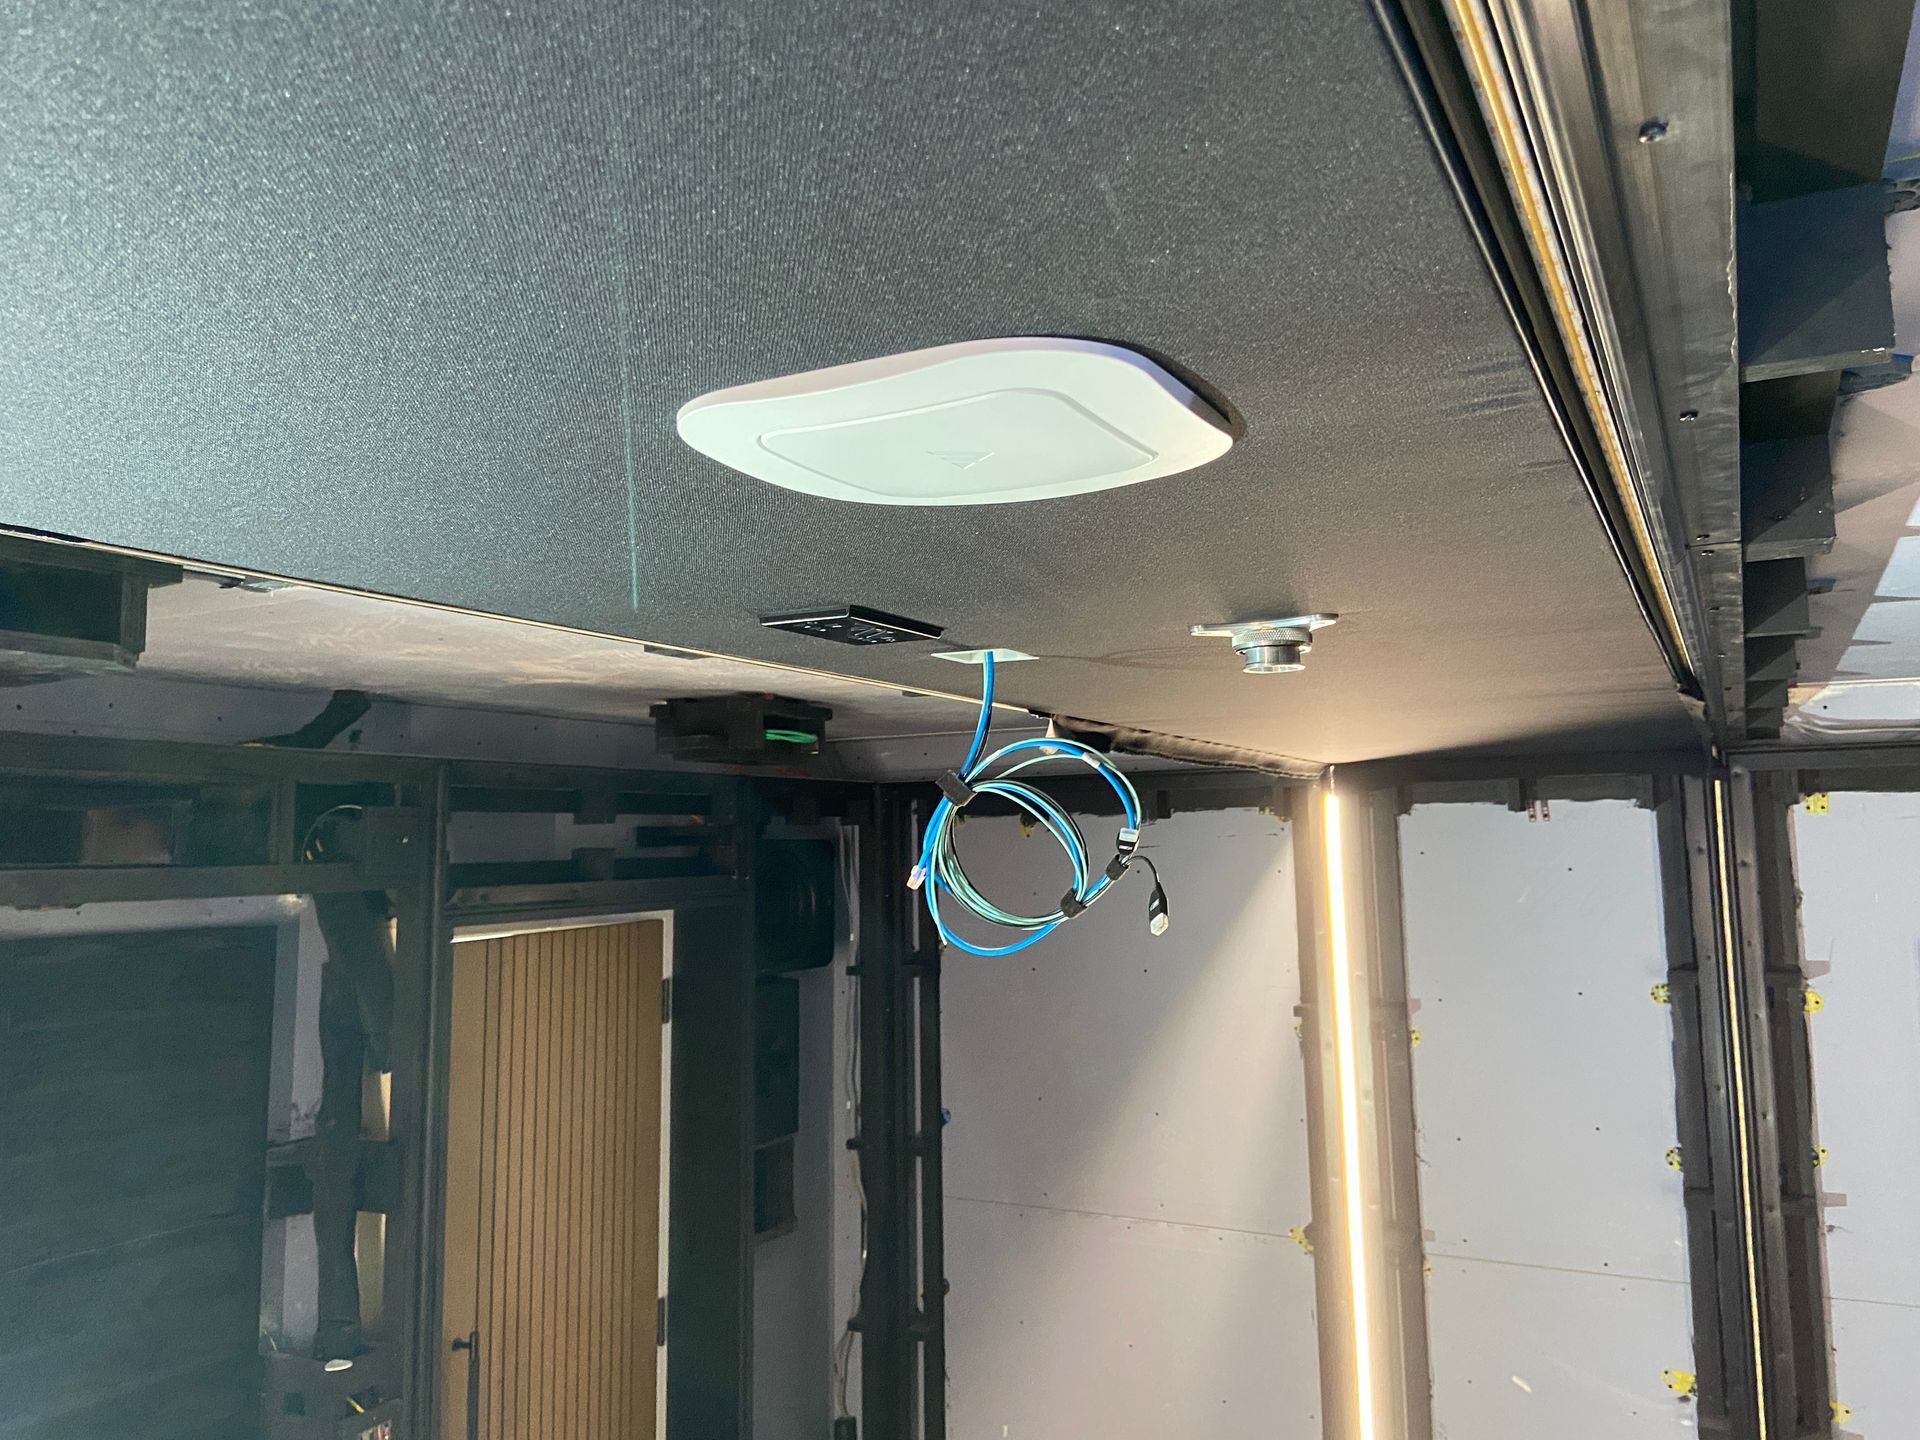
The home cinema room design required us to install a variety of cable types; speaker cables, CAT6A data cables (data & TV wall sockets), HD coaxial cables, smart lighting keypad cable, fibre optic HDMI cables and spare fibre cables.
We agreed with the client to install a TV wall socket in the location behind the projection screen in case they ever in the future decided they wanted to add an additional TV display in the room.
The spare fibre optic cables were installed to provide a form of future ready protection and allow us to upgrade the projection equipment to any higher resolution formats that might become available over time that might require faster data transmission rates.
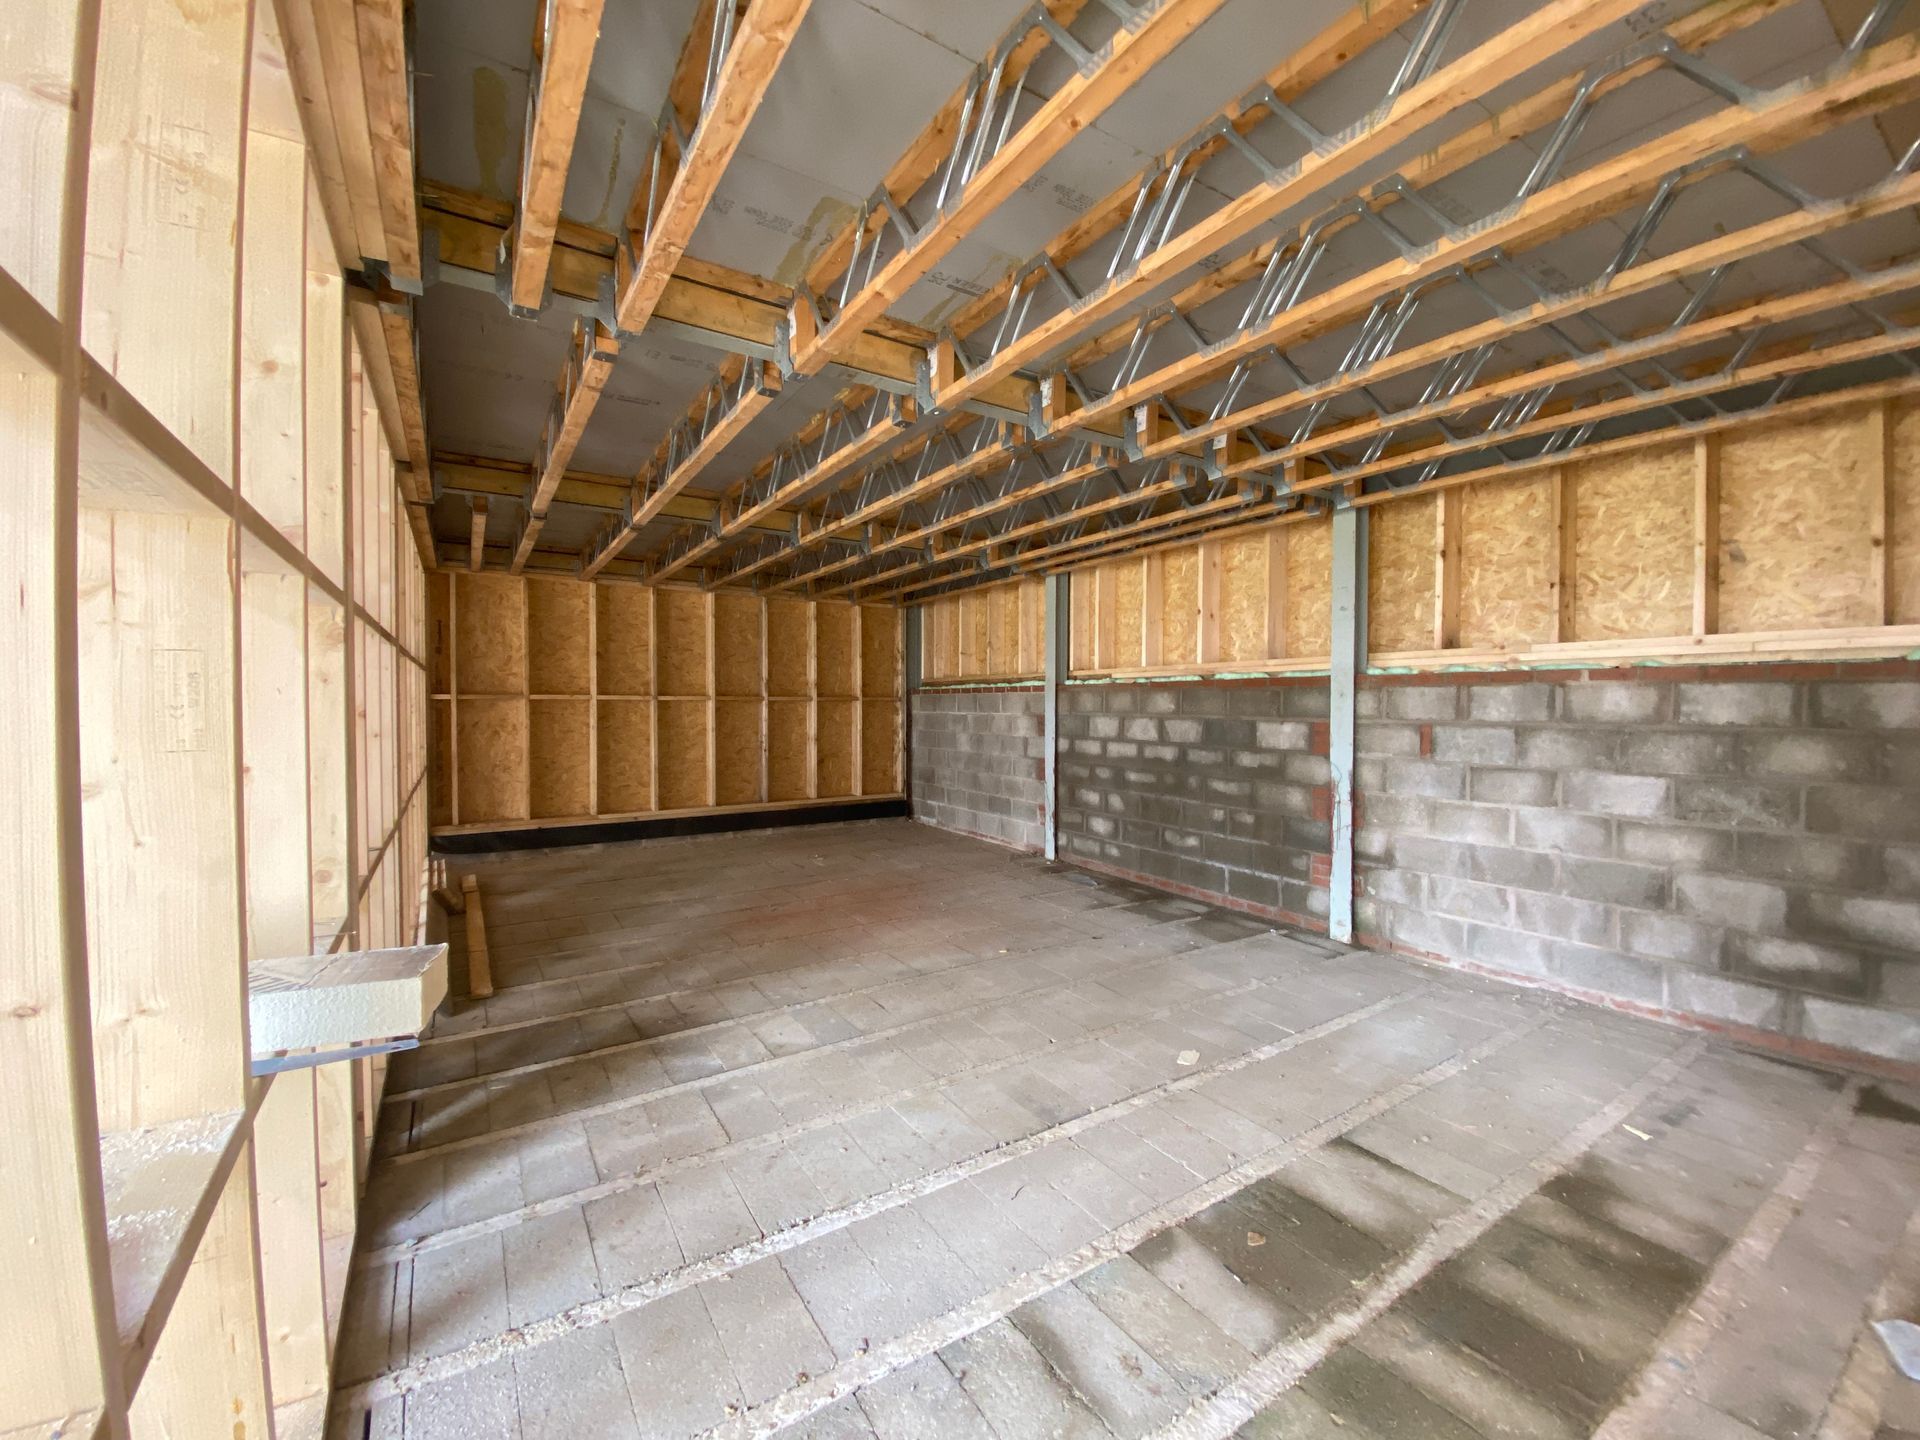
We were able to route the majority of our cables through the ‘Posi’ joists in the ceiling. Where we had to route the cables towards the front or rear of the room we used additional back box straps to provide additional support to the cables.
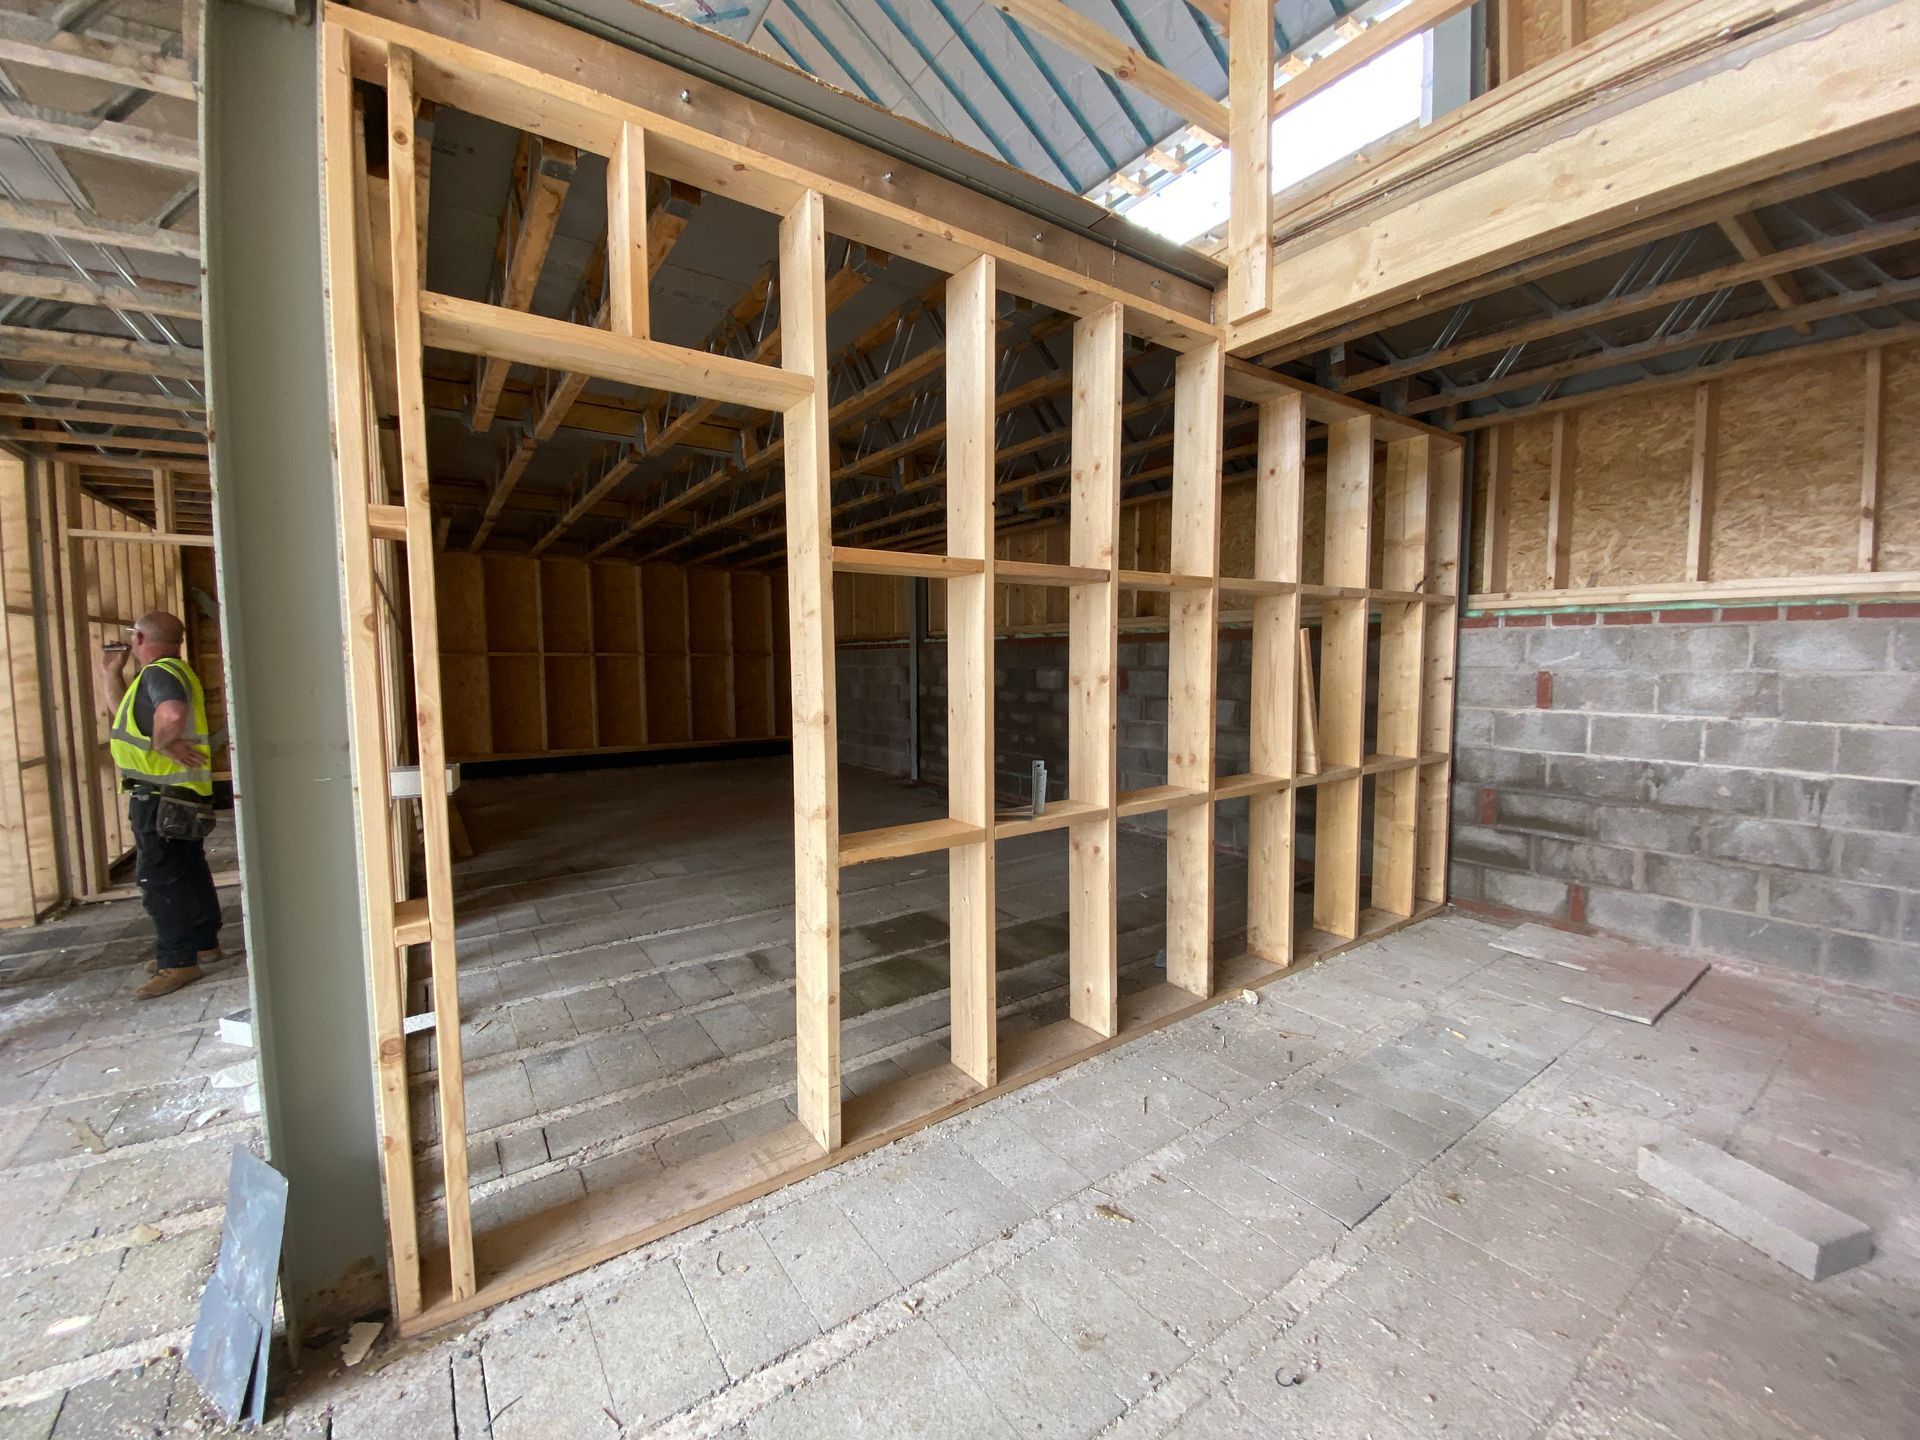
The main contractor utilised the following elements for the room wall and ceiling construction; 1st layer of plasterboard, 2nd layer of OSB wood and 3rd layer of plasterboard. This multi-layer approach was adopted for a few different reasons, firstly it would provide an increased level of sound deadening and secondly the OSB layer would provide us with a better fixing substrate for the Space Frame stretch fabric timber framing support solution we would be mounting to the walls and ceiling.
Cinema room 2nd fix
Typically on a project we would complete our 1st fix activities and then move onto completing our 2nd fix activities offsite at our workshop. We do this as normally during 2nd fix onsite it is a very dusty environment with lots of power interruptions to the power to accommodate the various work of other trades. There can also be significant amounts of water usage onsite, heating of the environment can be very intermittent. This project was a little different, during the project pause phase we suggested to the client that we could actually commence our 2nd Fix activities whilst we were waiting for a new main contractor to be appointed. This would mean that we were able to advance the timeline of our works even though the main project works were on hold.
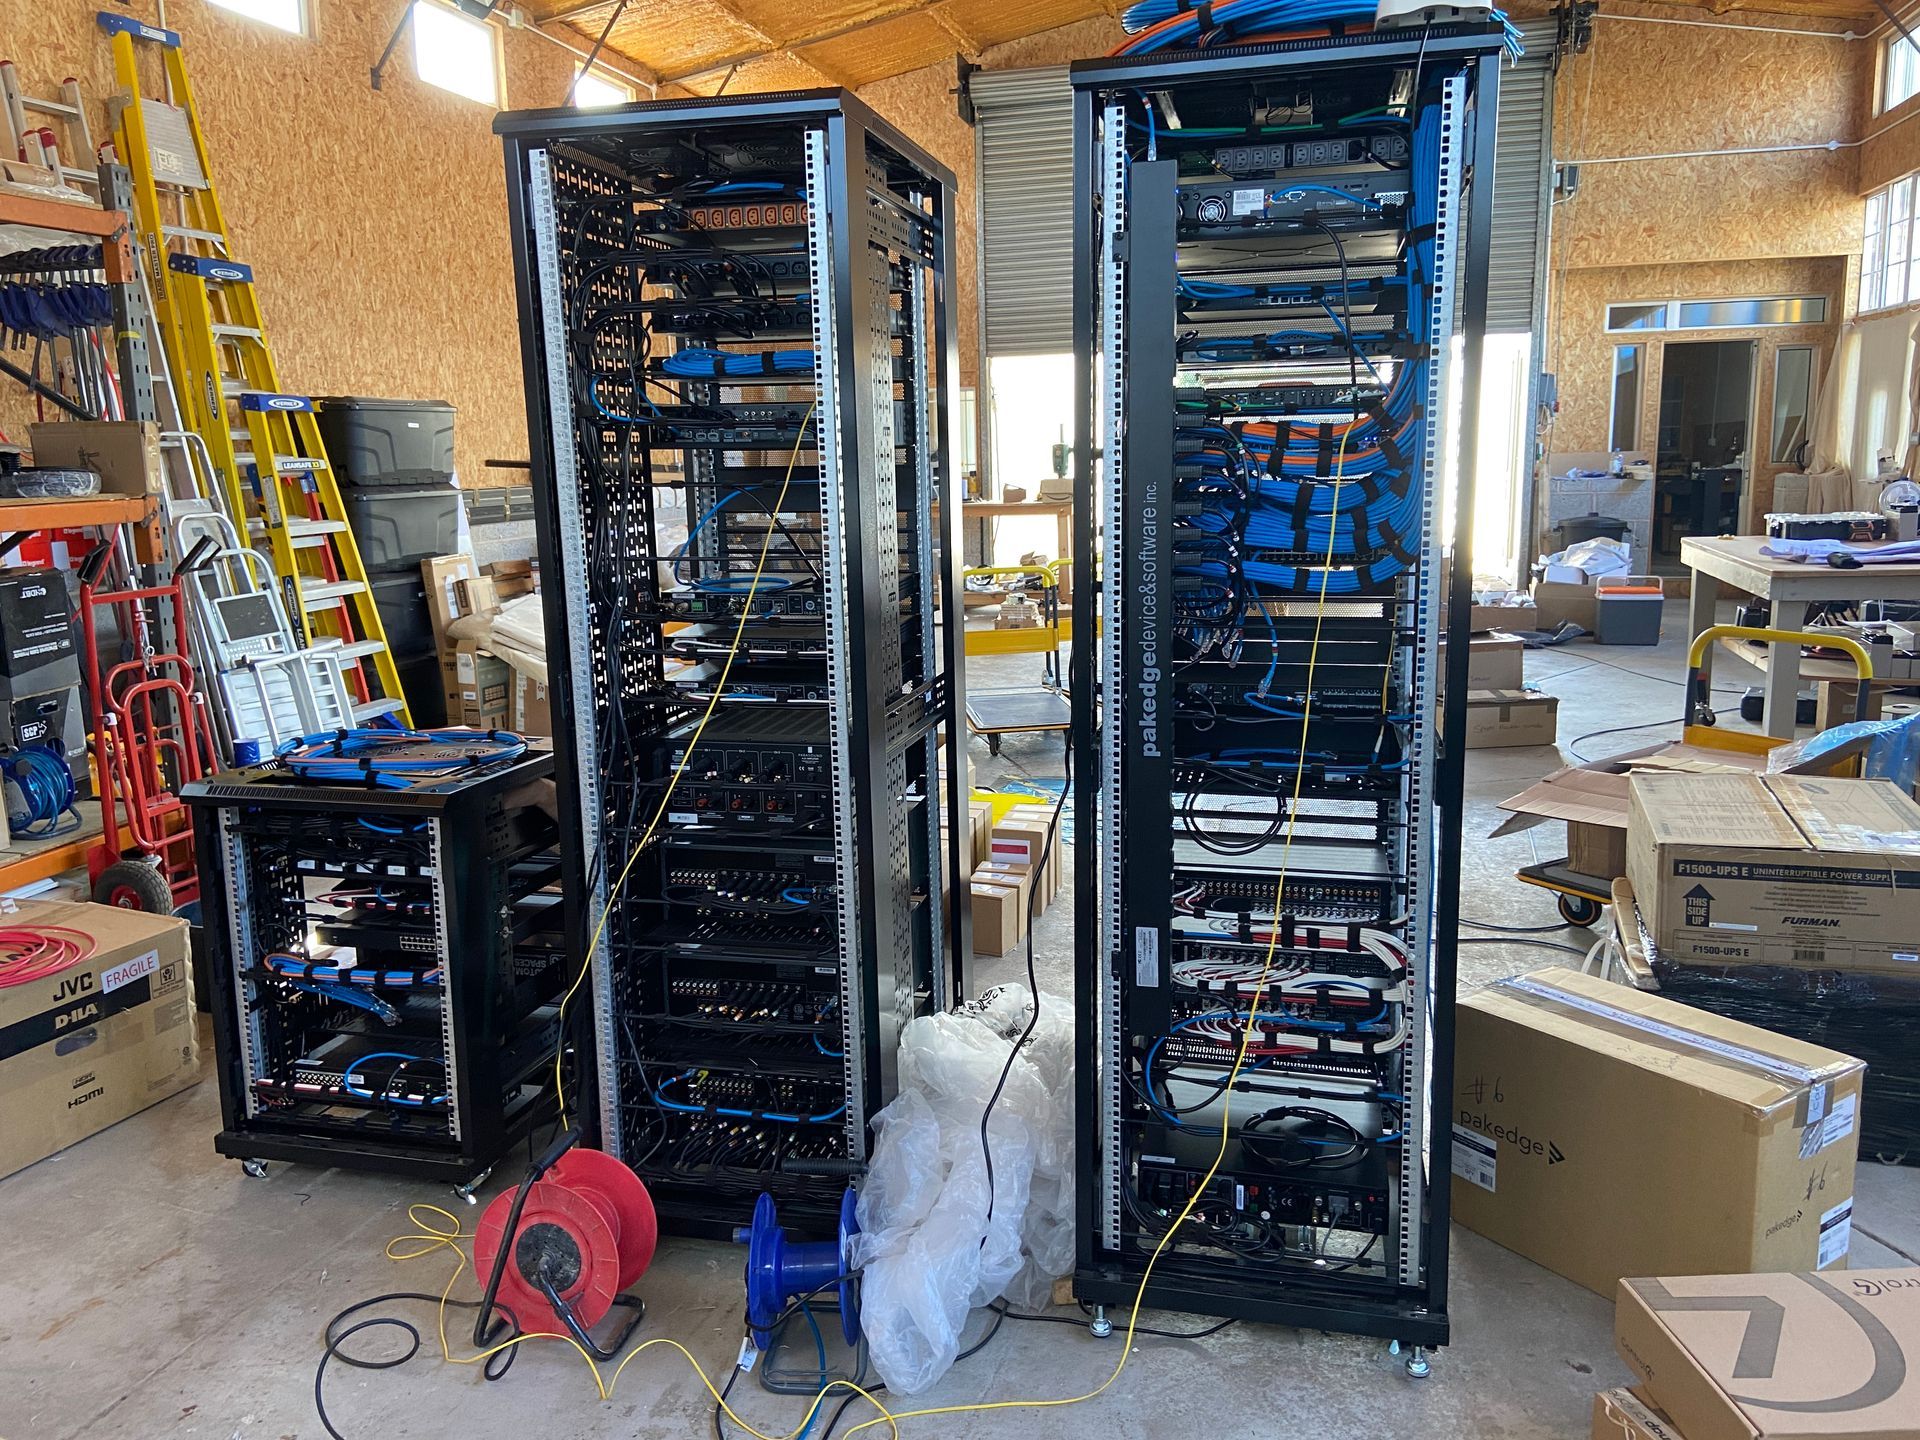
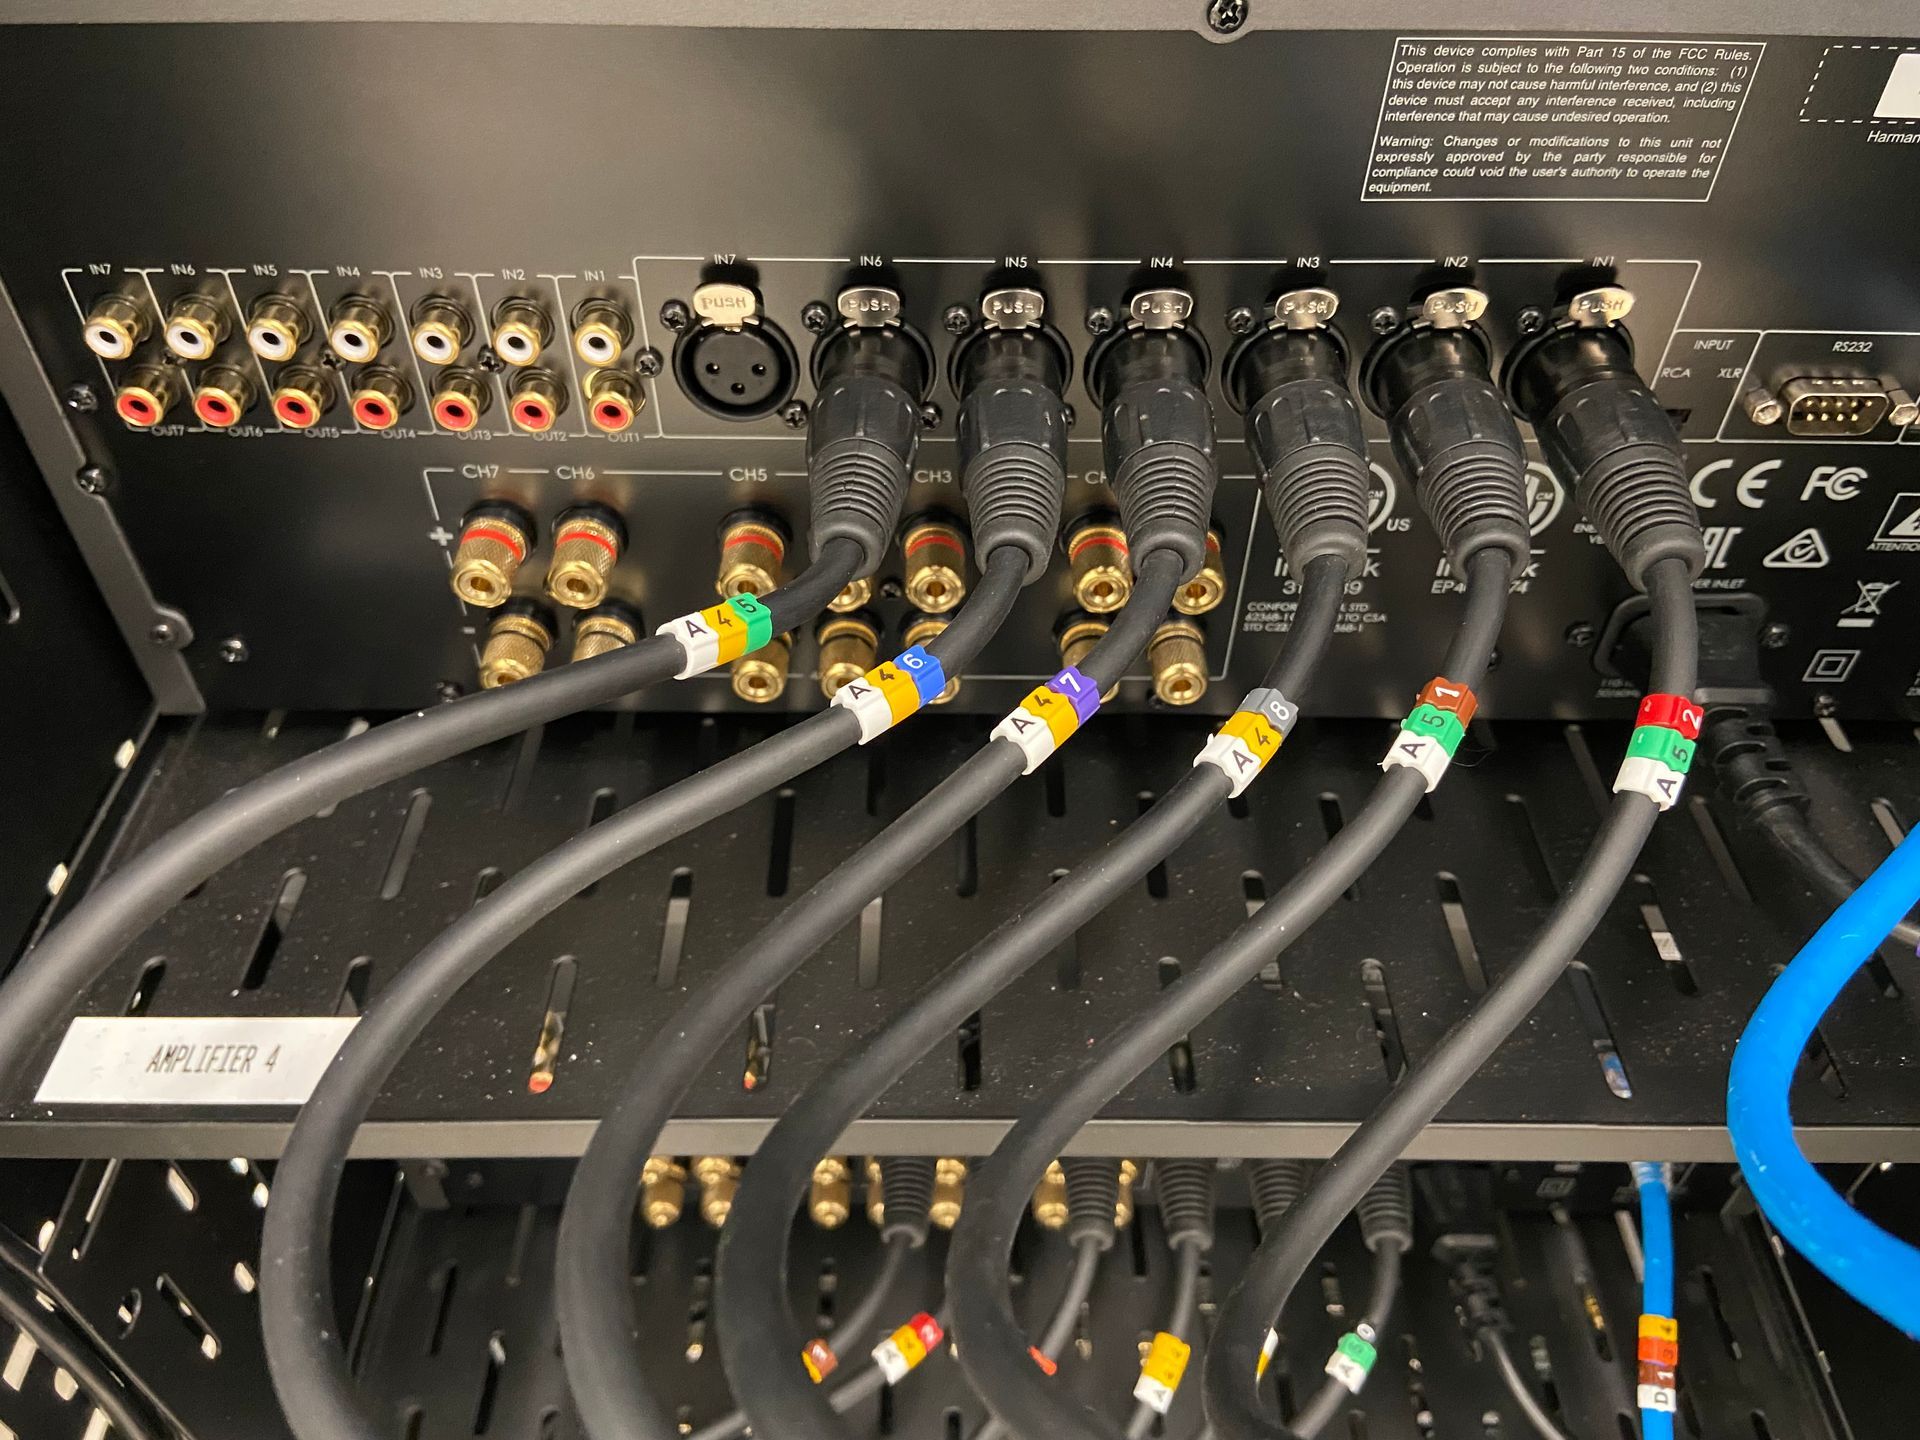
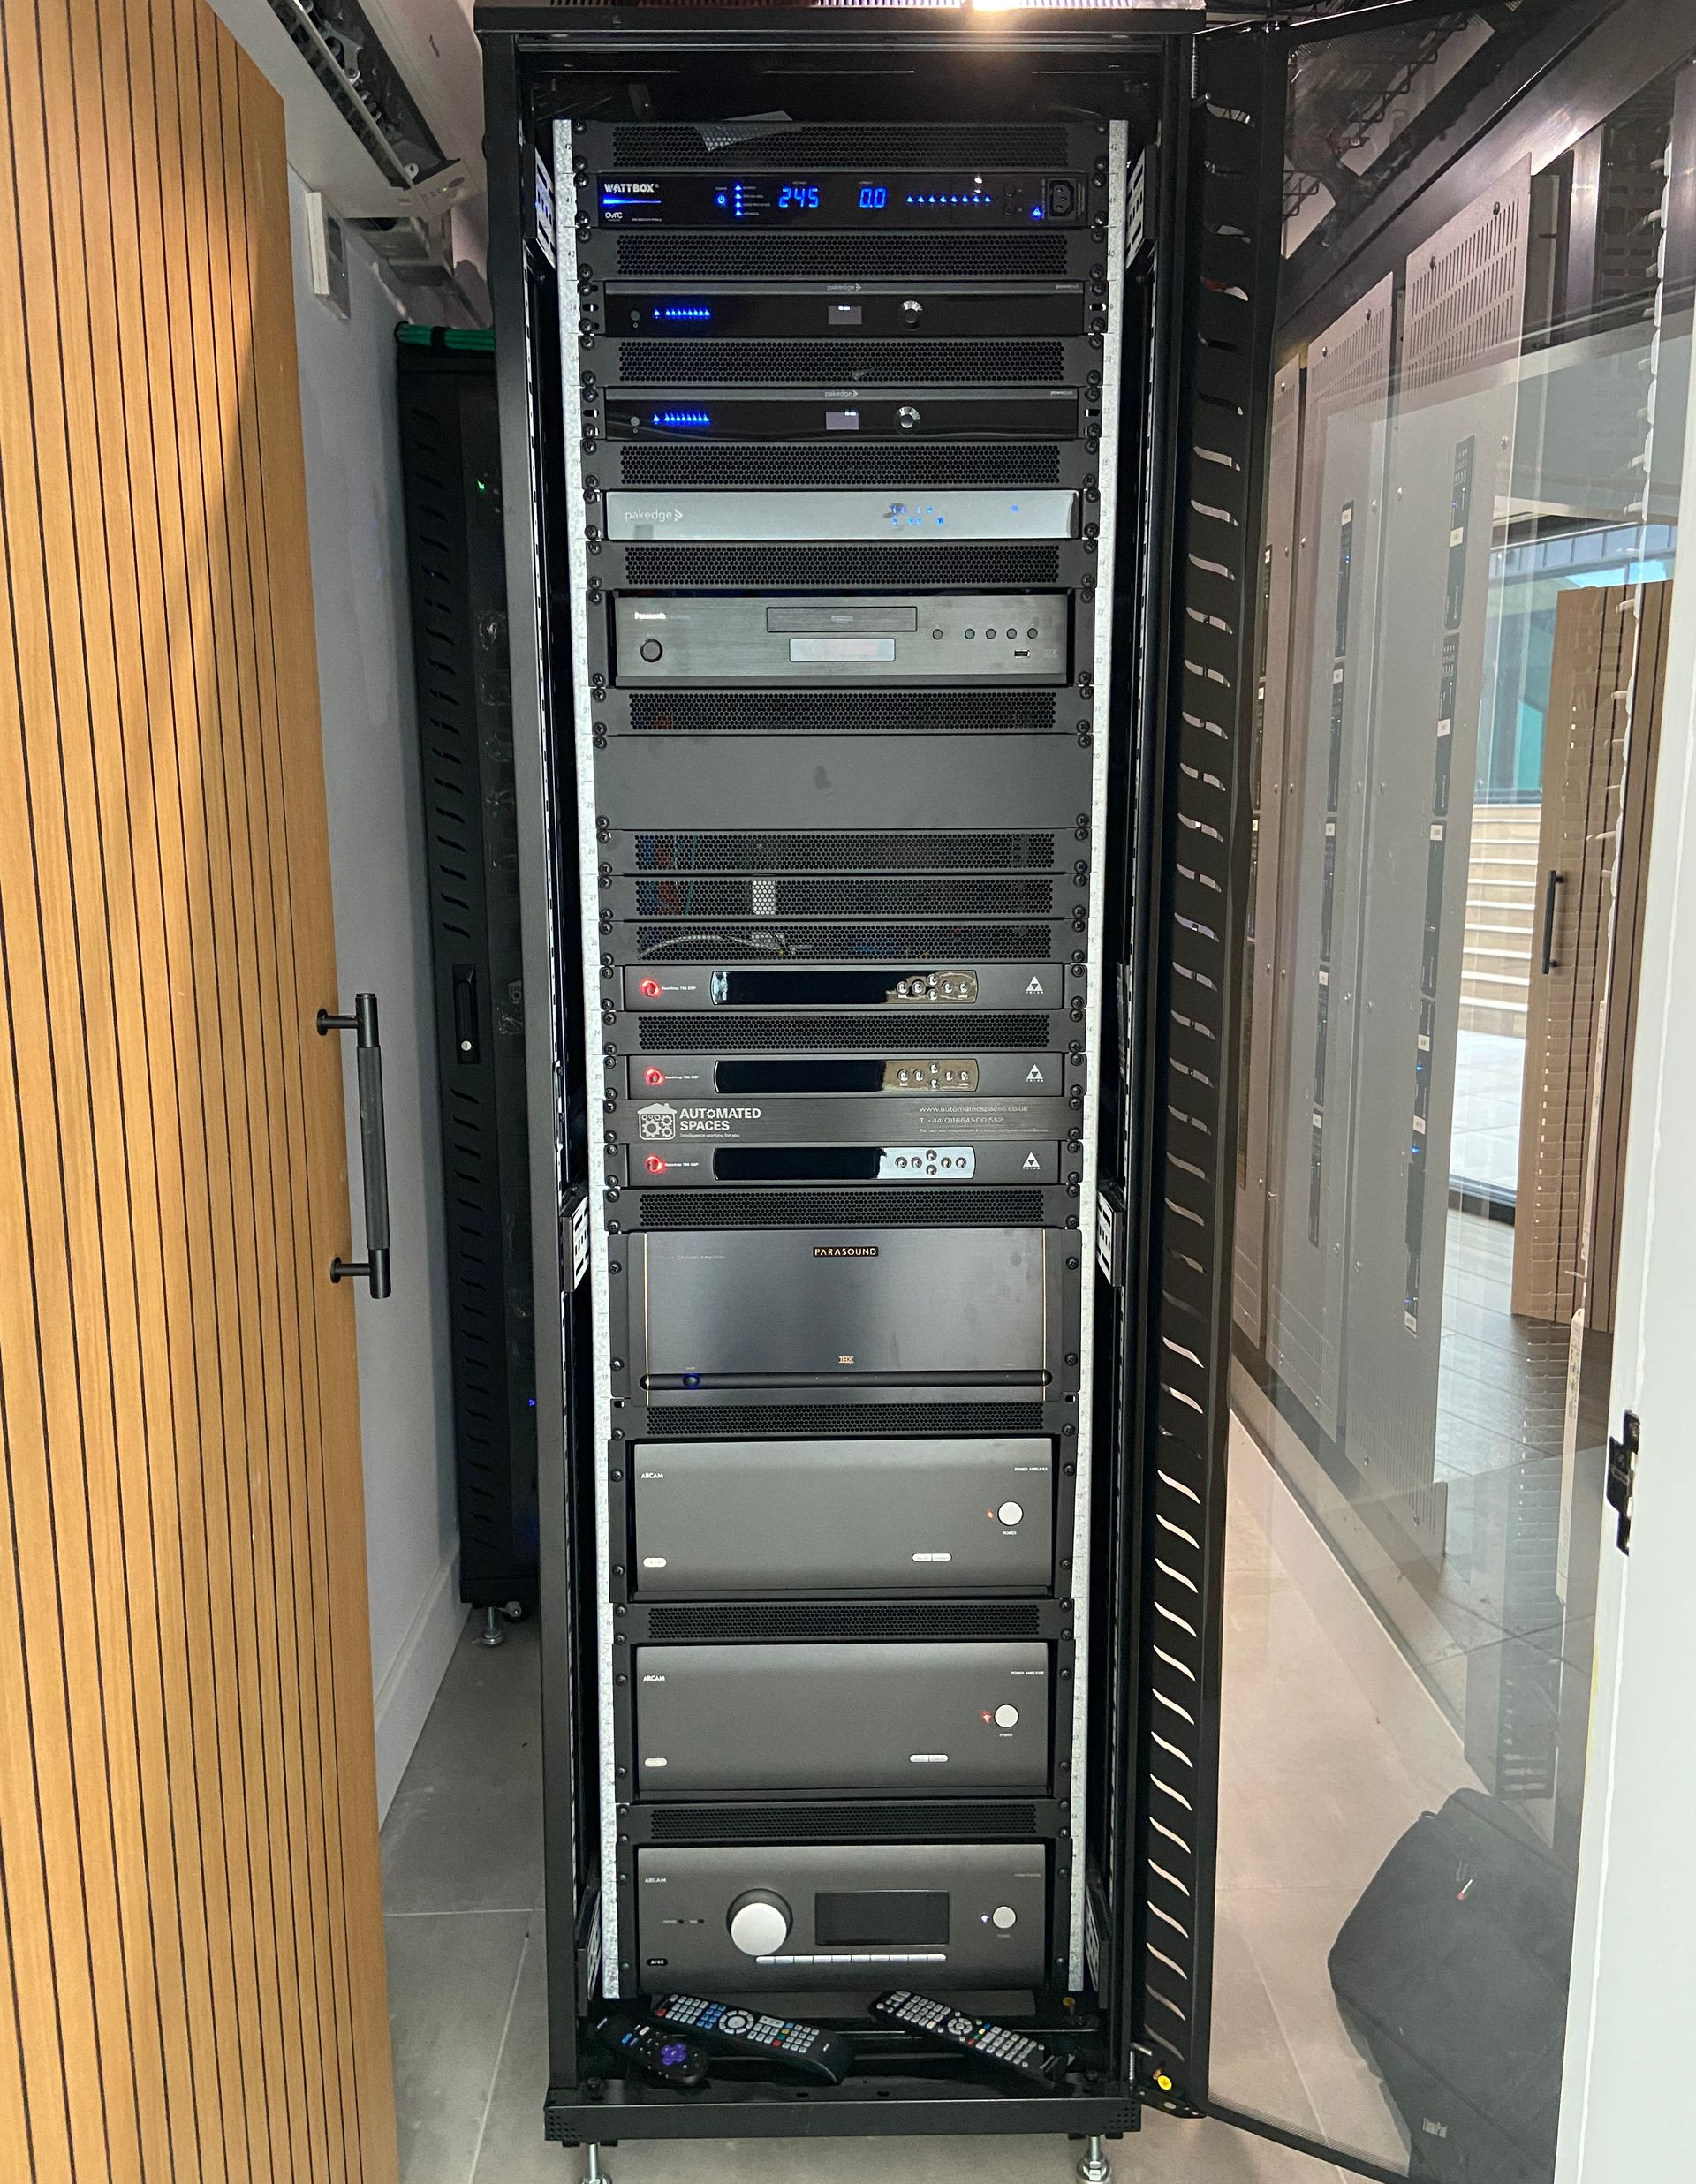
We installed the various cinema room equipment into its own dedicated 42U server rack. After soak testing of the equipment we installed the various server rack equipment interconnecting cables as well as lacing in the Patch Panel cables from the network switches. We left these patch cables with enough length to be installed into the ceiling mounted basket tray over to the location of the Patch Panel mounted on the rear wall in the Head End.
We also ensured that we left plenty of spare capacity in the rack to install further video processing equipment in the future should the client wish to add additional equipment. Our rack design also ensured that we allowed for lots of air movement around the various rack mounted equipment, warm air extraction from the top of the rack and cold air to be pulled in through the base of the rack to ensure we could help the various amplifiers maintain suitable working temperature.

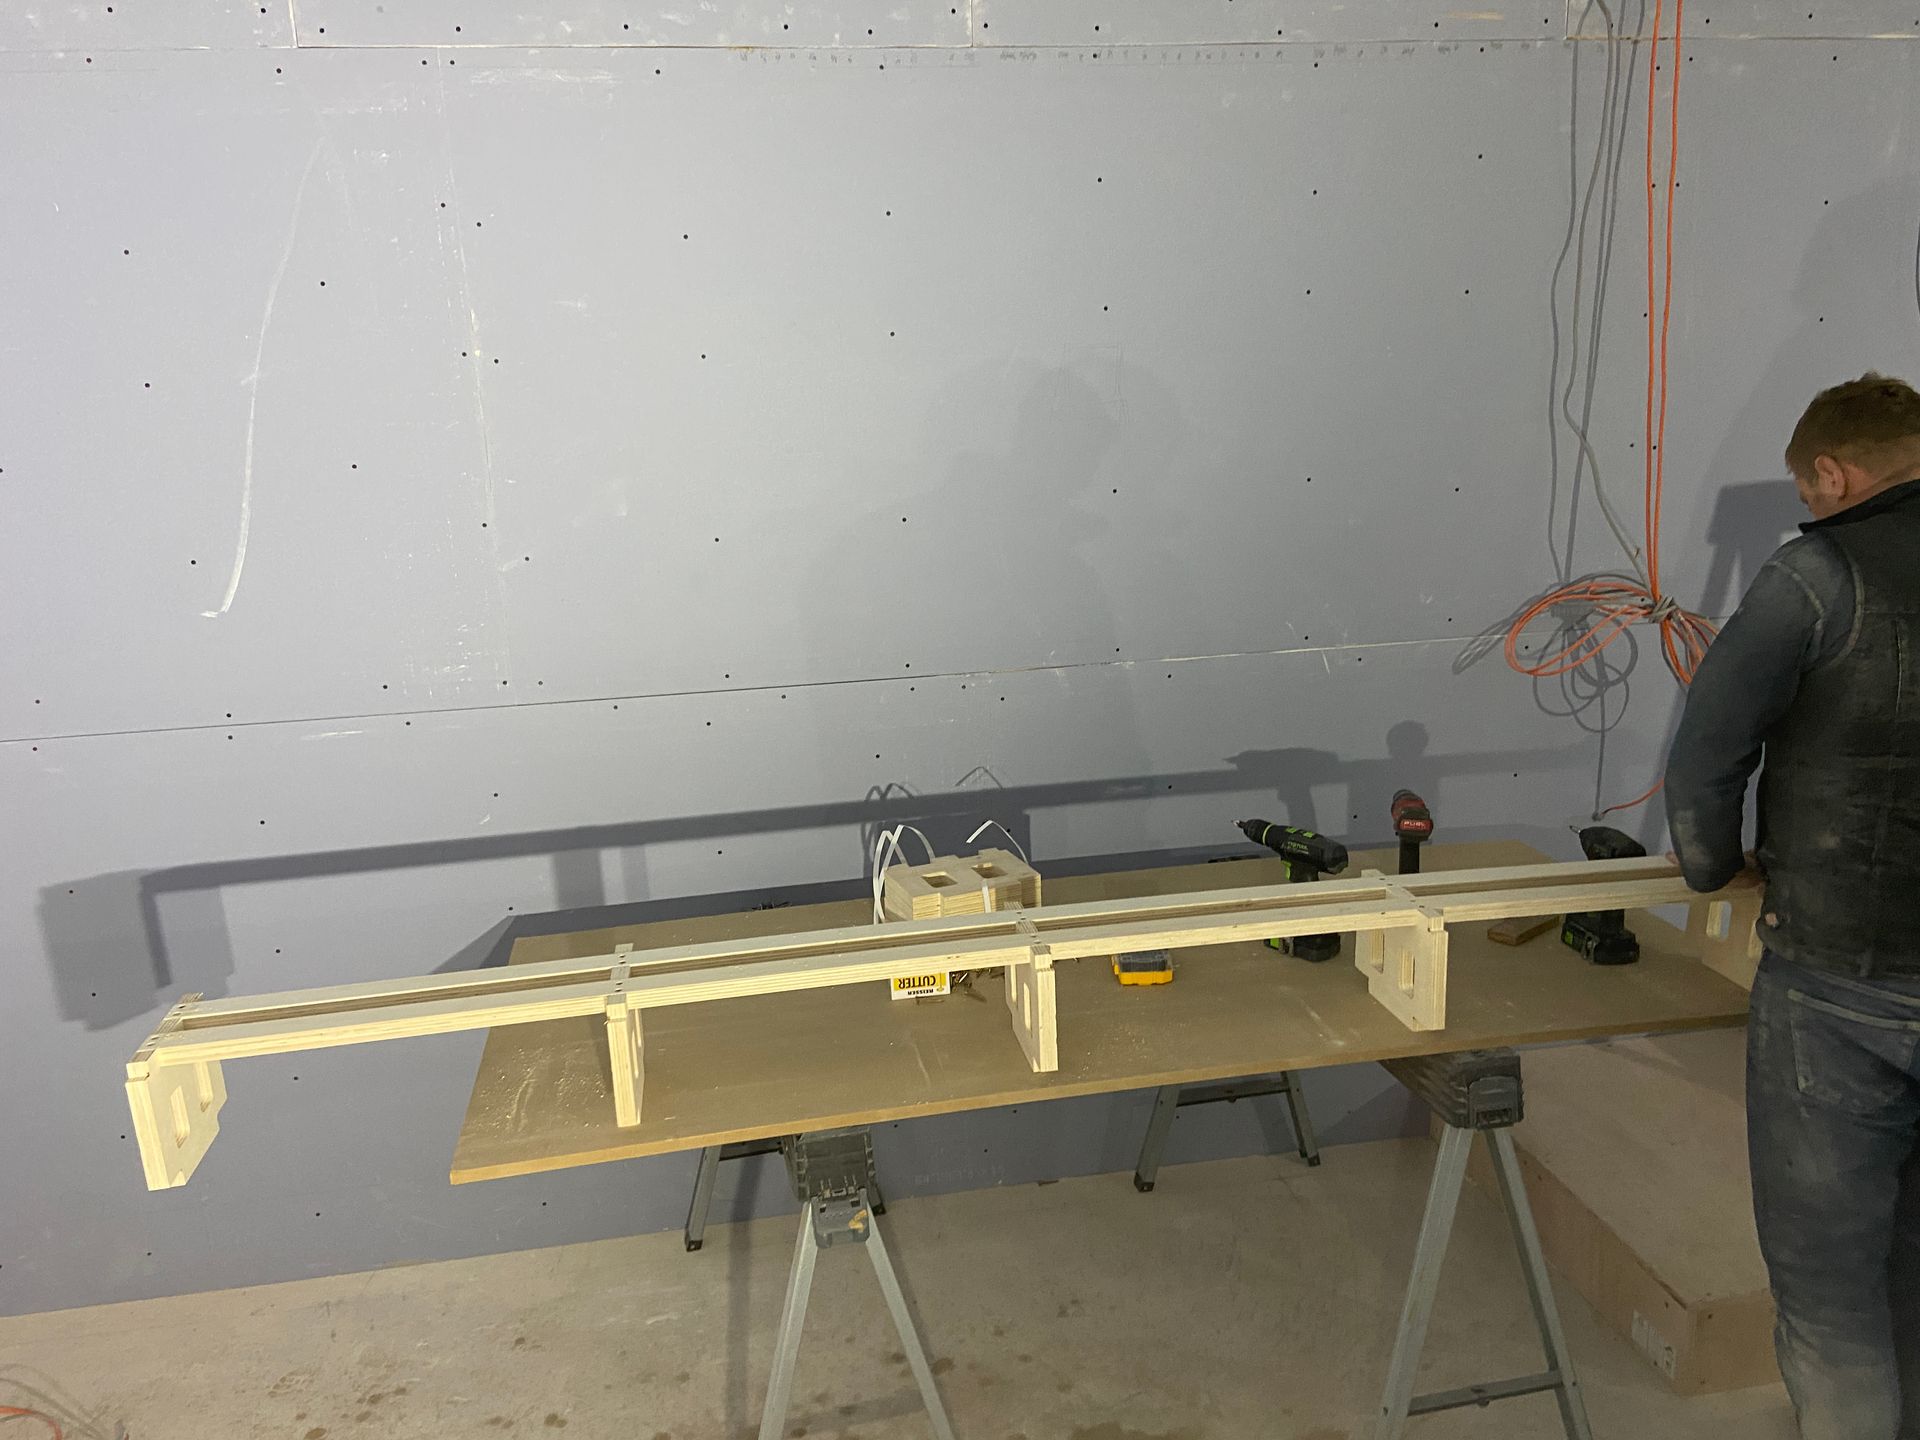
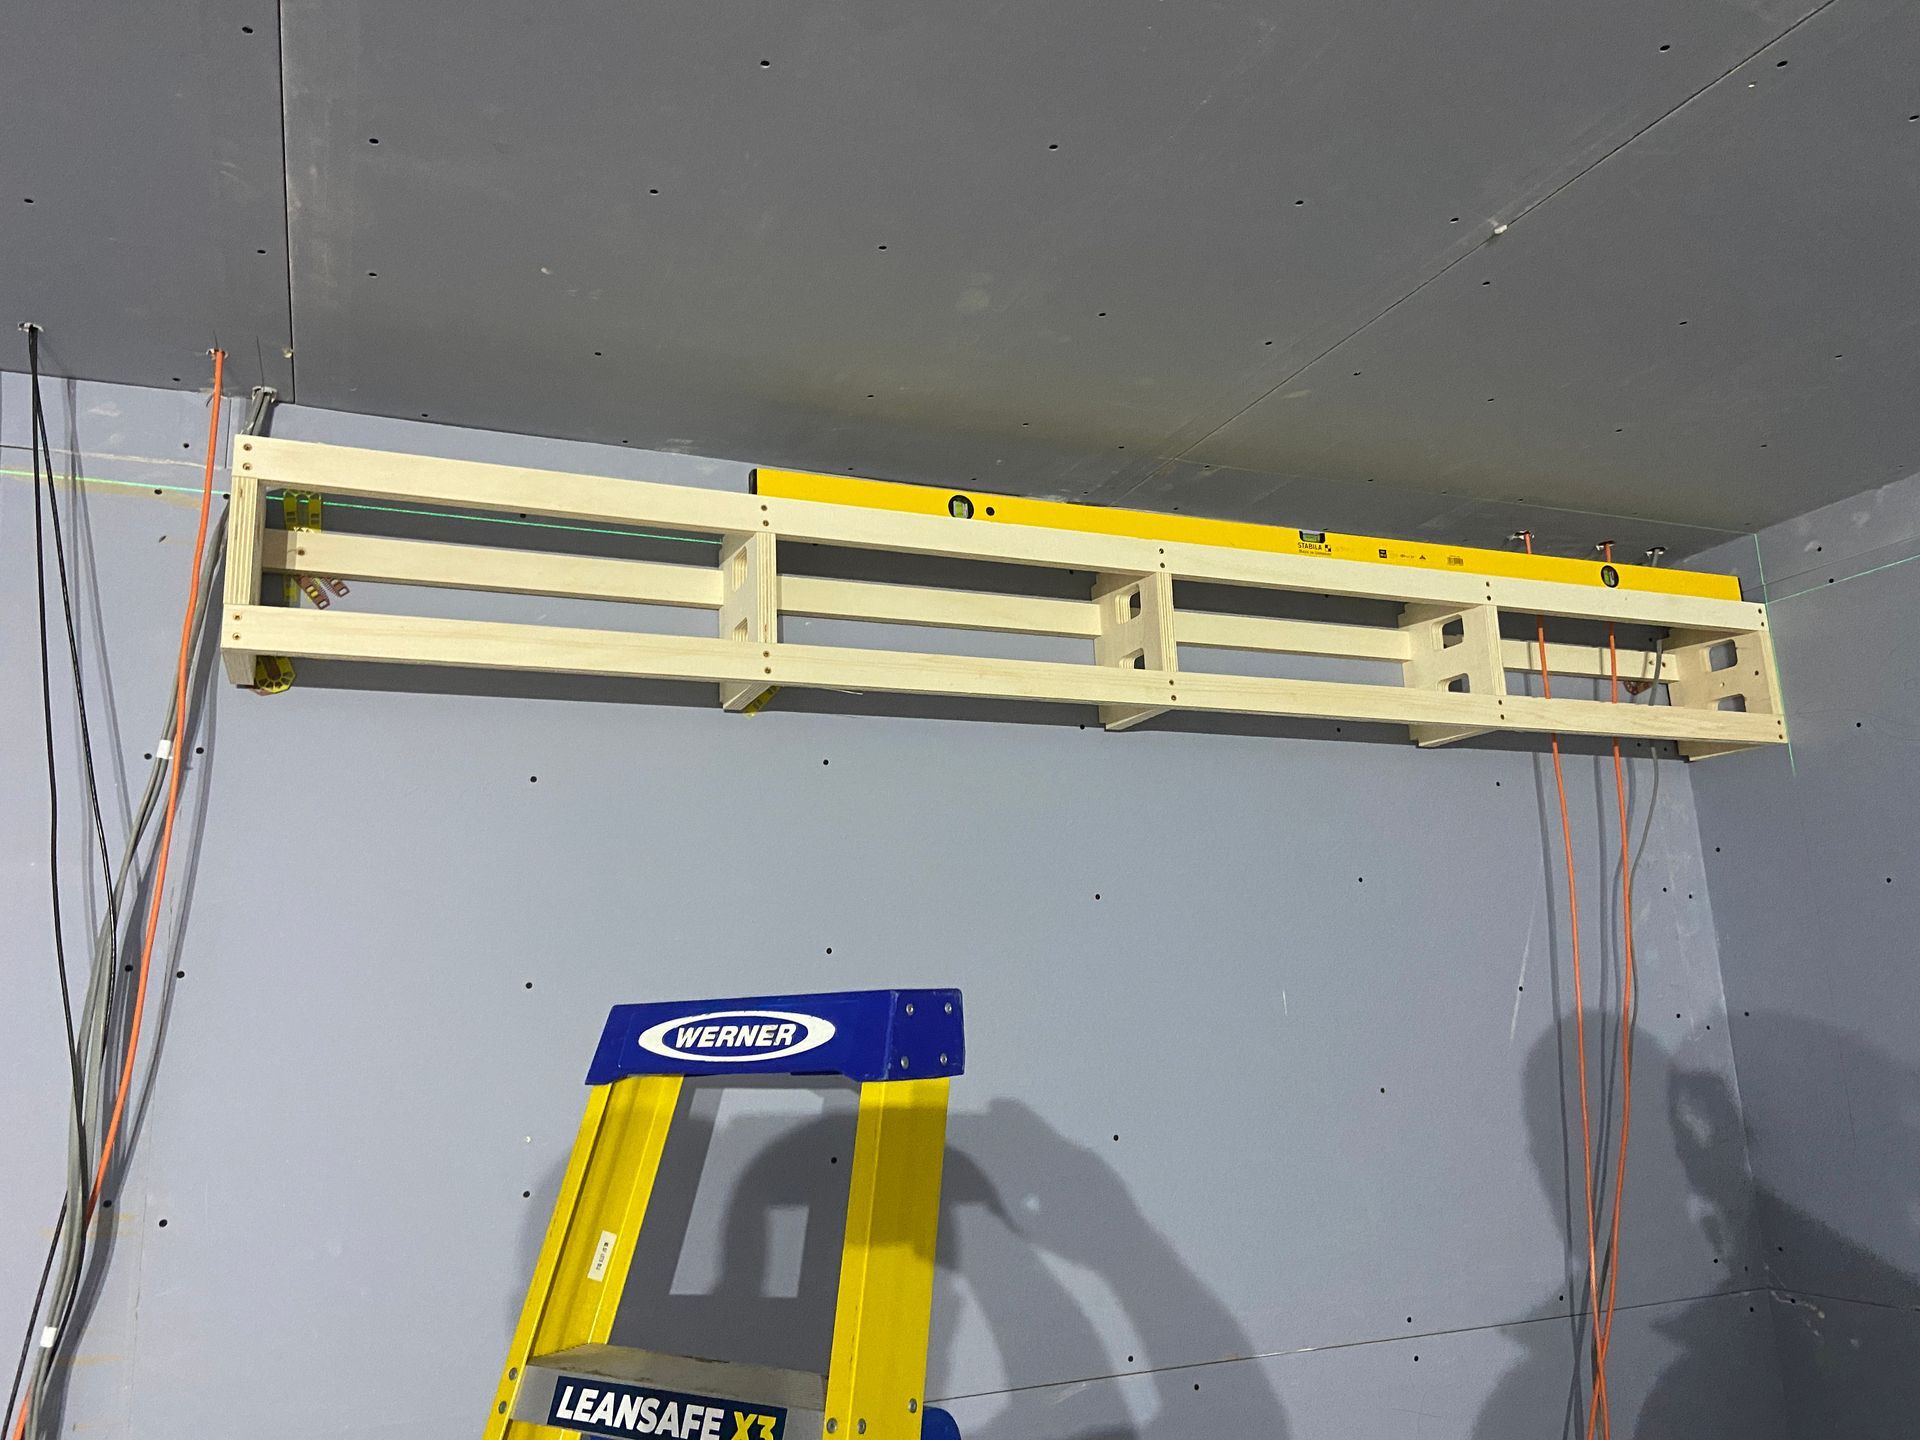

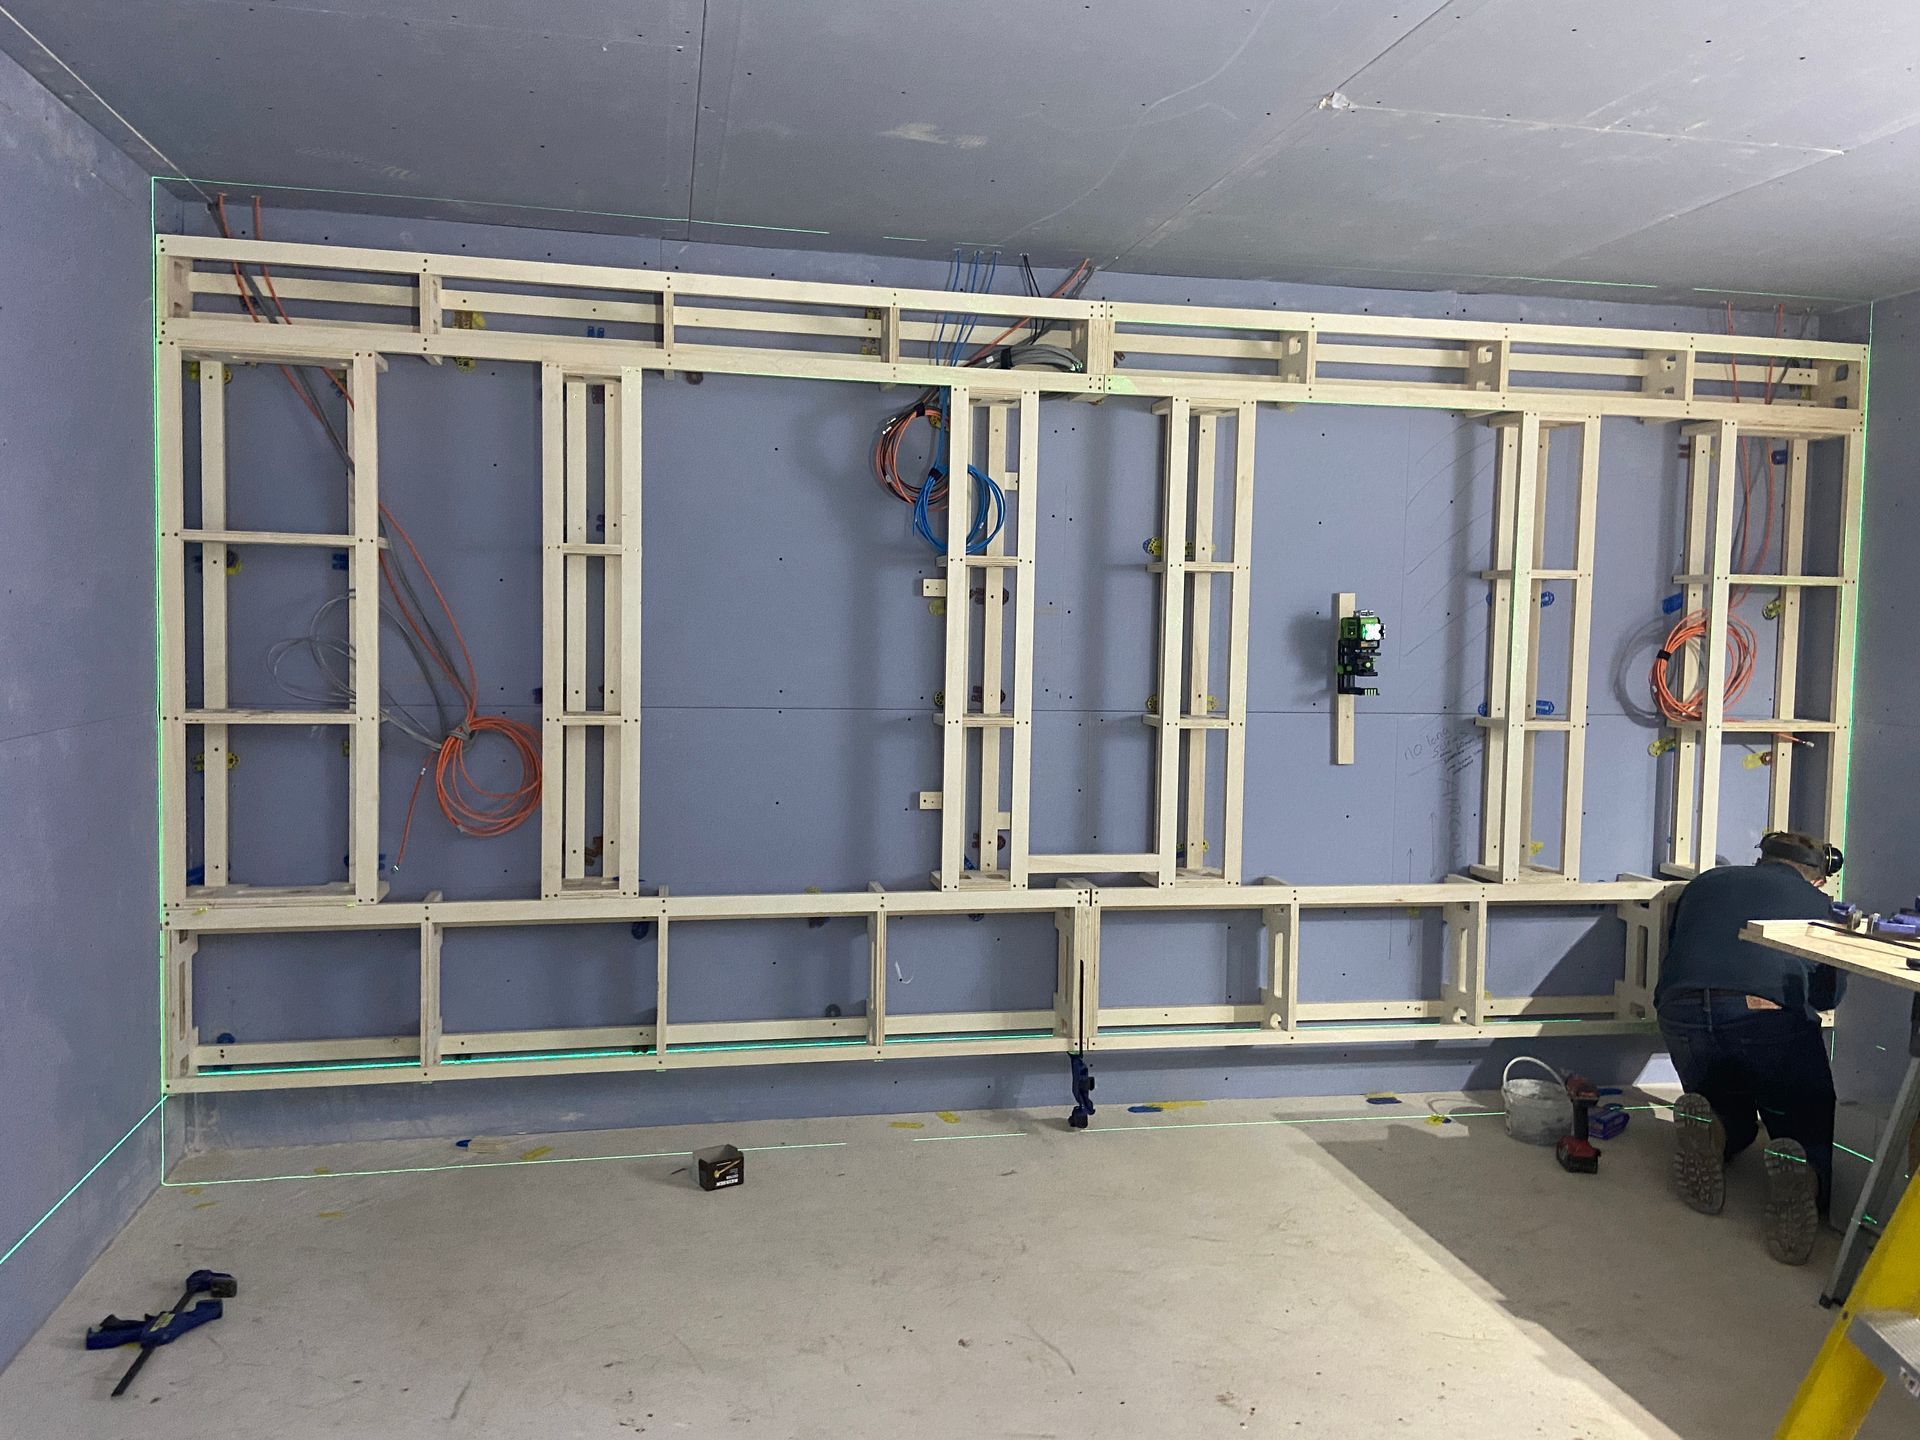
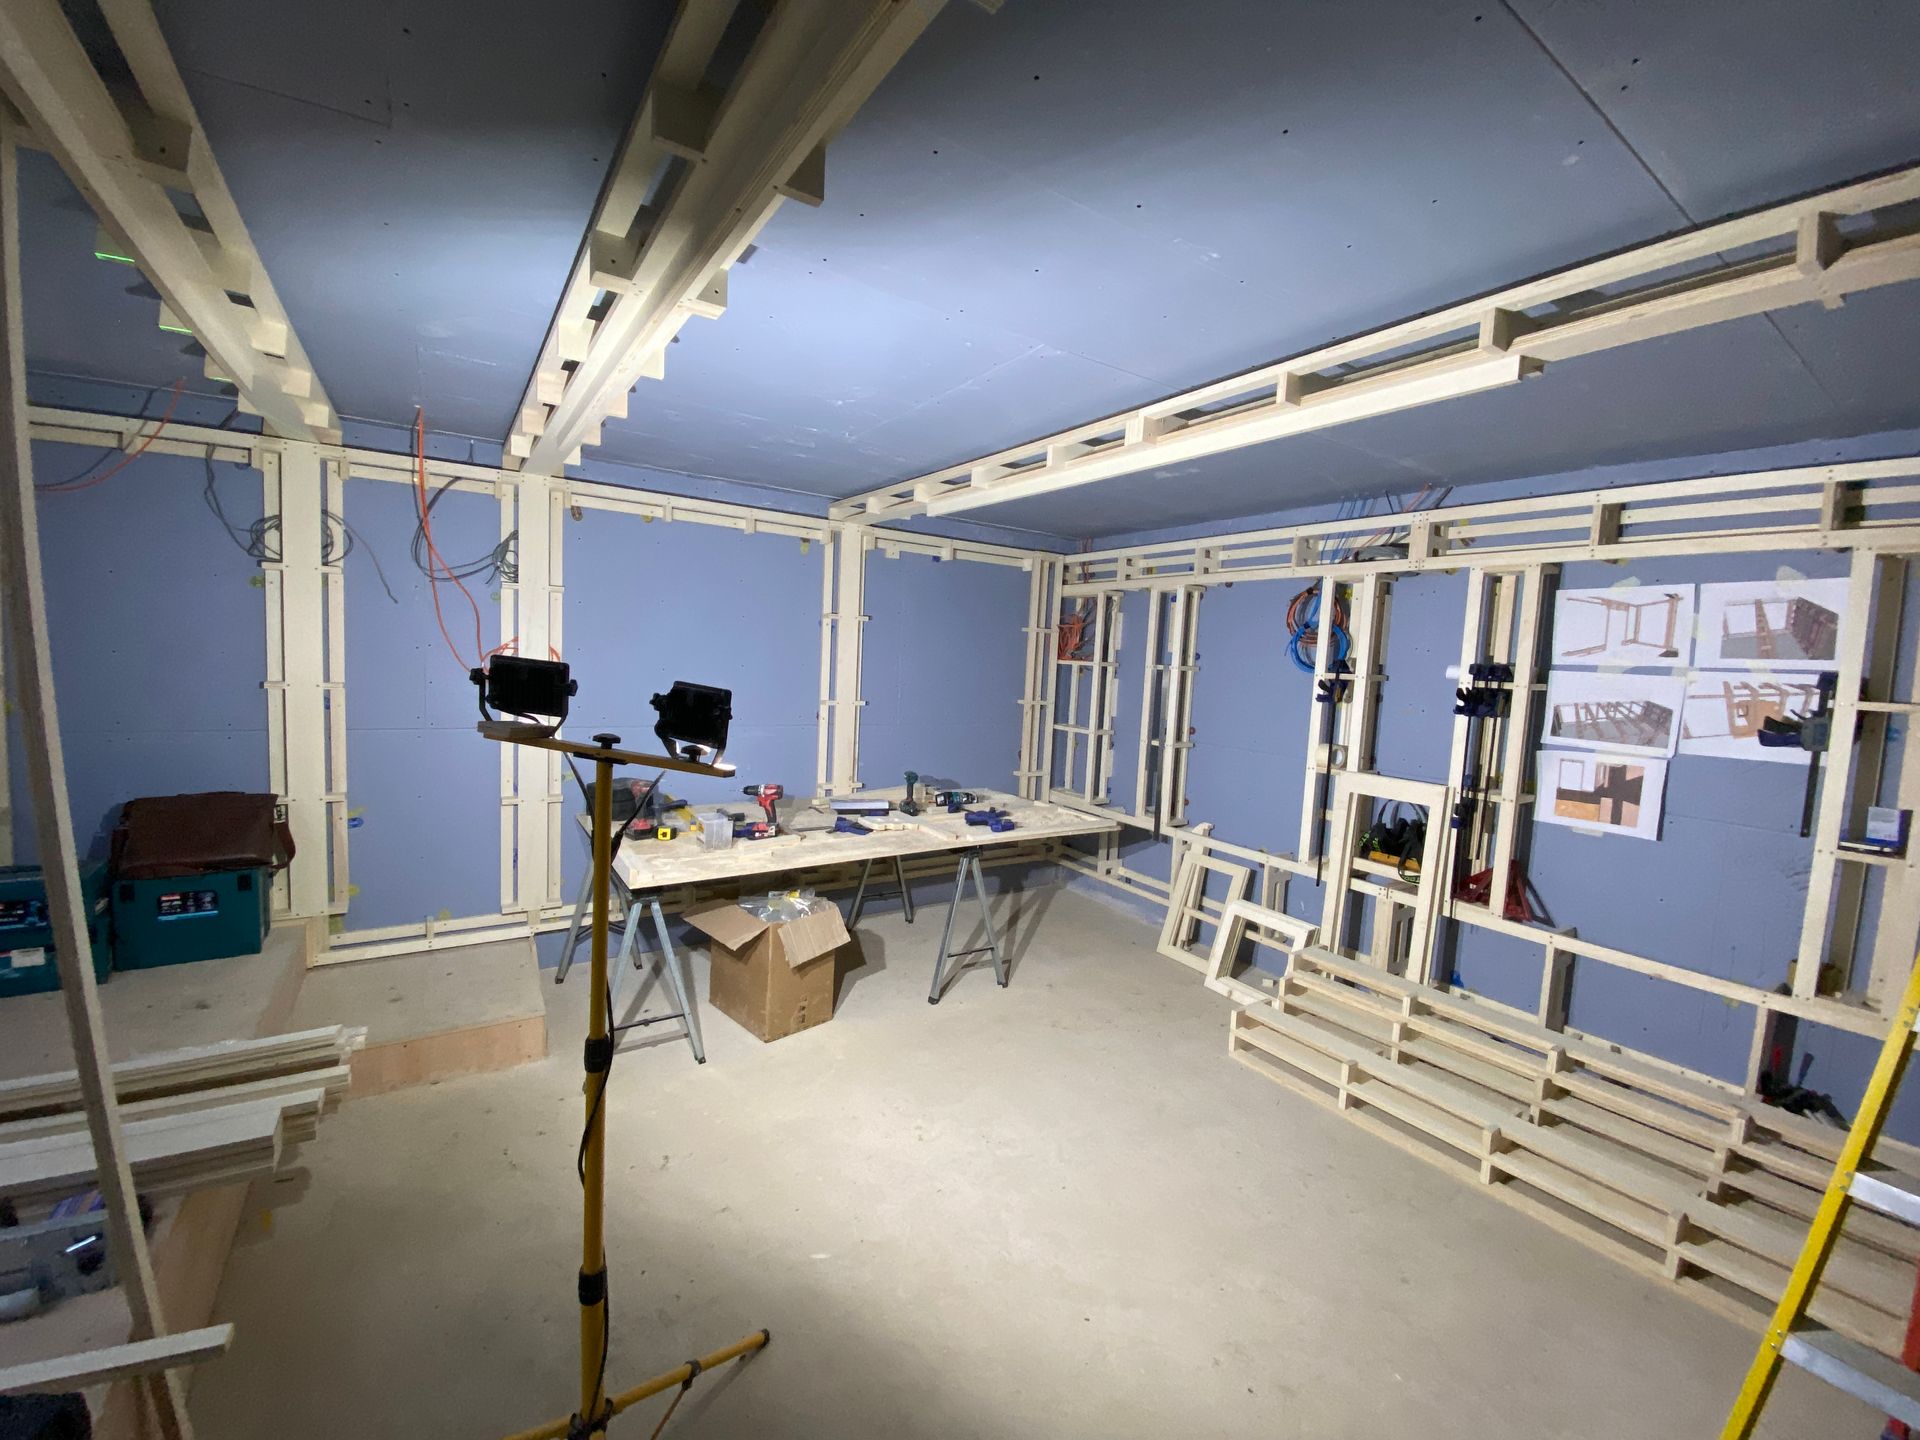
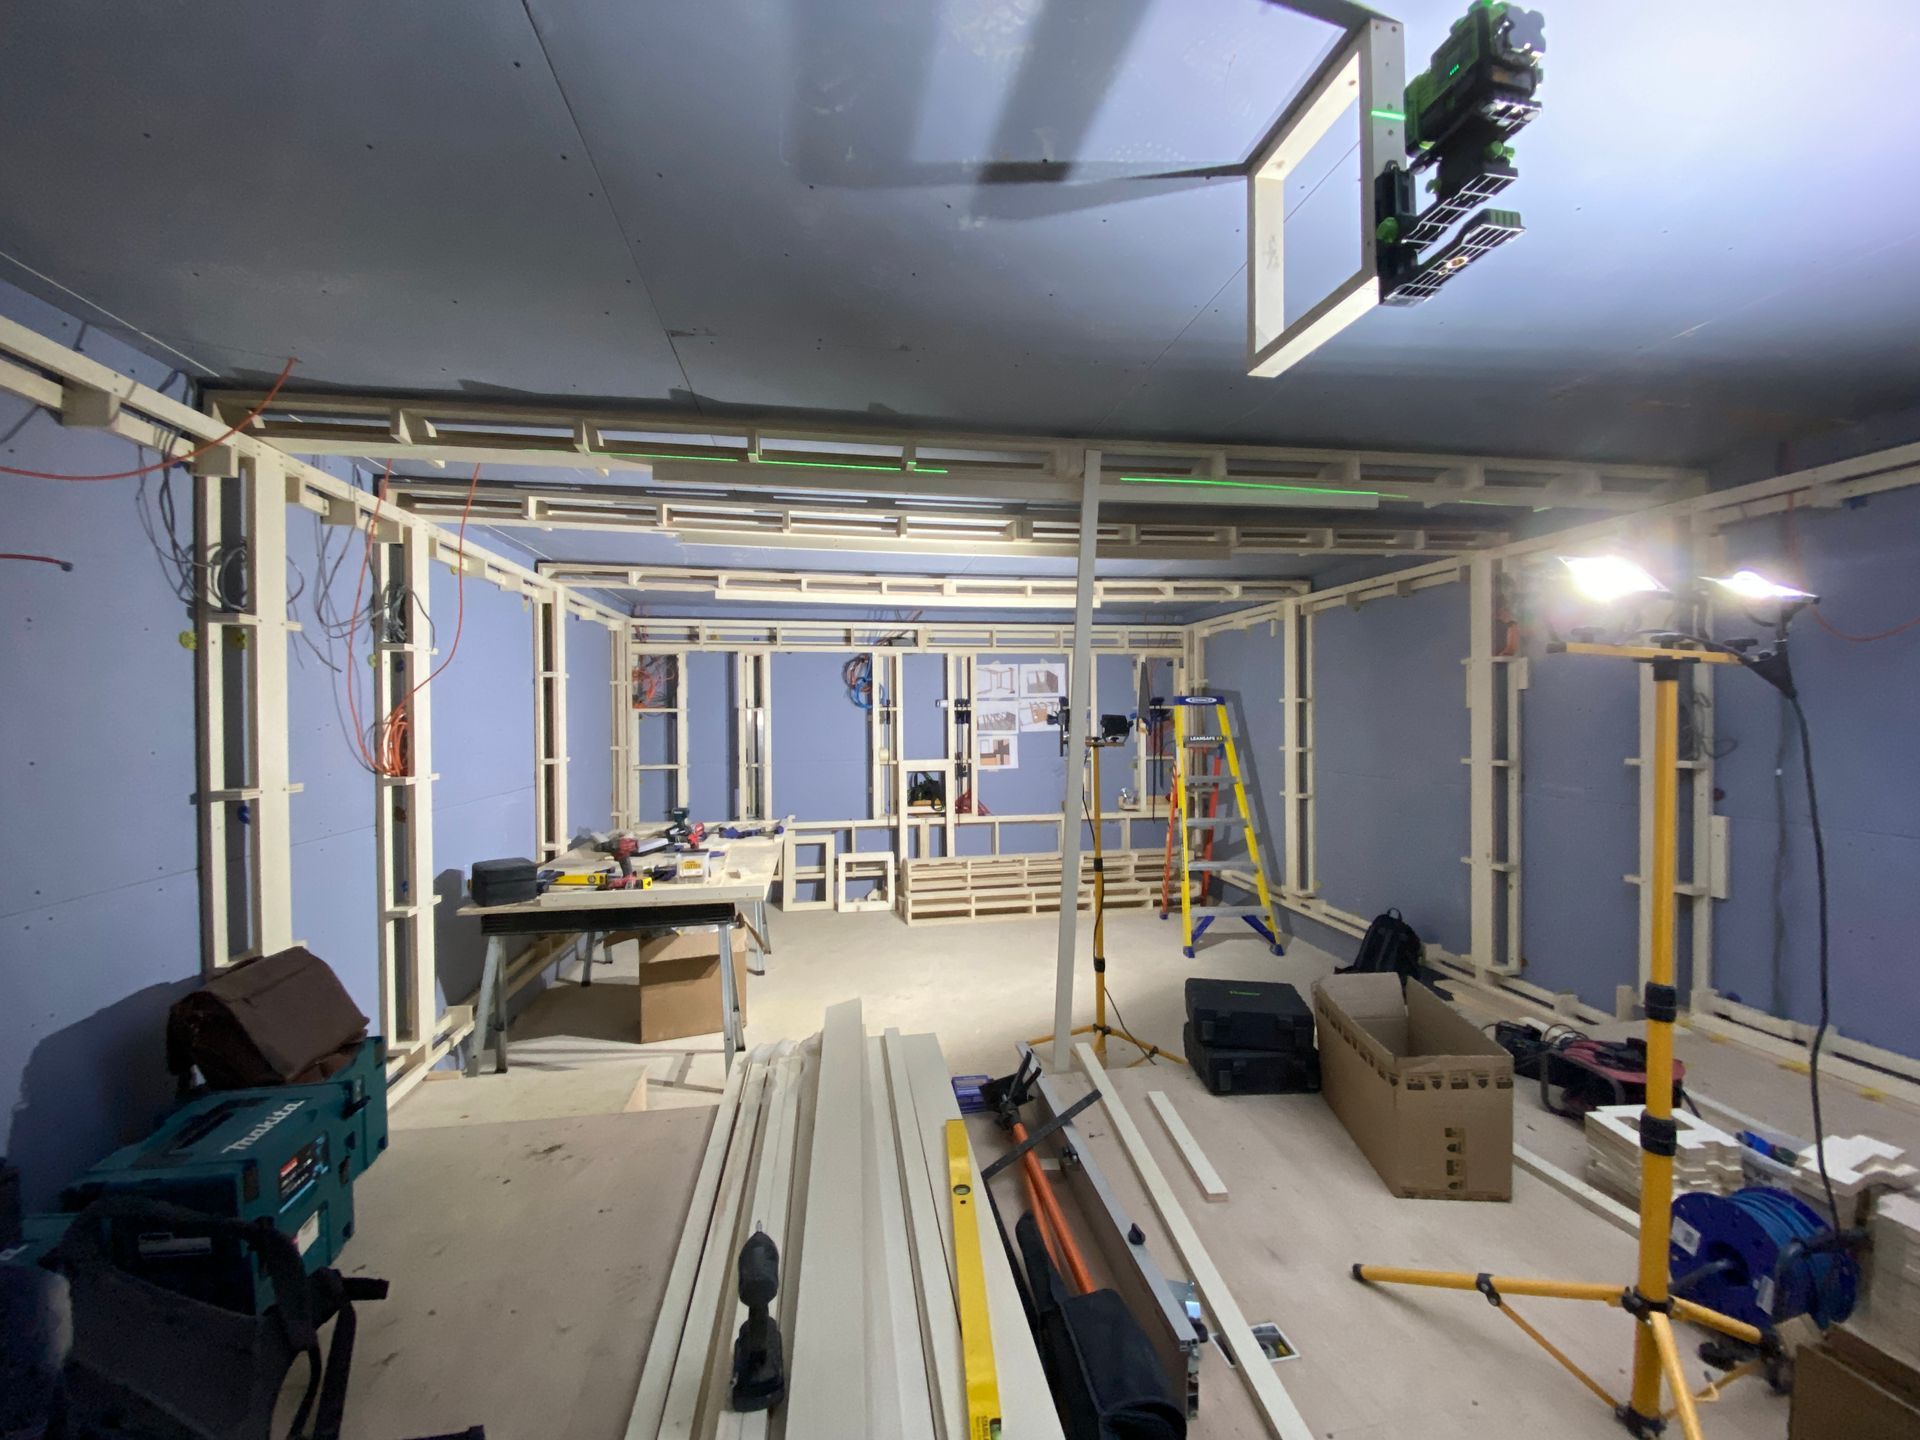
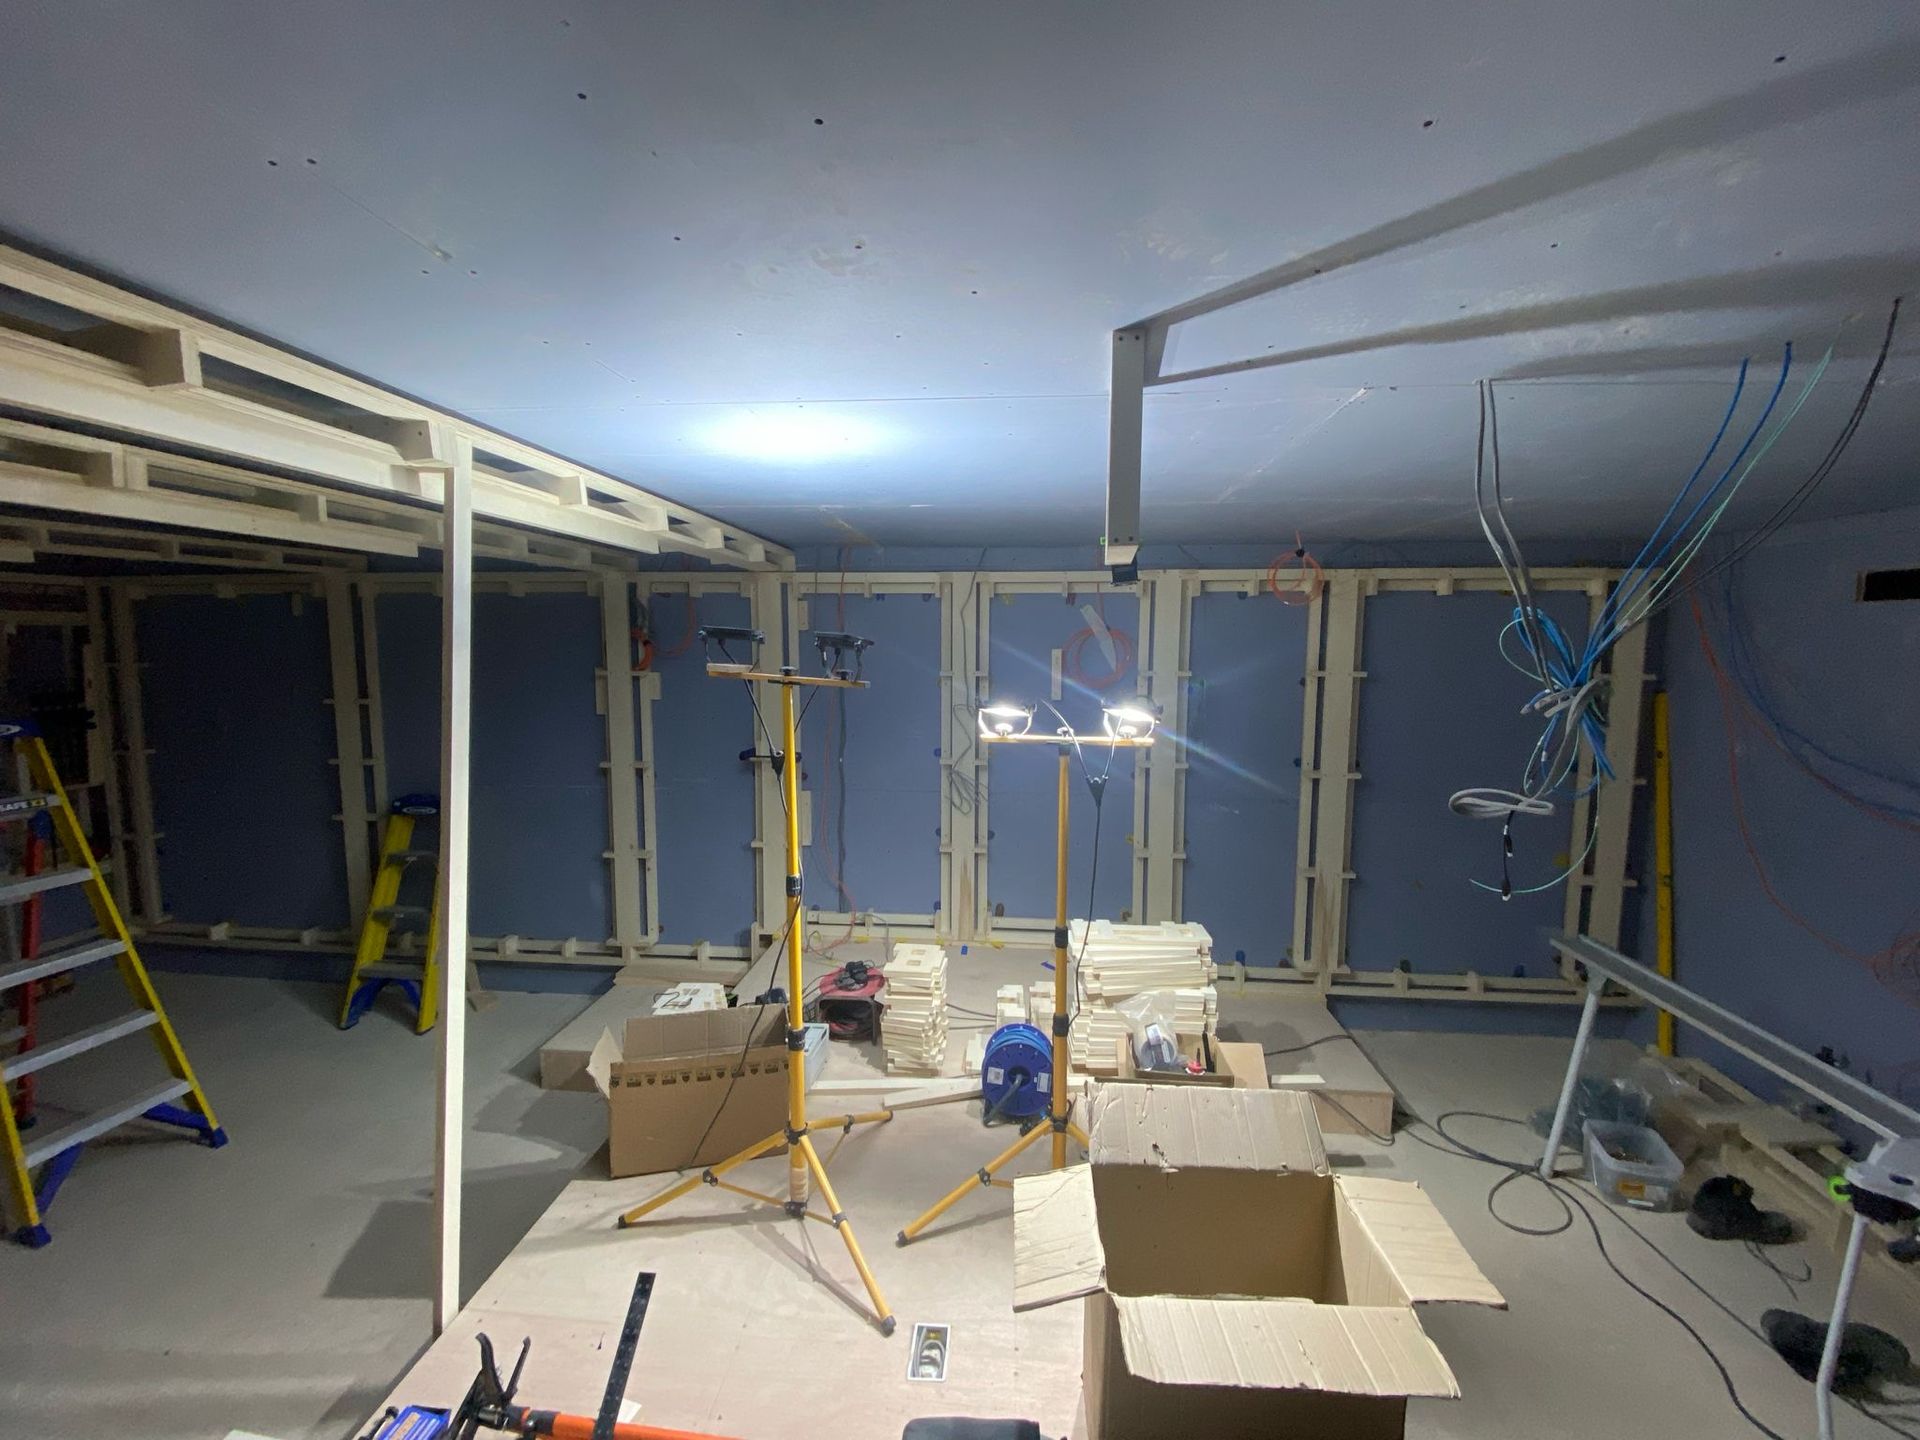
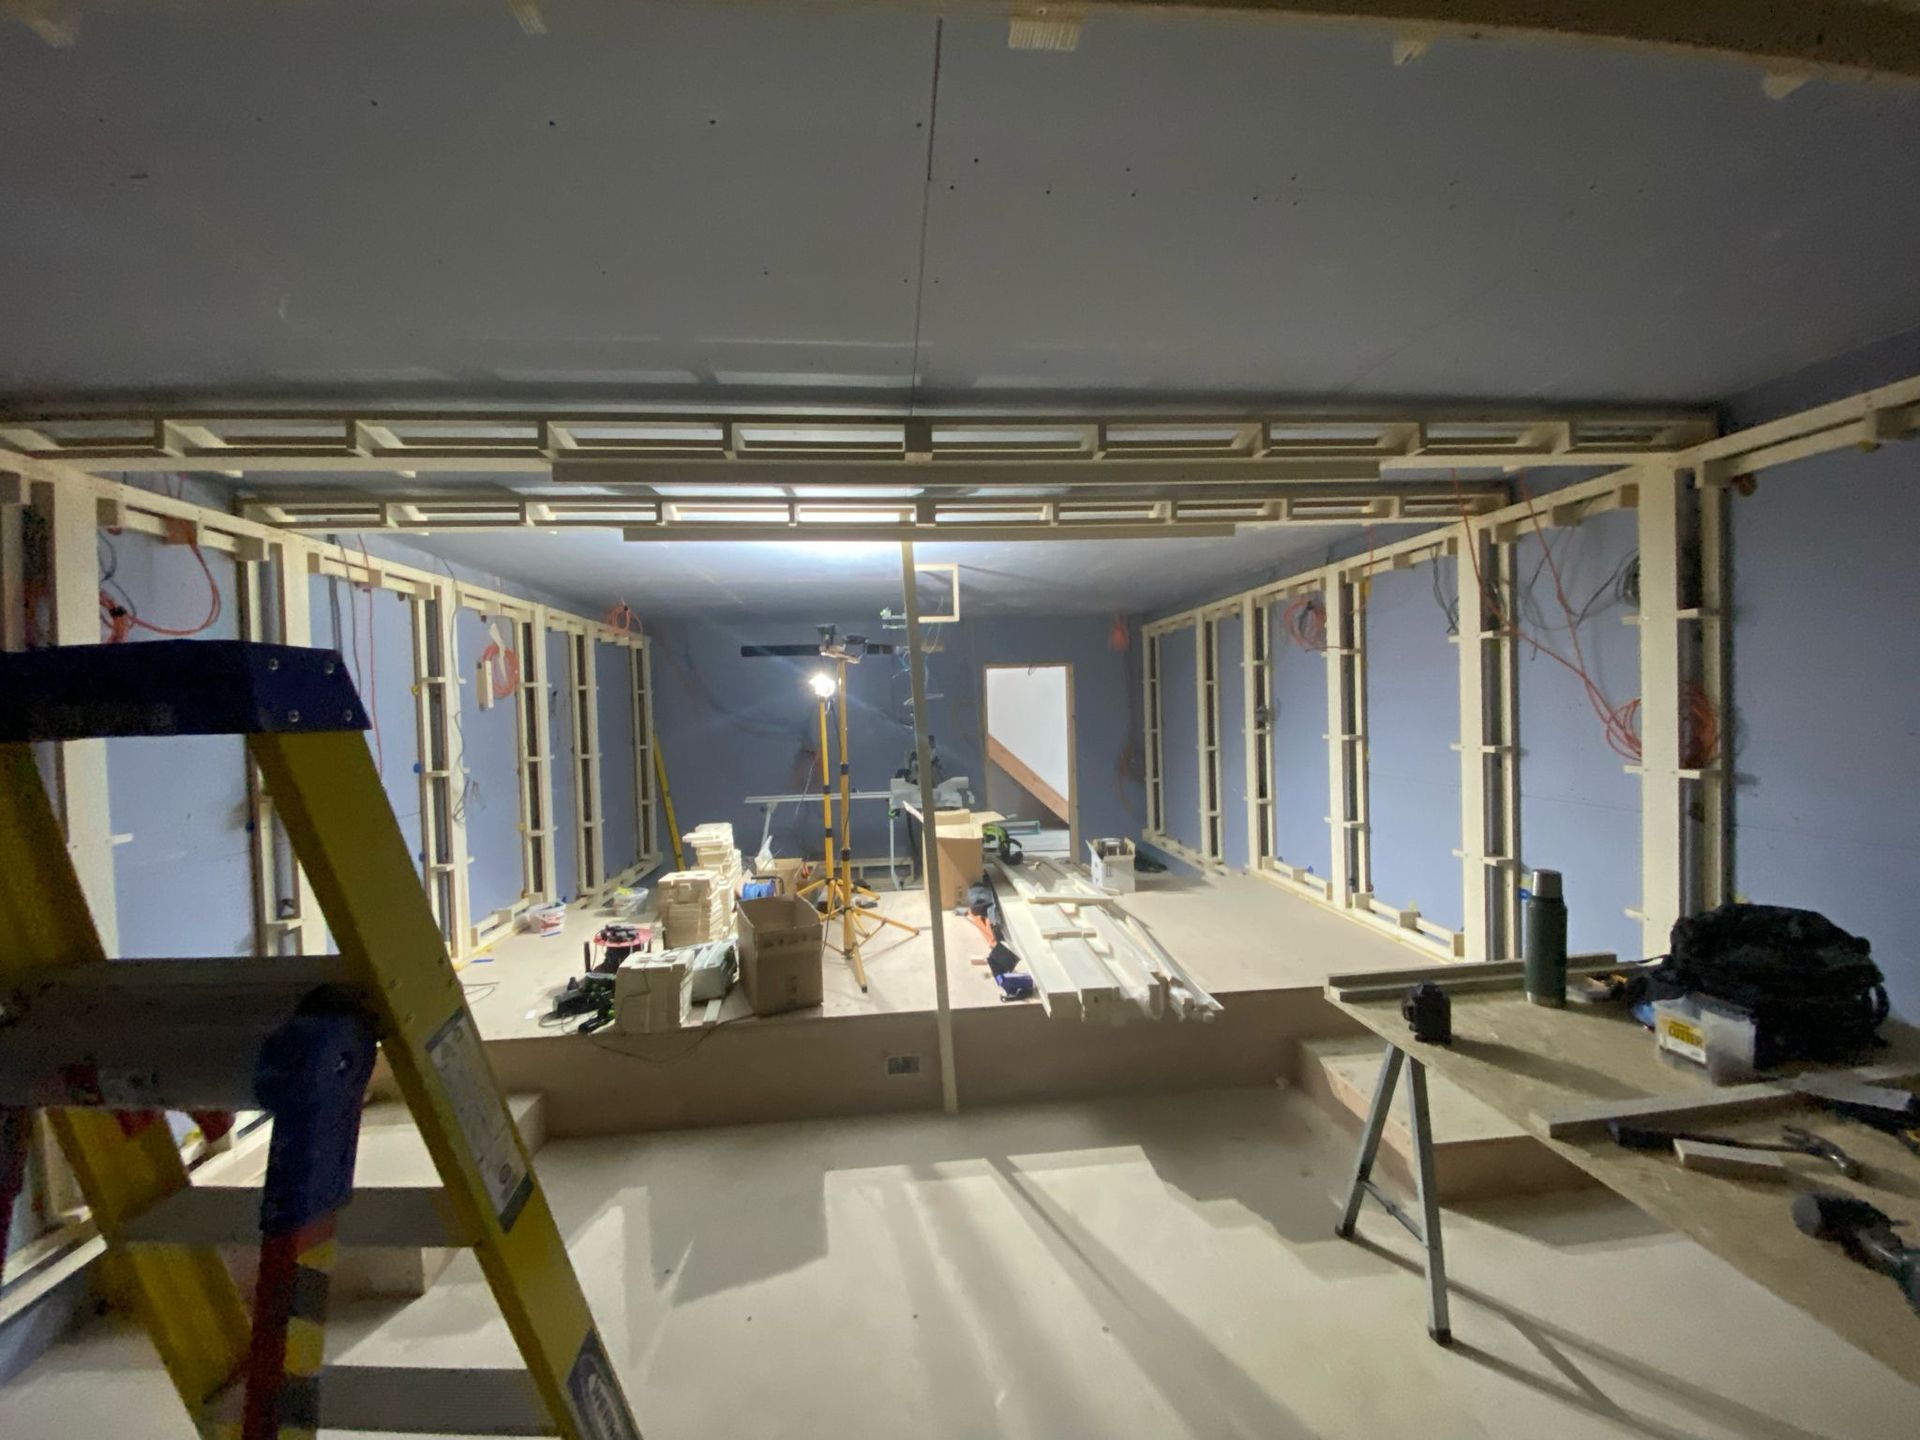
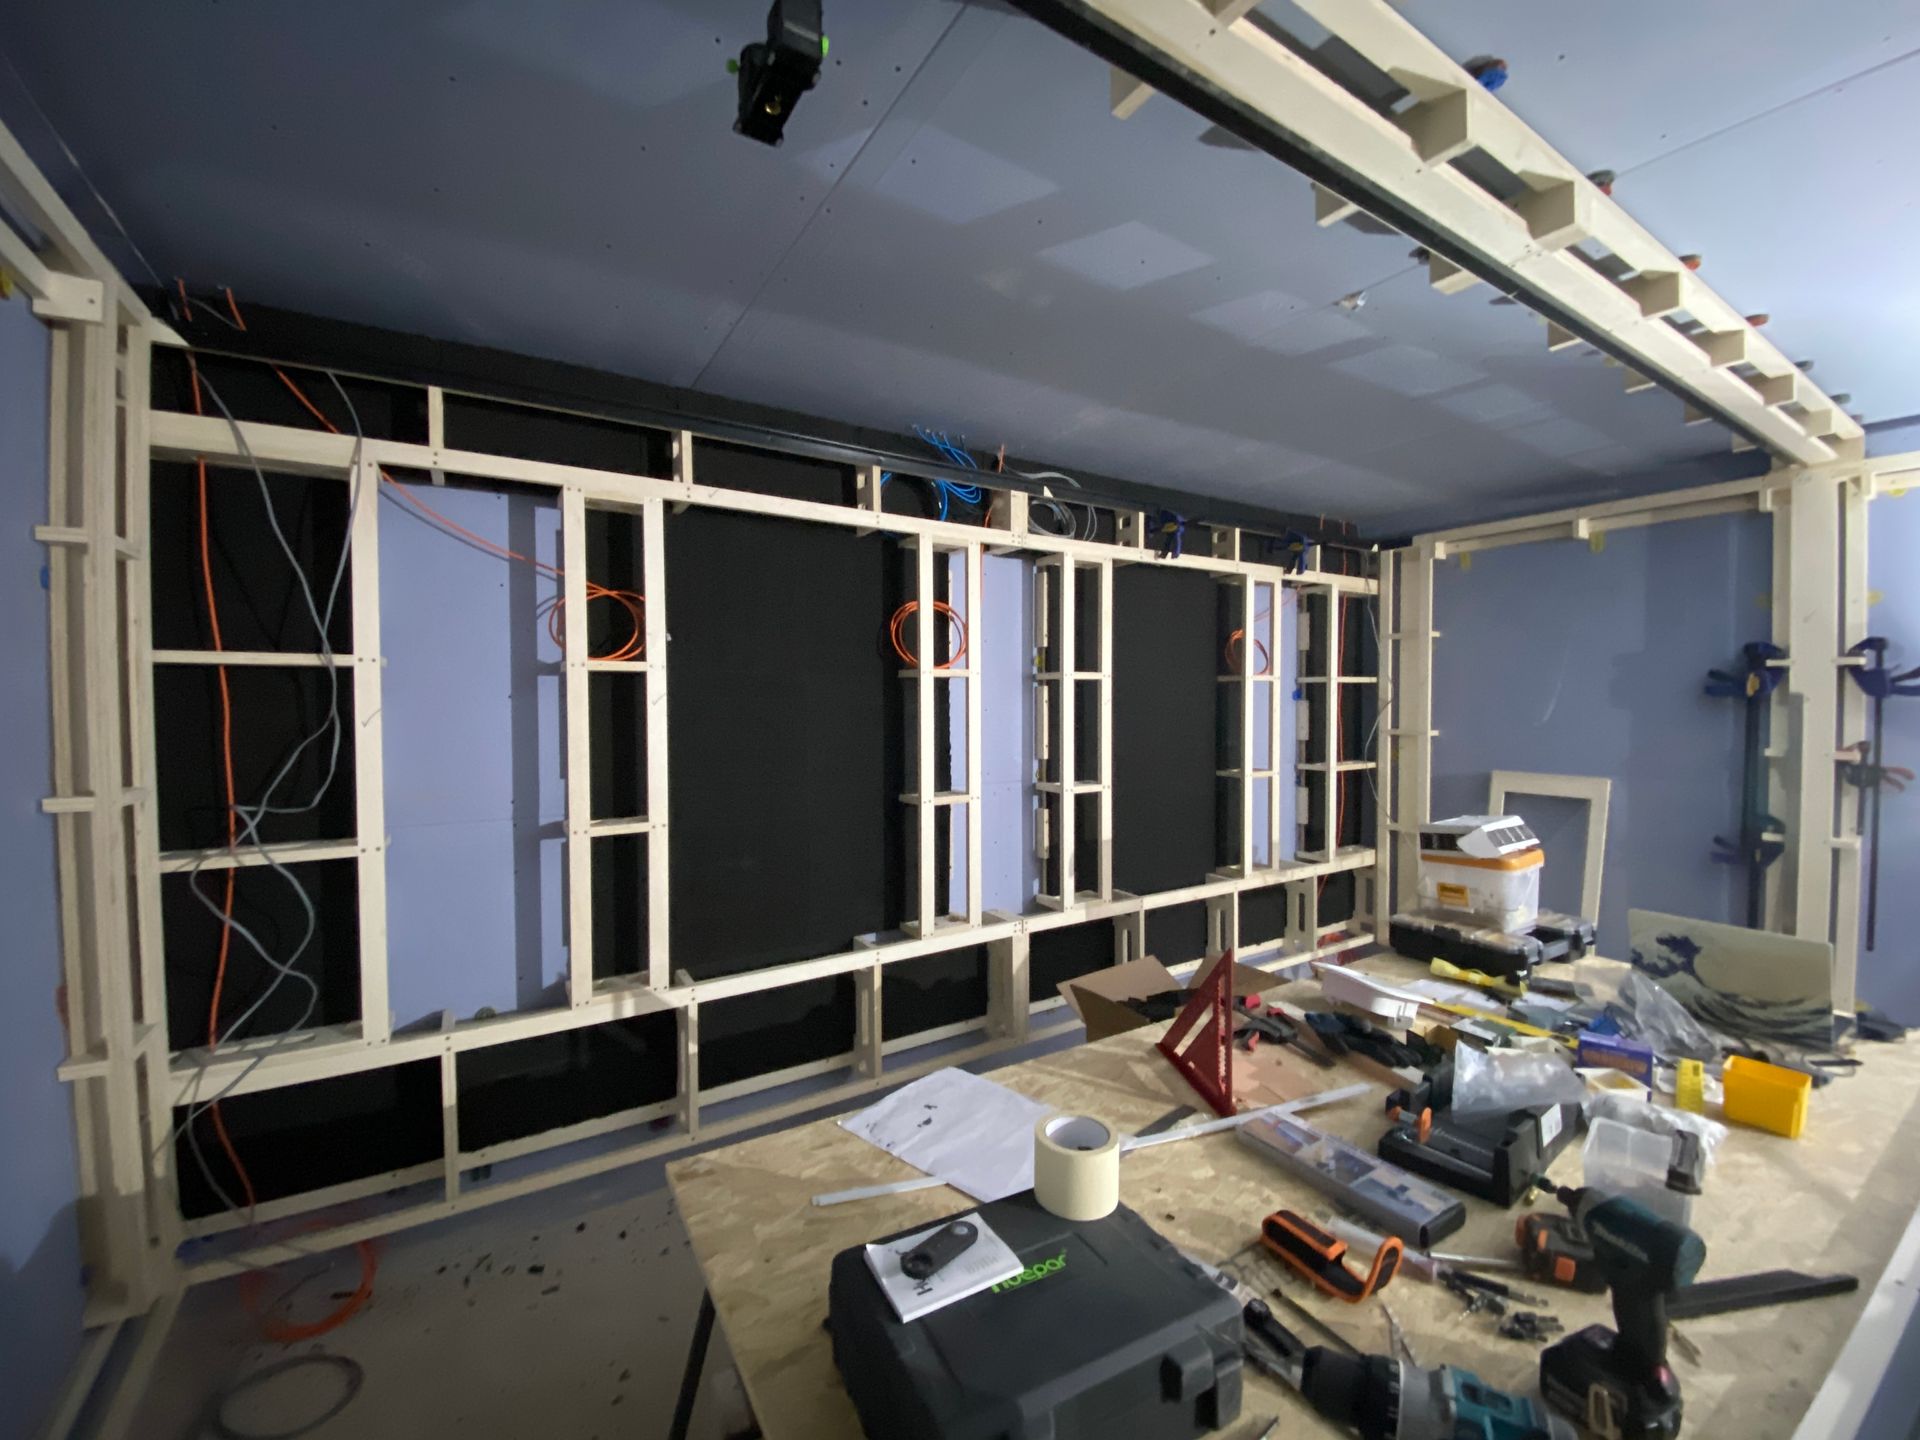
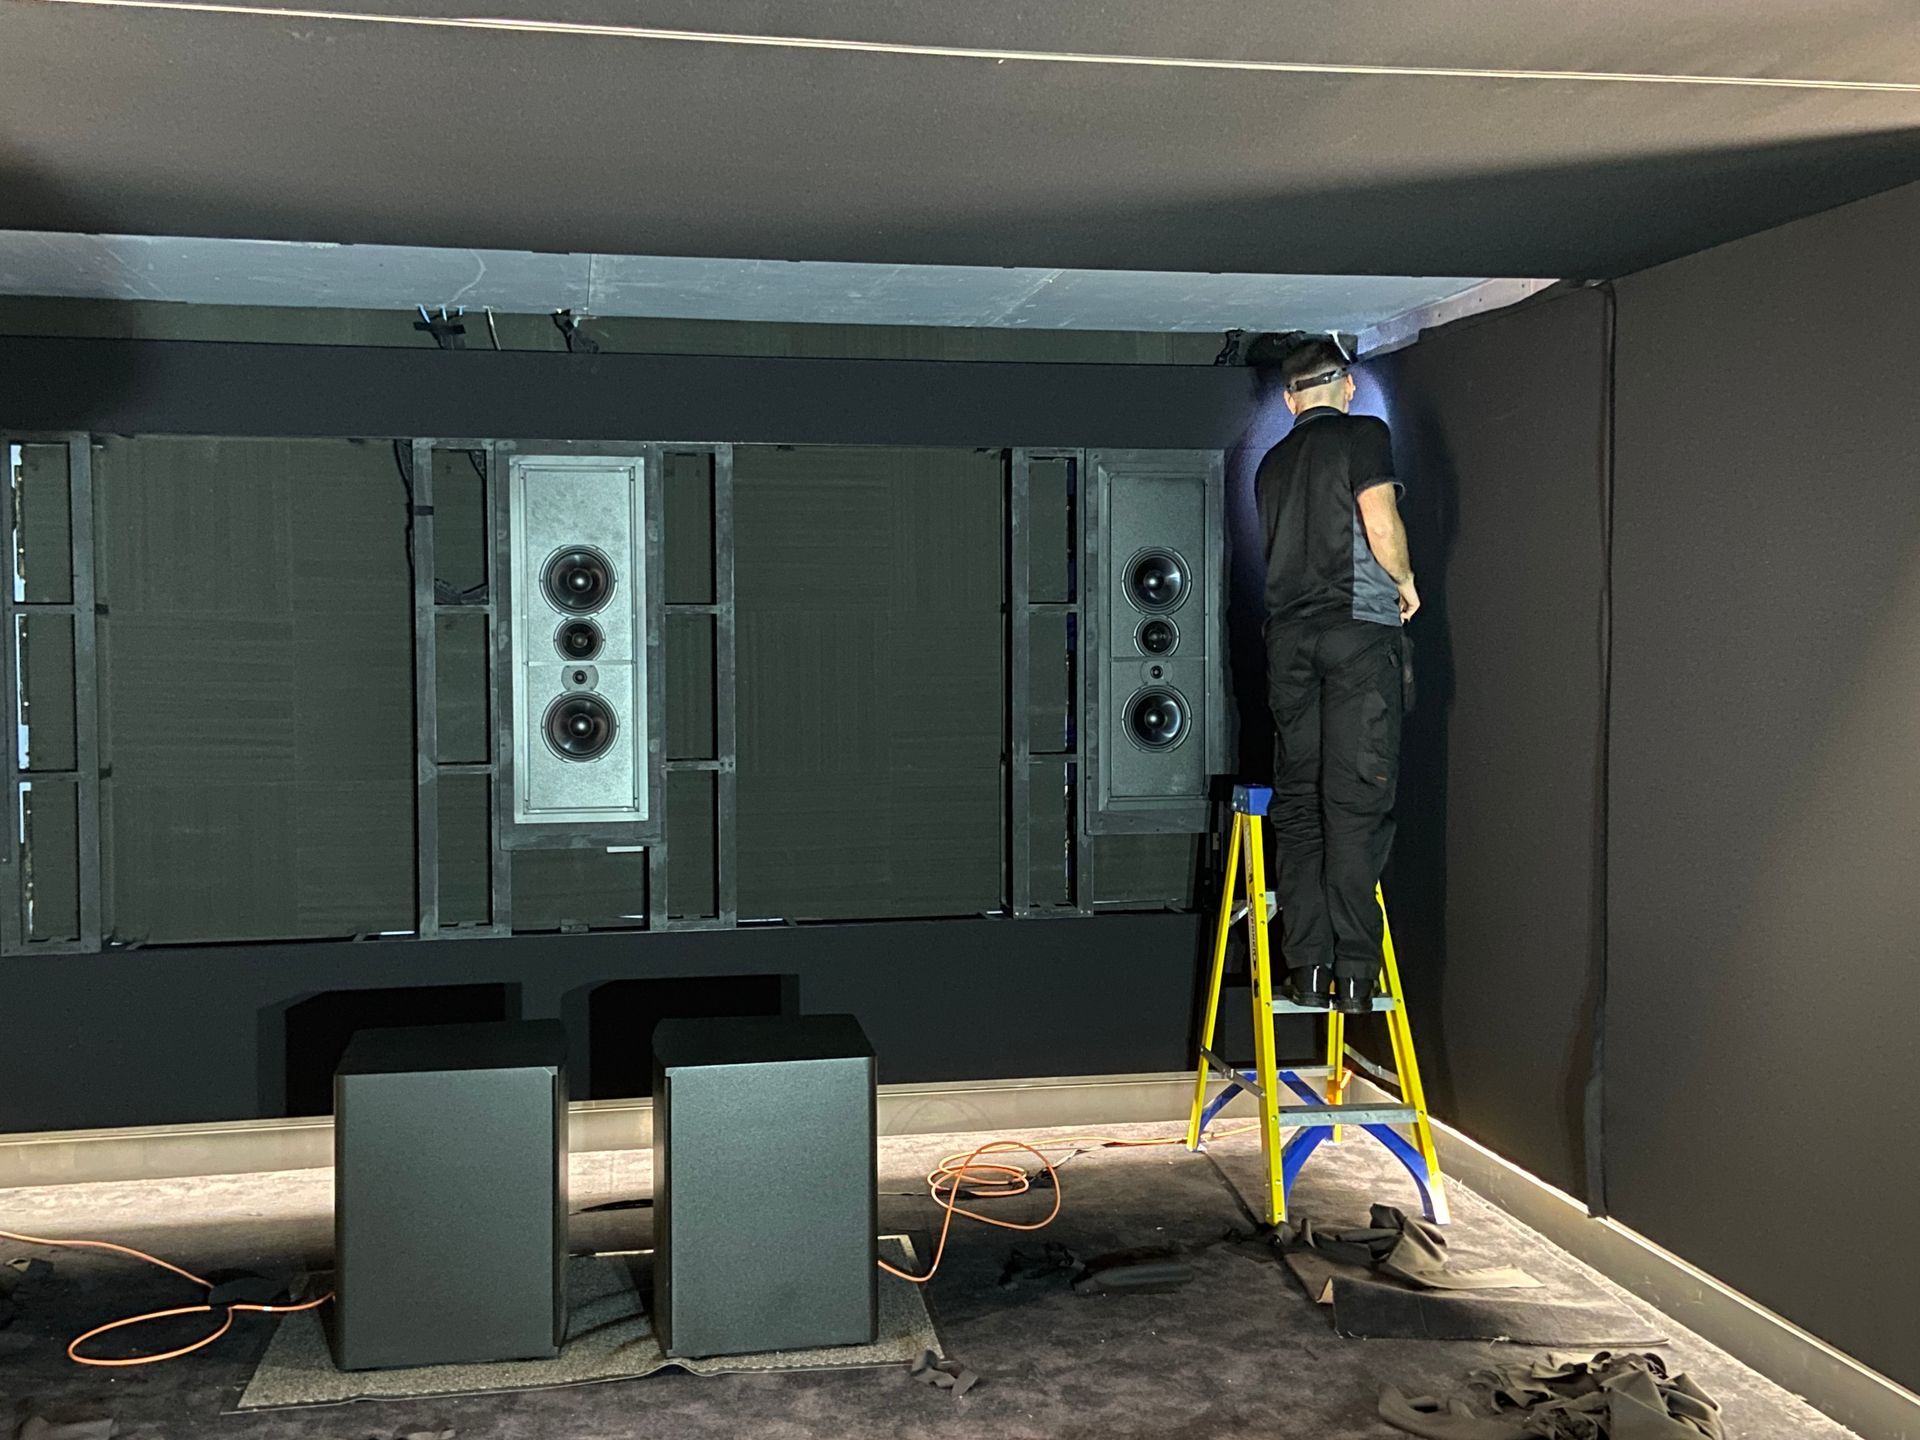
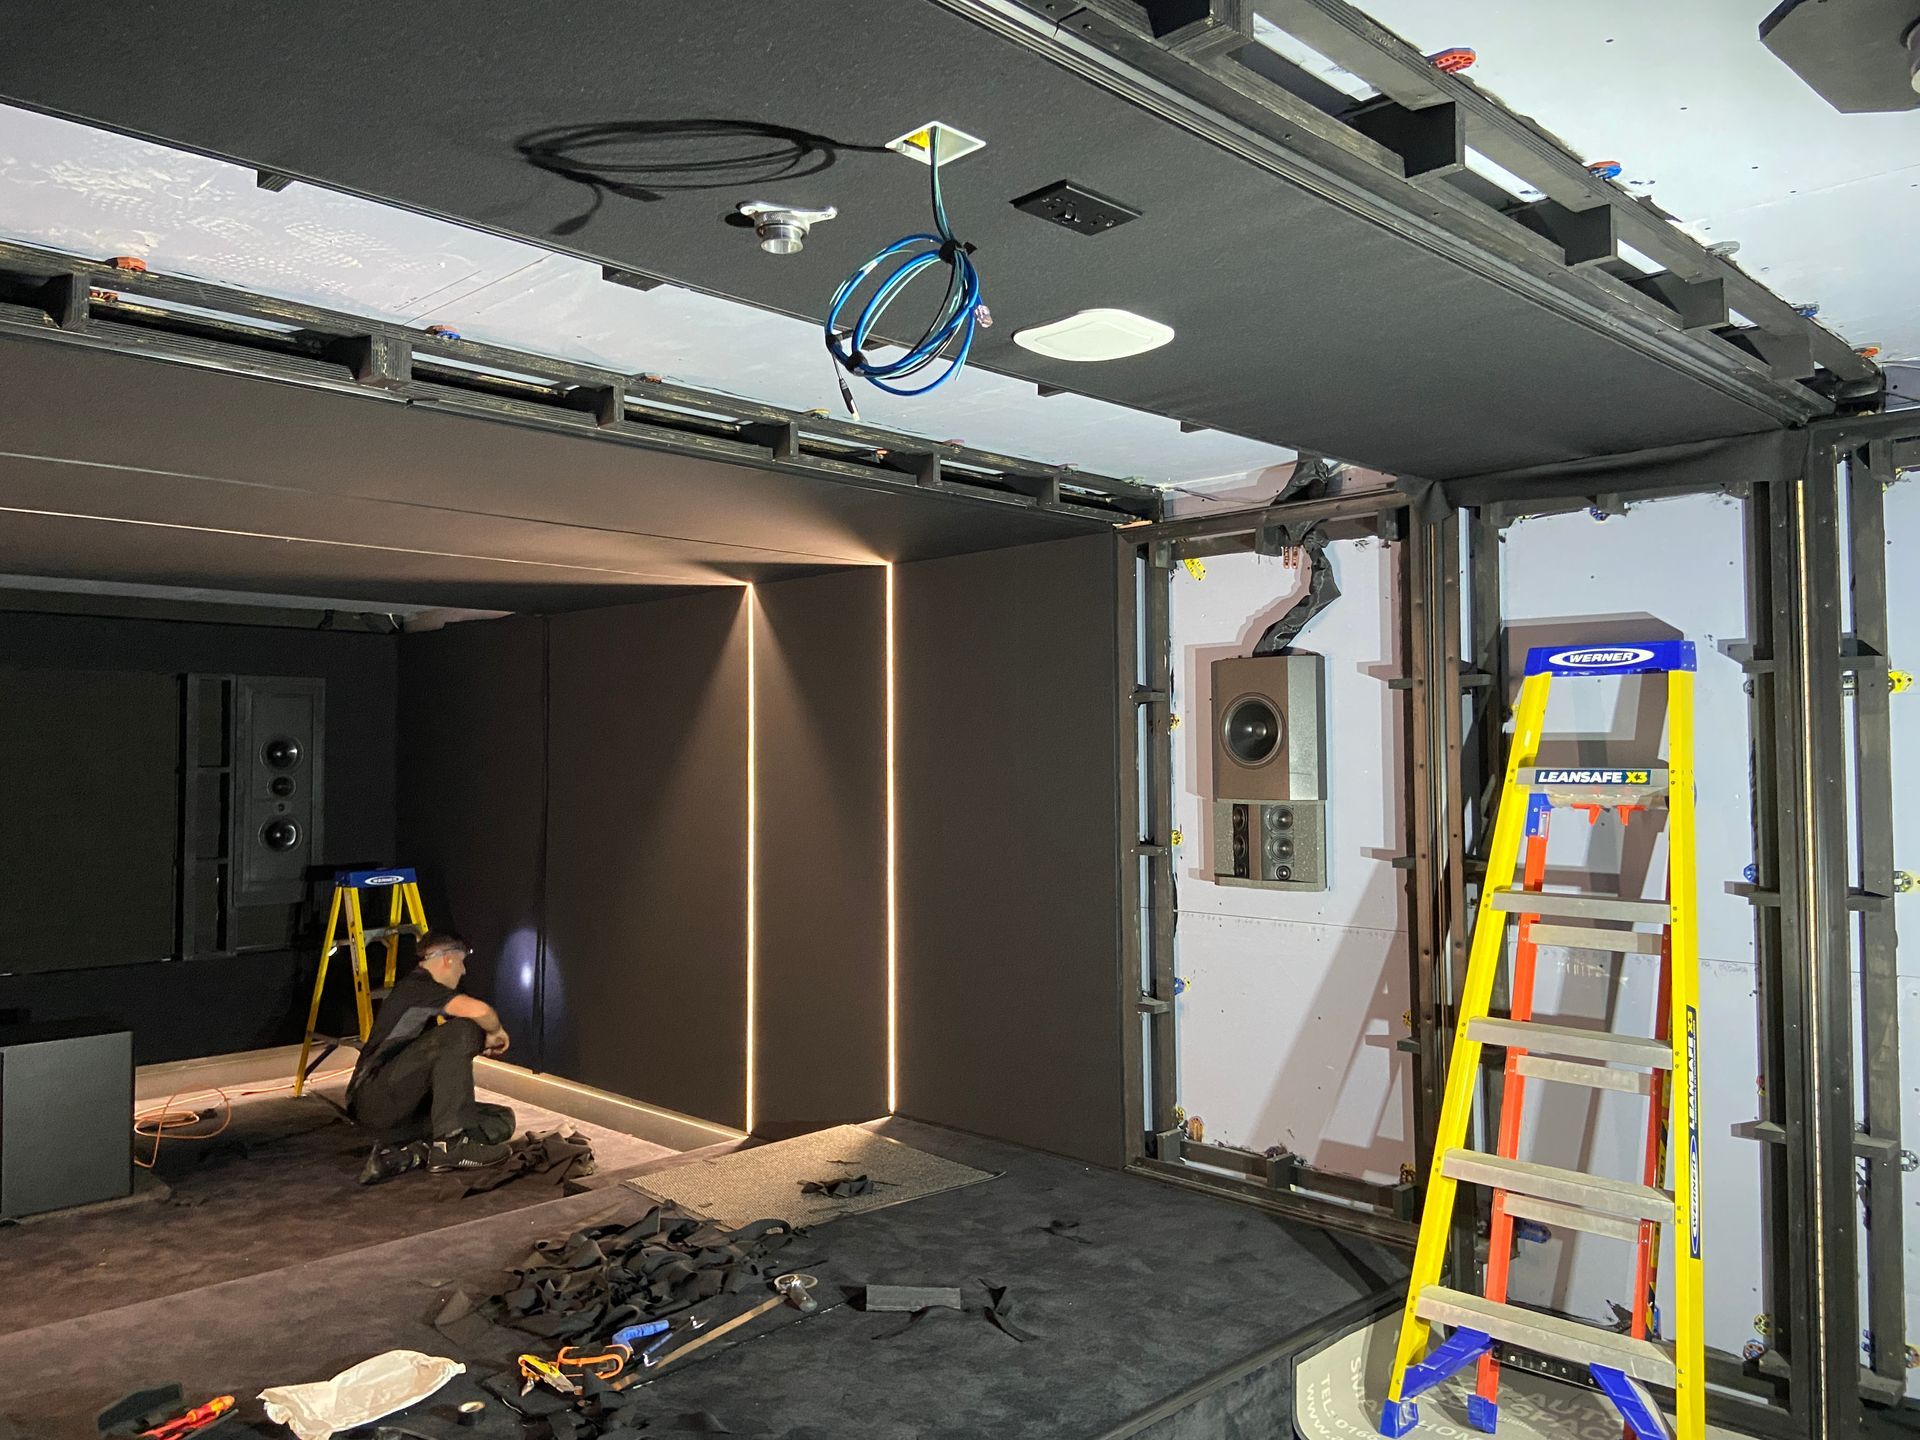
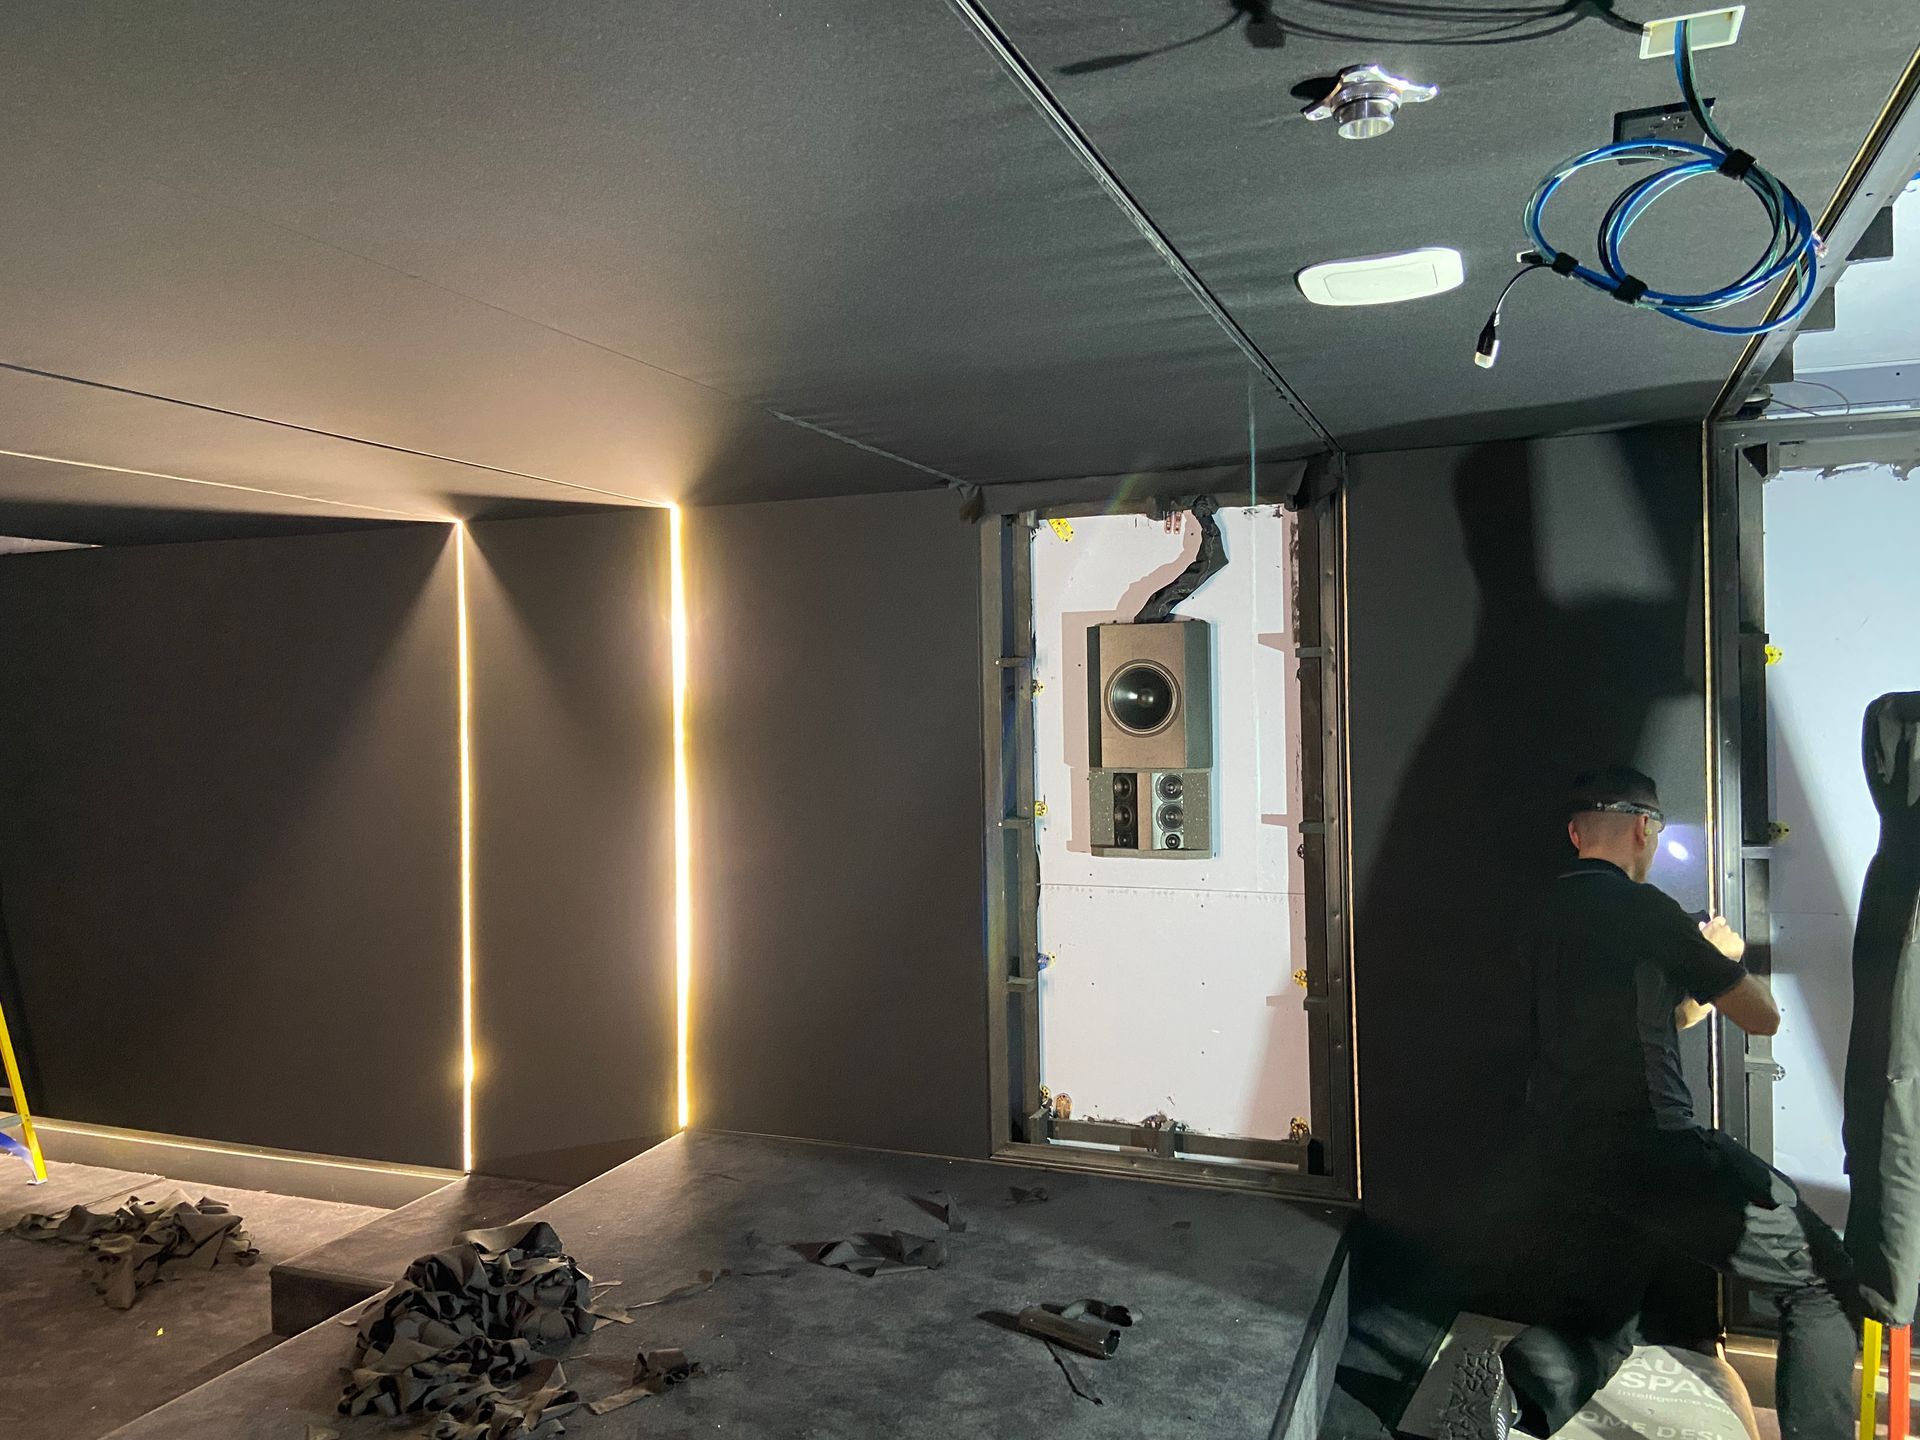
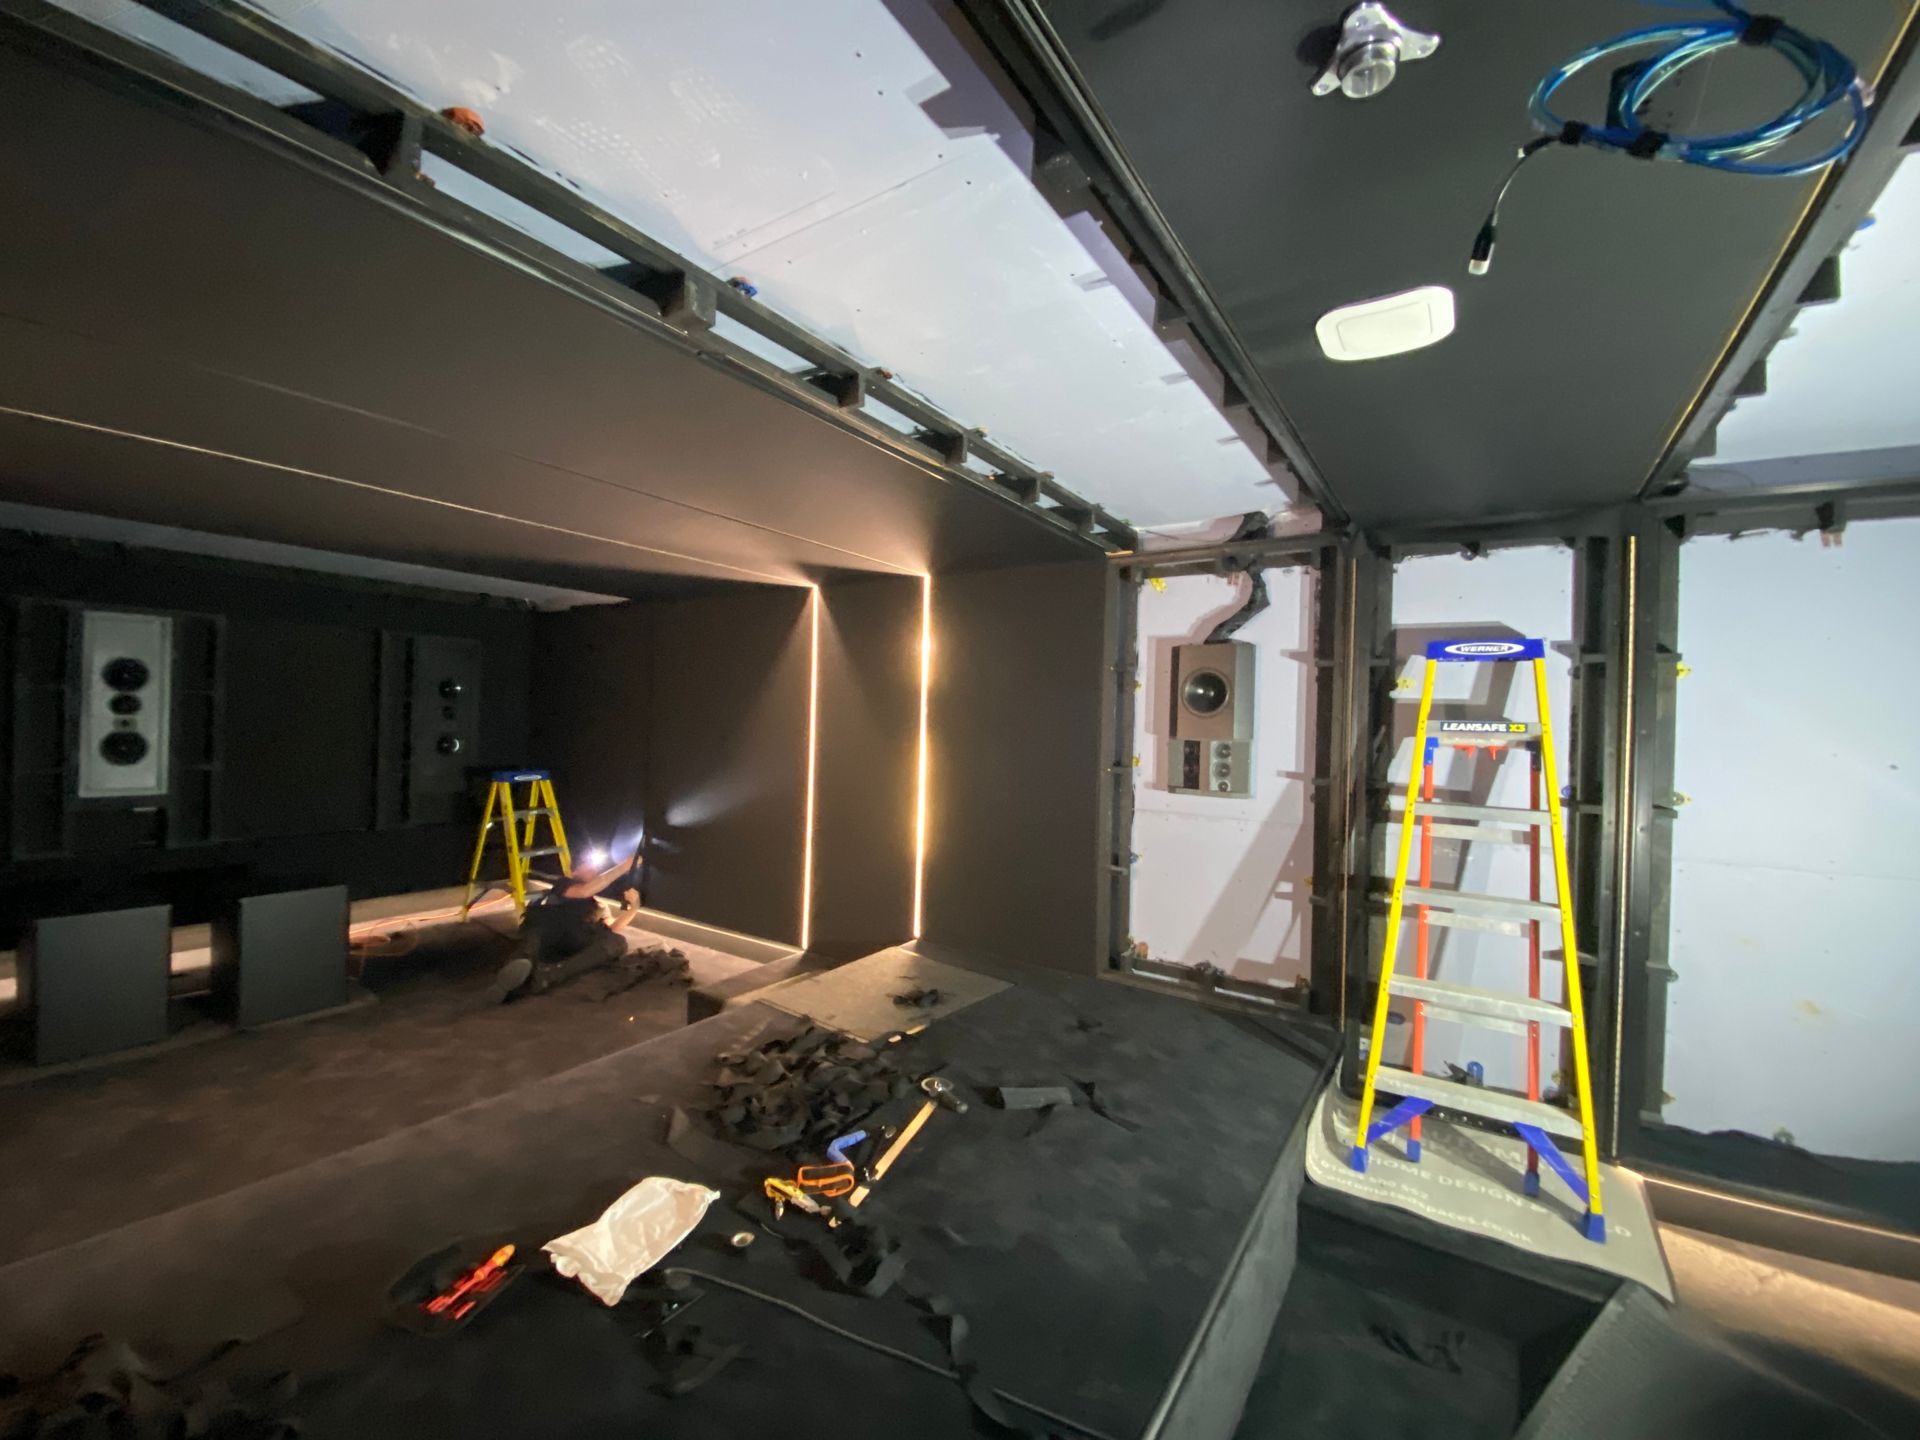
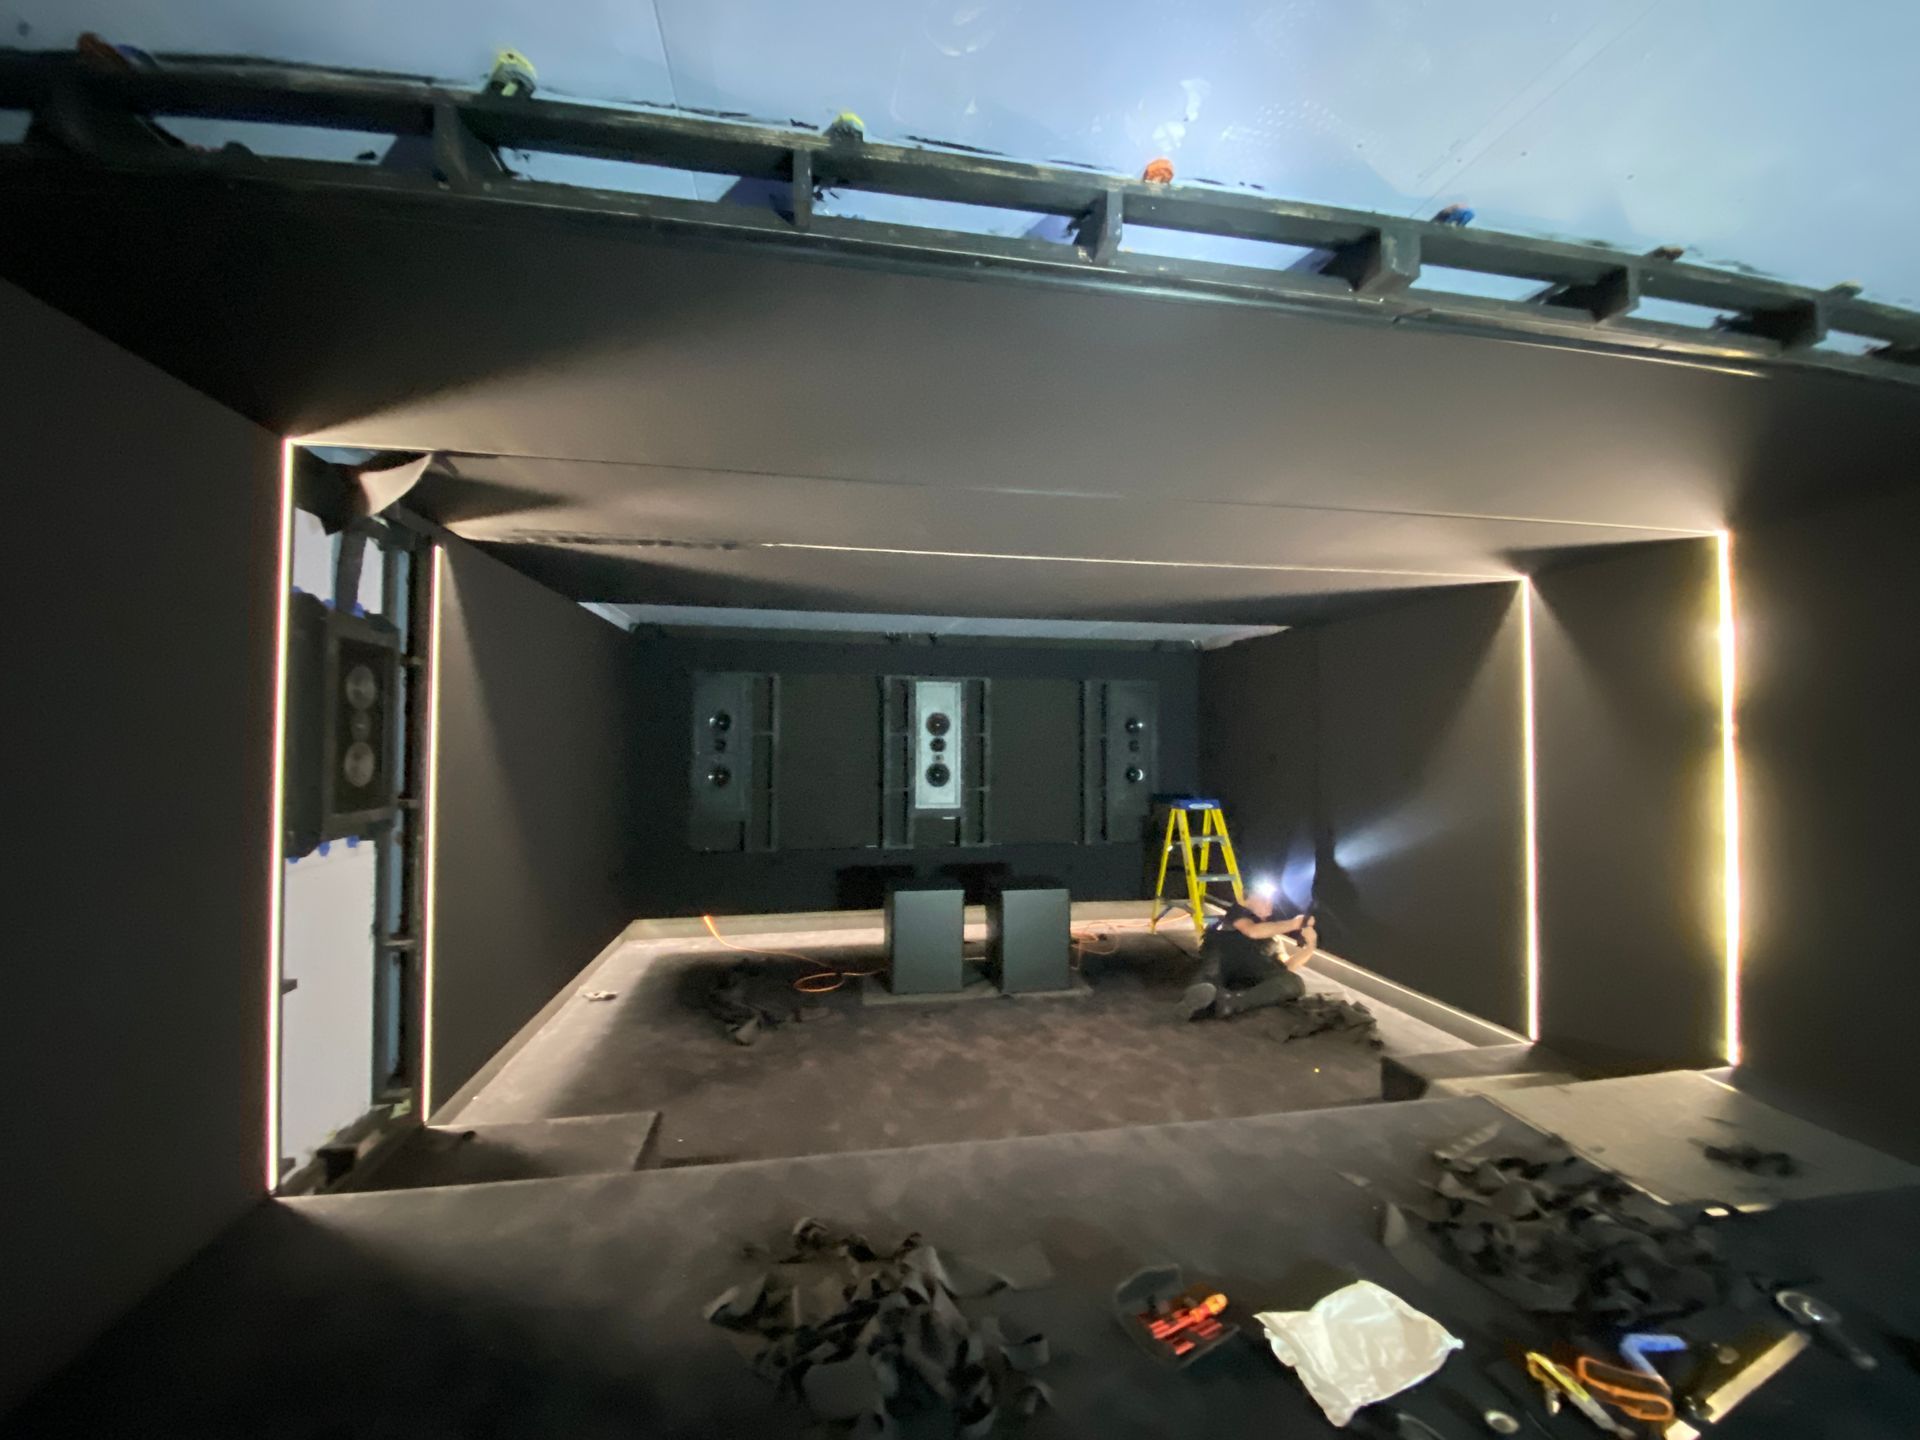
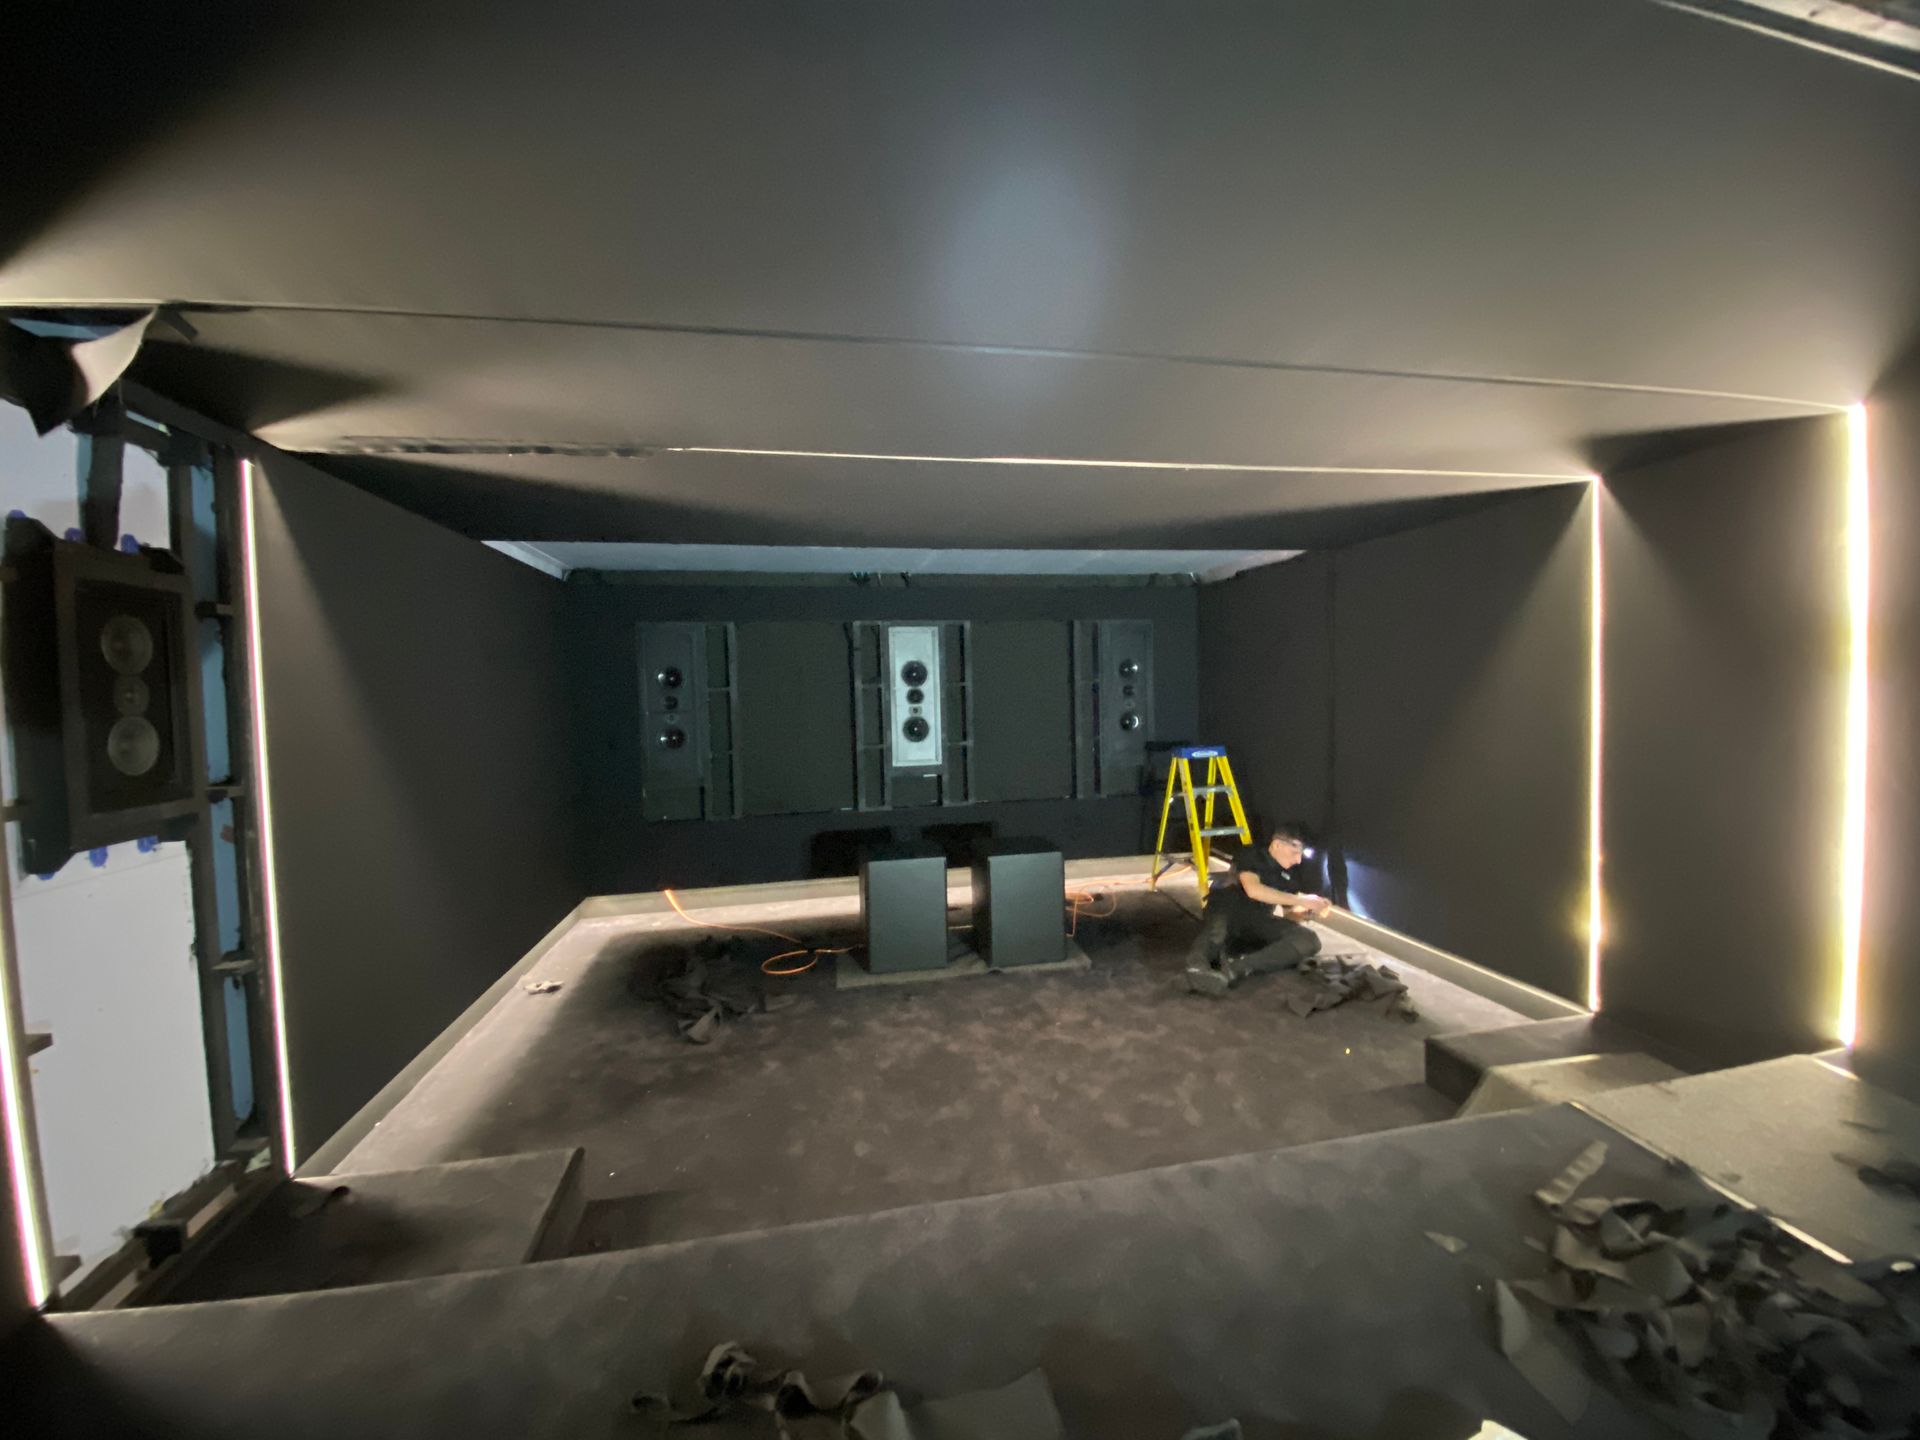
Cinema room 3rd fix
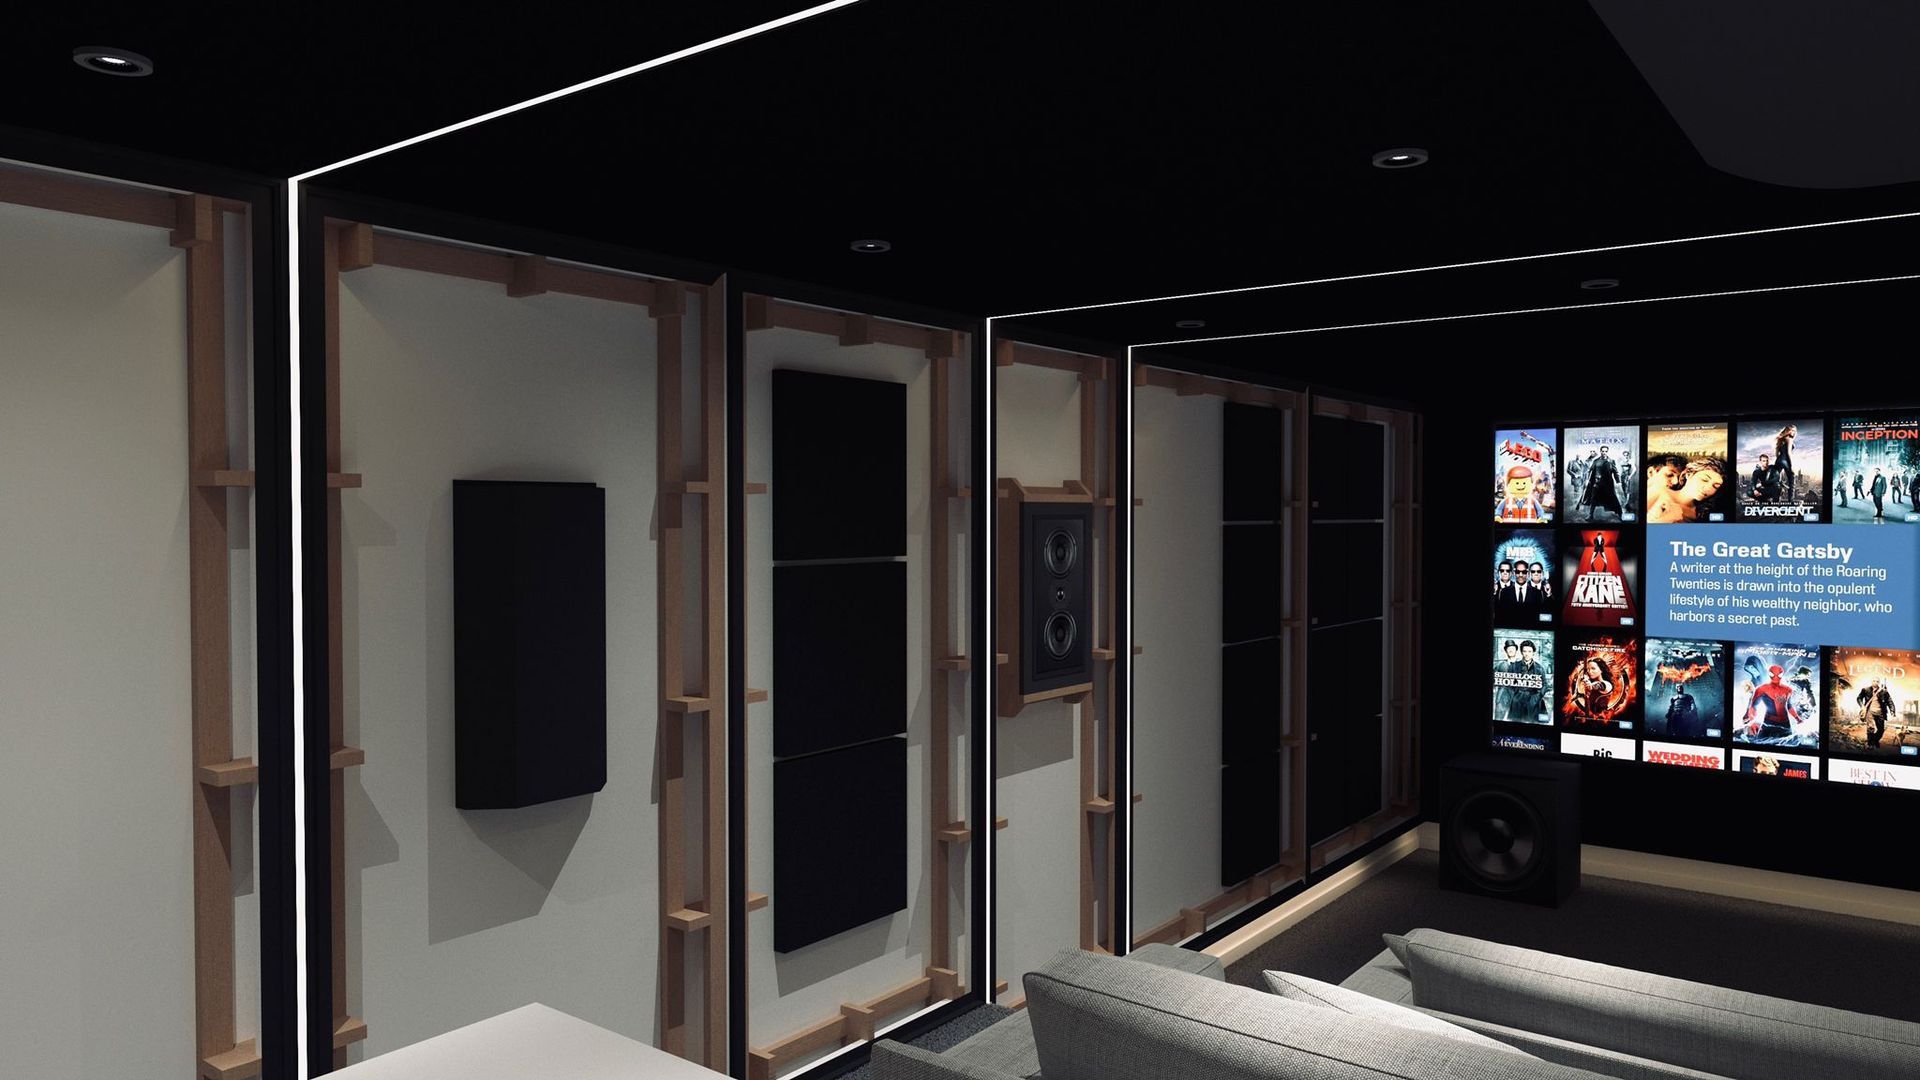
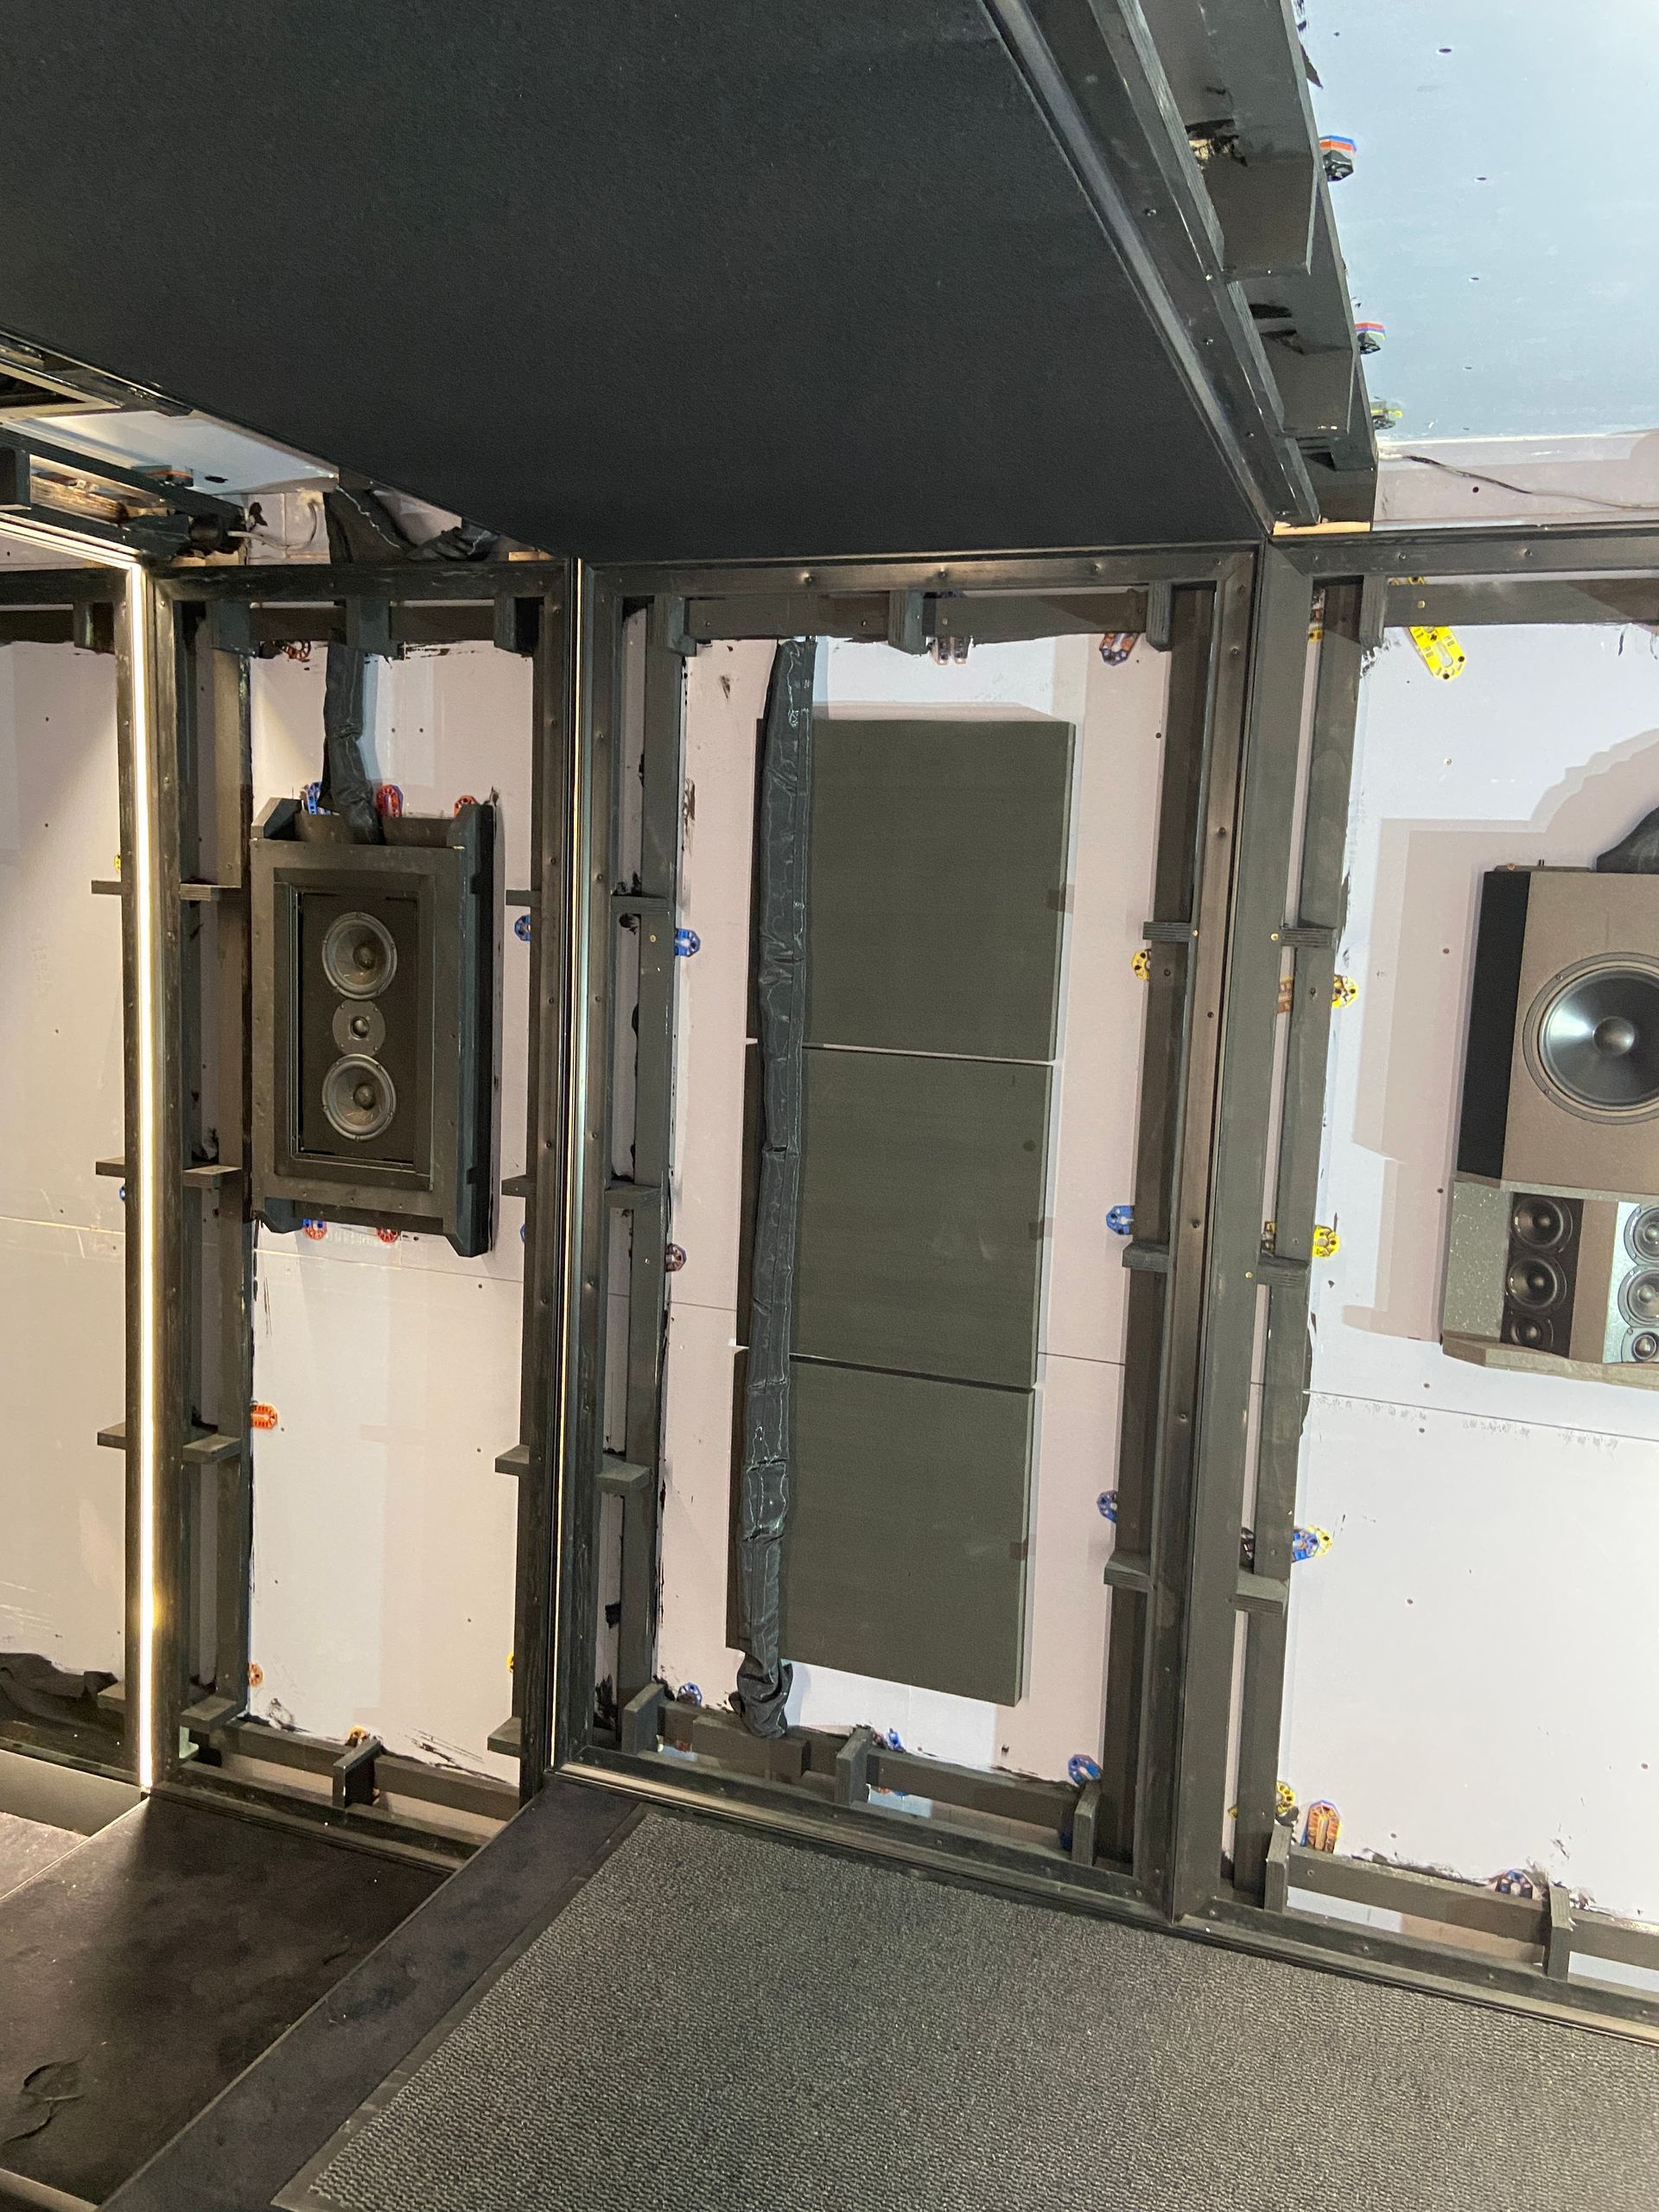
For this special cinema room, we were privileged to be able to work with Cinema Build Systems and their innovative Space Frame timber framing solution. Space Frame is system that provides a stable platform to mount stretch fabric track onto as well as providing a hollow space between the fabric and the constructed walls/ceilings to allow speakers to be concealed by the acoustically transparent stretch fabric.
Once we had constructed the Space Frame we then installed the 17 speakers into their associated Space Frame speaker mounts or directly onto the internal constructed walls. Next we installed Cinema Build Systems fantastic acoustic treatments throughout the specific designed locations to best control the audio experience within the room.
After painting the Space Frame black (to minimise light reflection through the stretched fabric) we installed Cinema Build Systems in-house stretch fabric track system. Next we conducted a thorough ‘rattle test’ of the room, where we introduced a sweep of low frequency sound, to help identify if any elements of the installed systems were loose and might rattle during future use of the room.
Once we were assured that there would be no rattles, we then installed the stretch fabric materials into the track system covering all 4 walls and the entire ceiling.
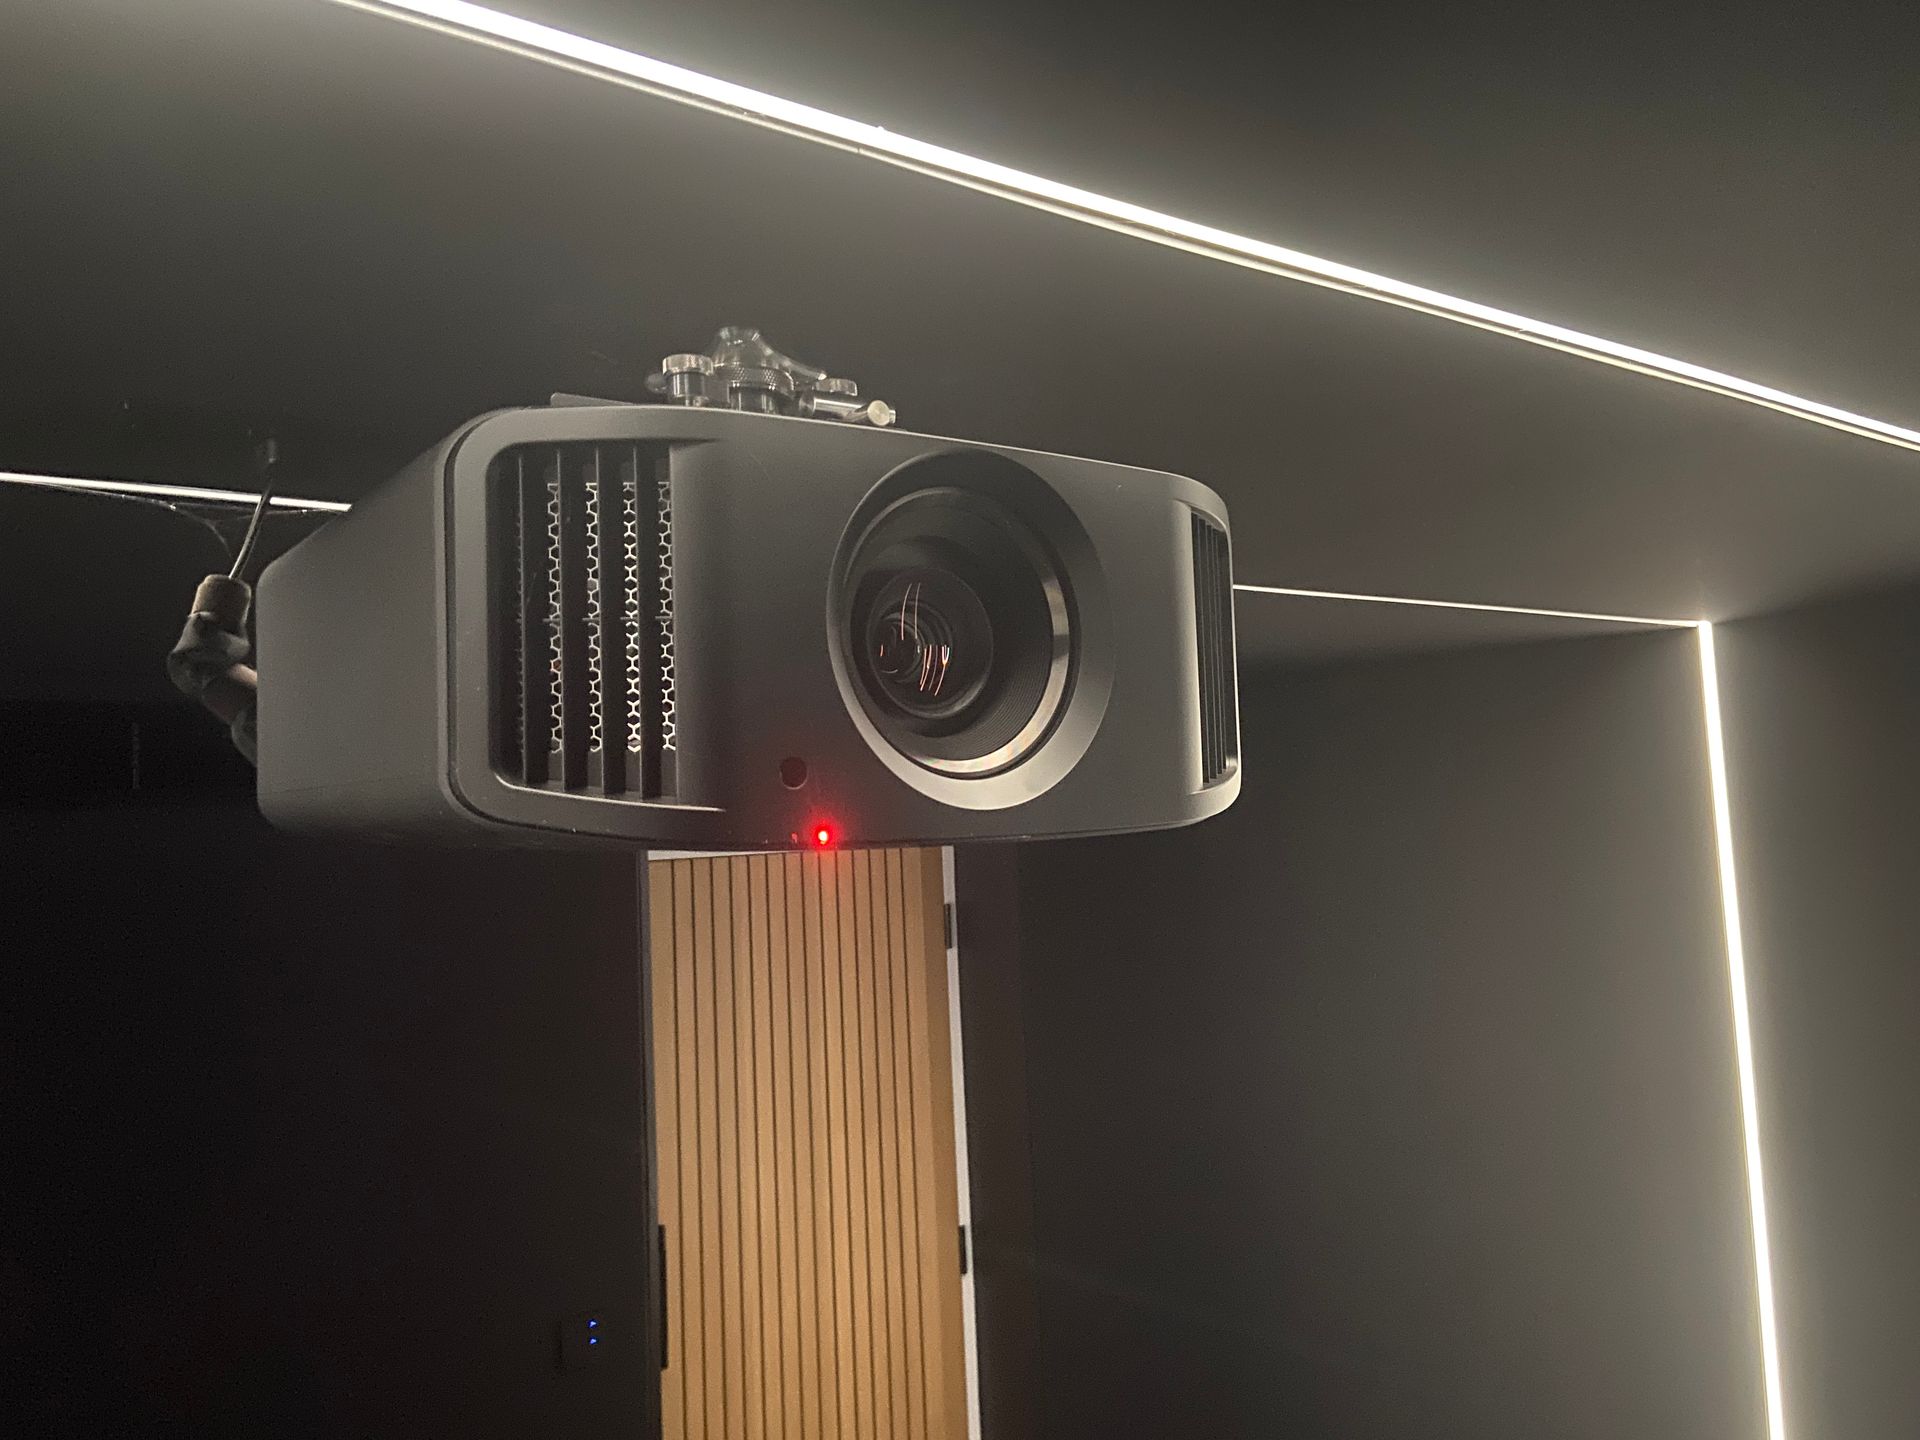
After the stretch fabric installation was completed, and we had installed the projector on its ceiling mount, one of the final steps was to have a THX and audio calibration completed to ensure the client had the best viewing and listening experience possible.
360 degree sweep showing Triad speakers and Space Frame installation
The video below shows a 360 degree sweep around the home cinema room Triad speakers and Space Frame with 1st panel of stretch fabric installed onto ceiling
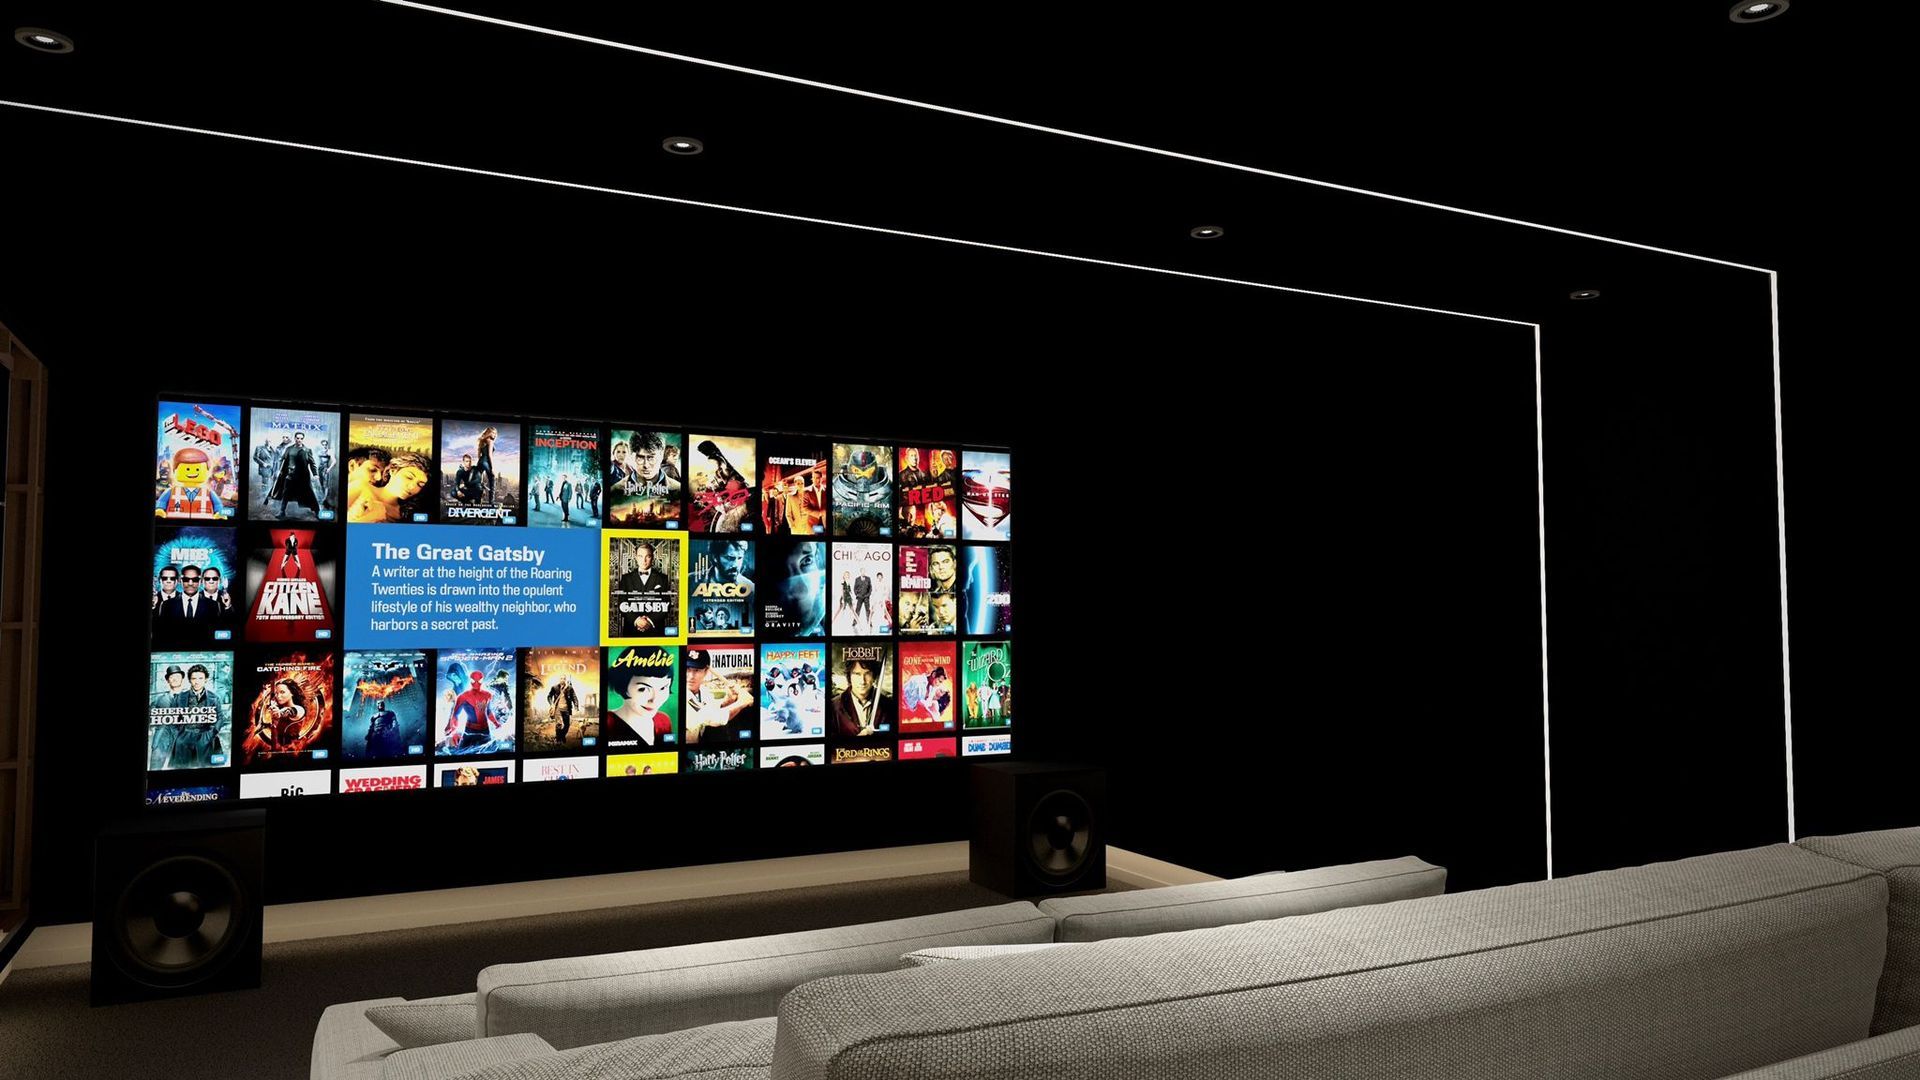
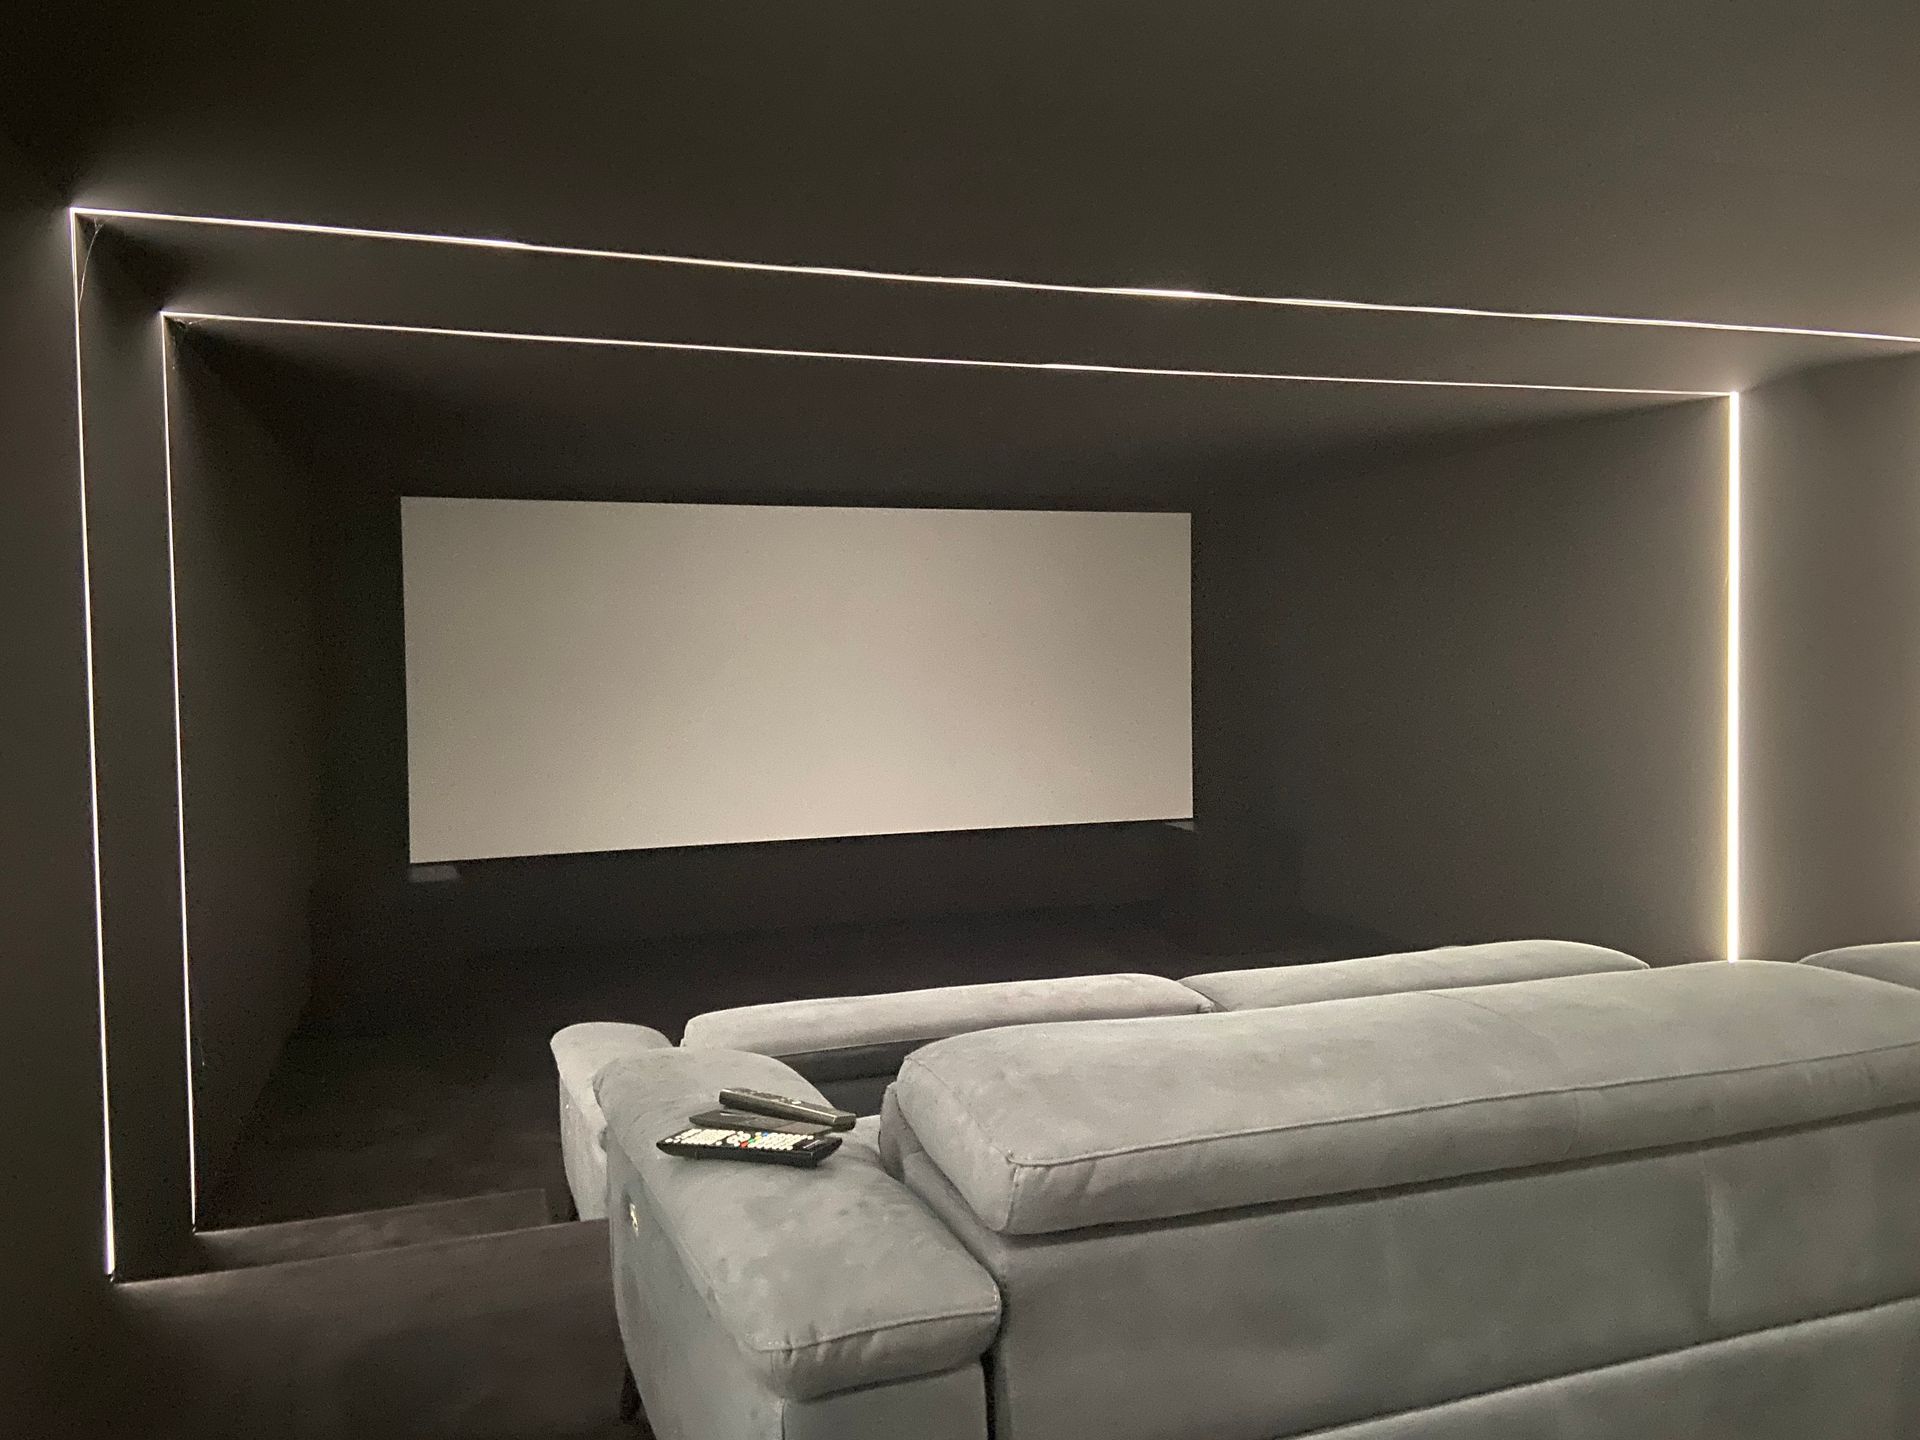
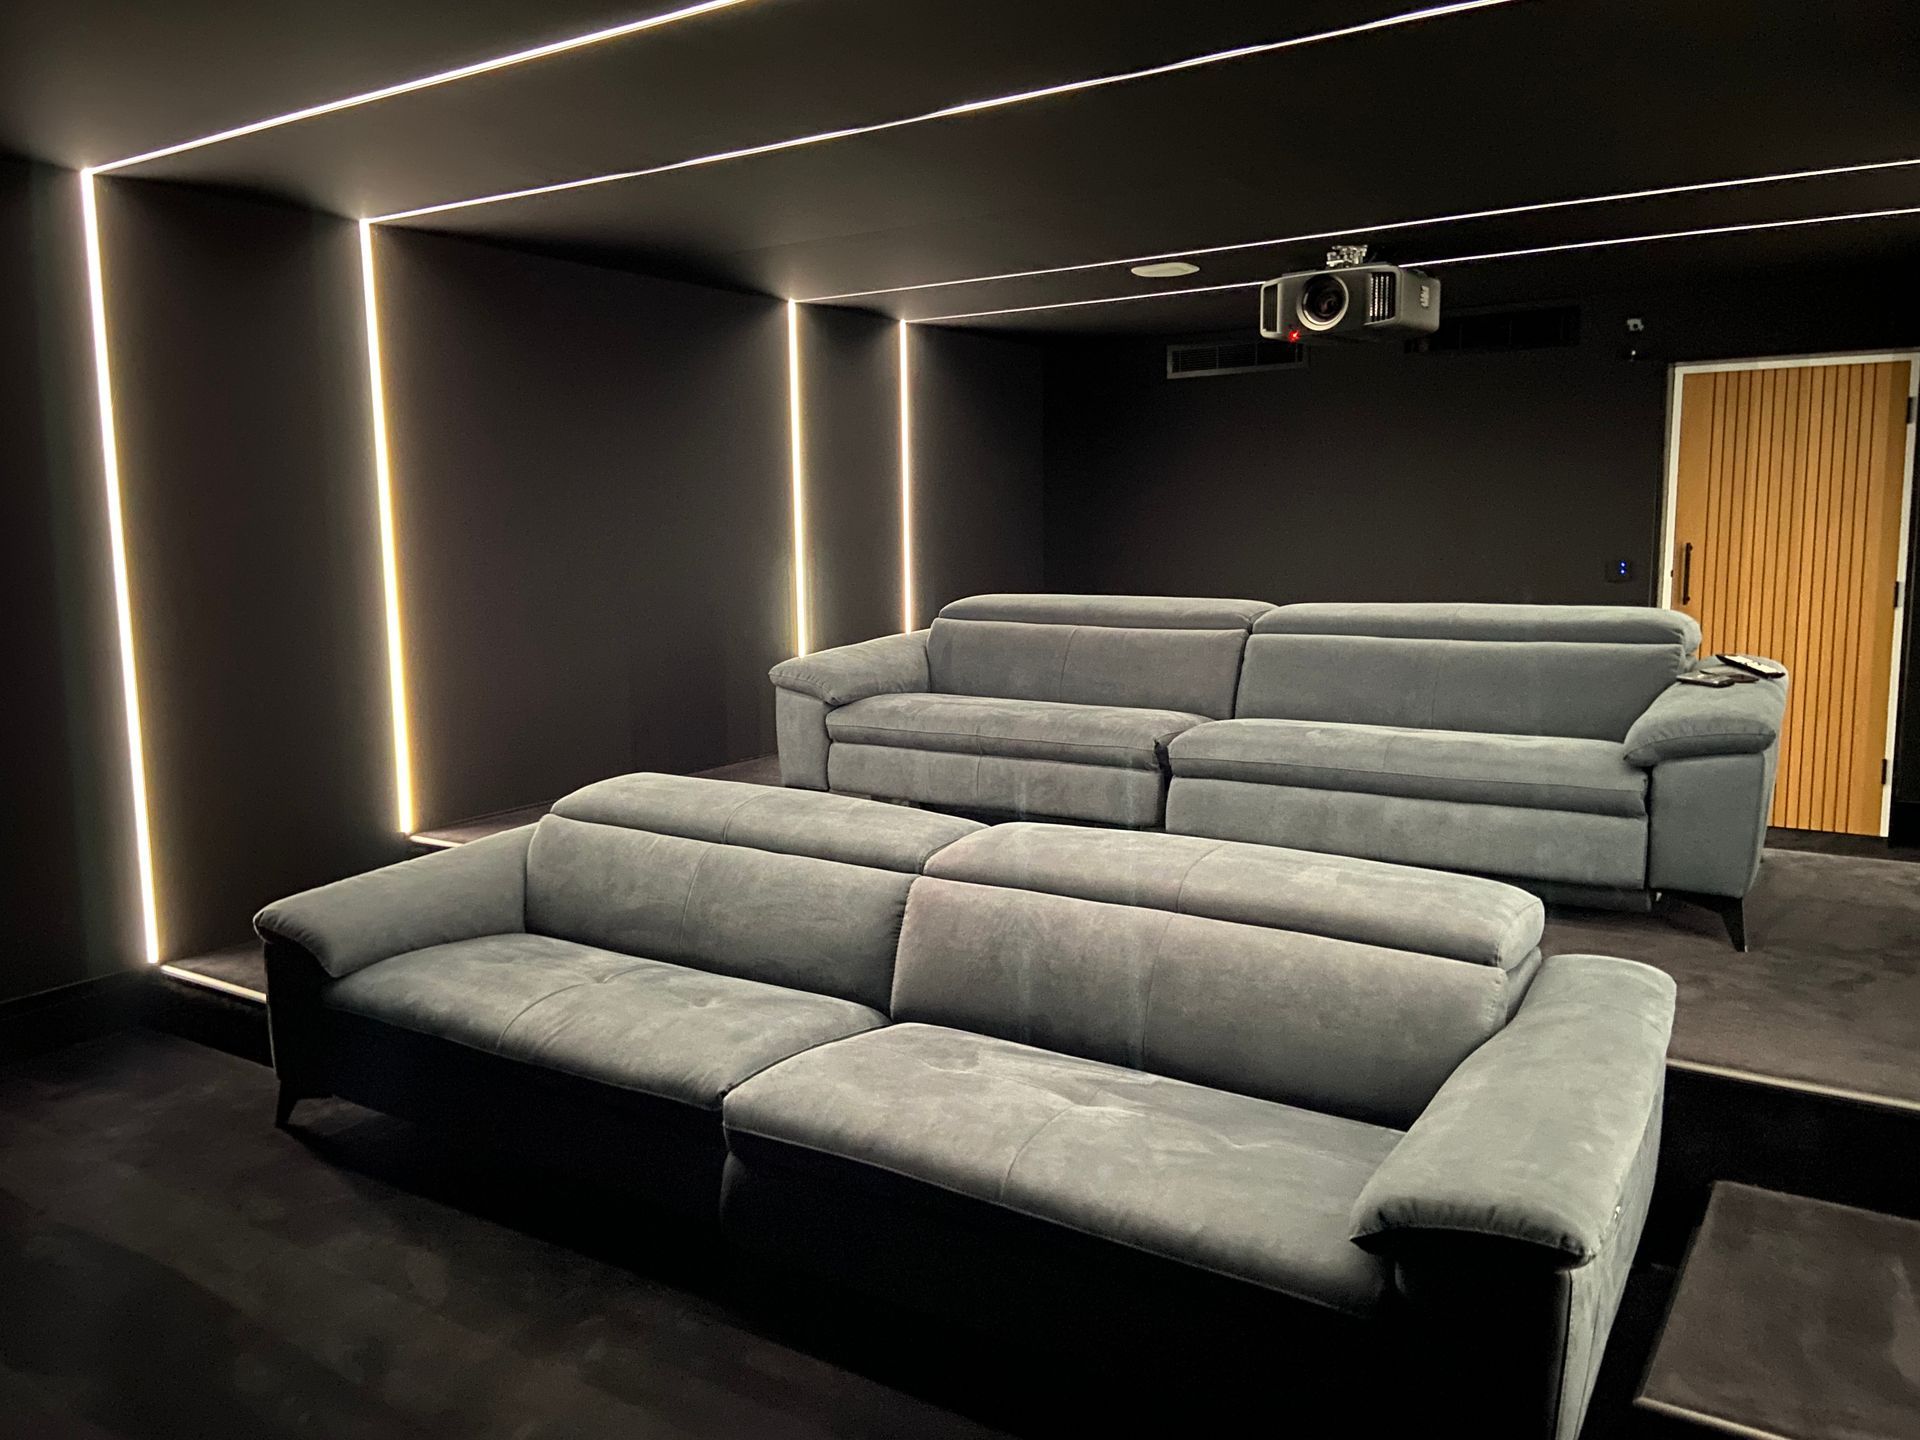
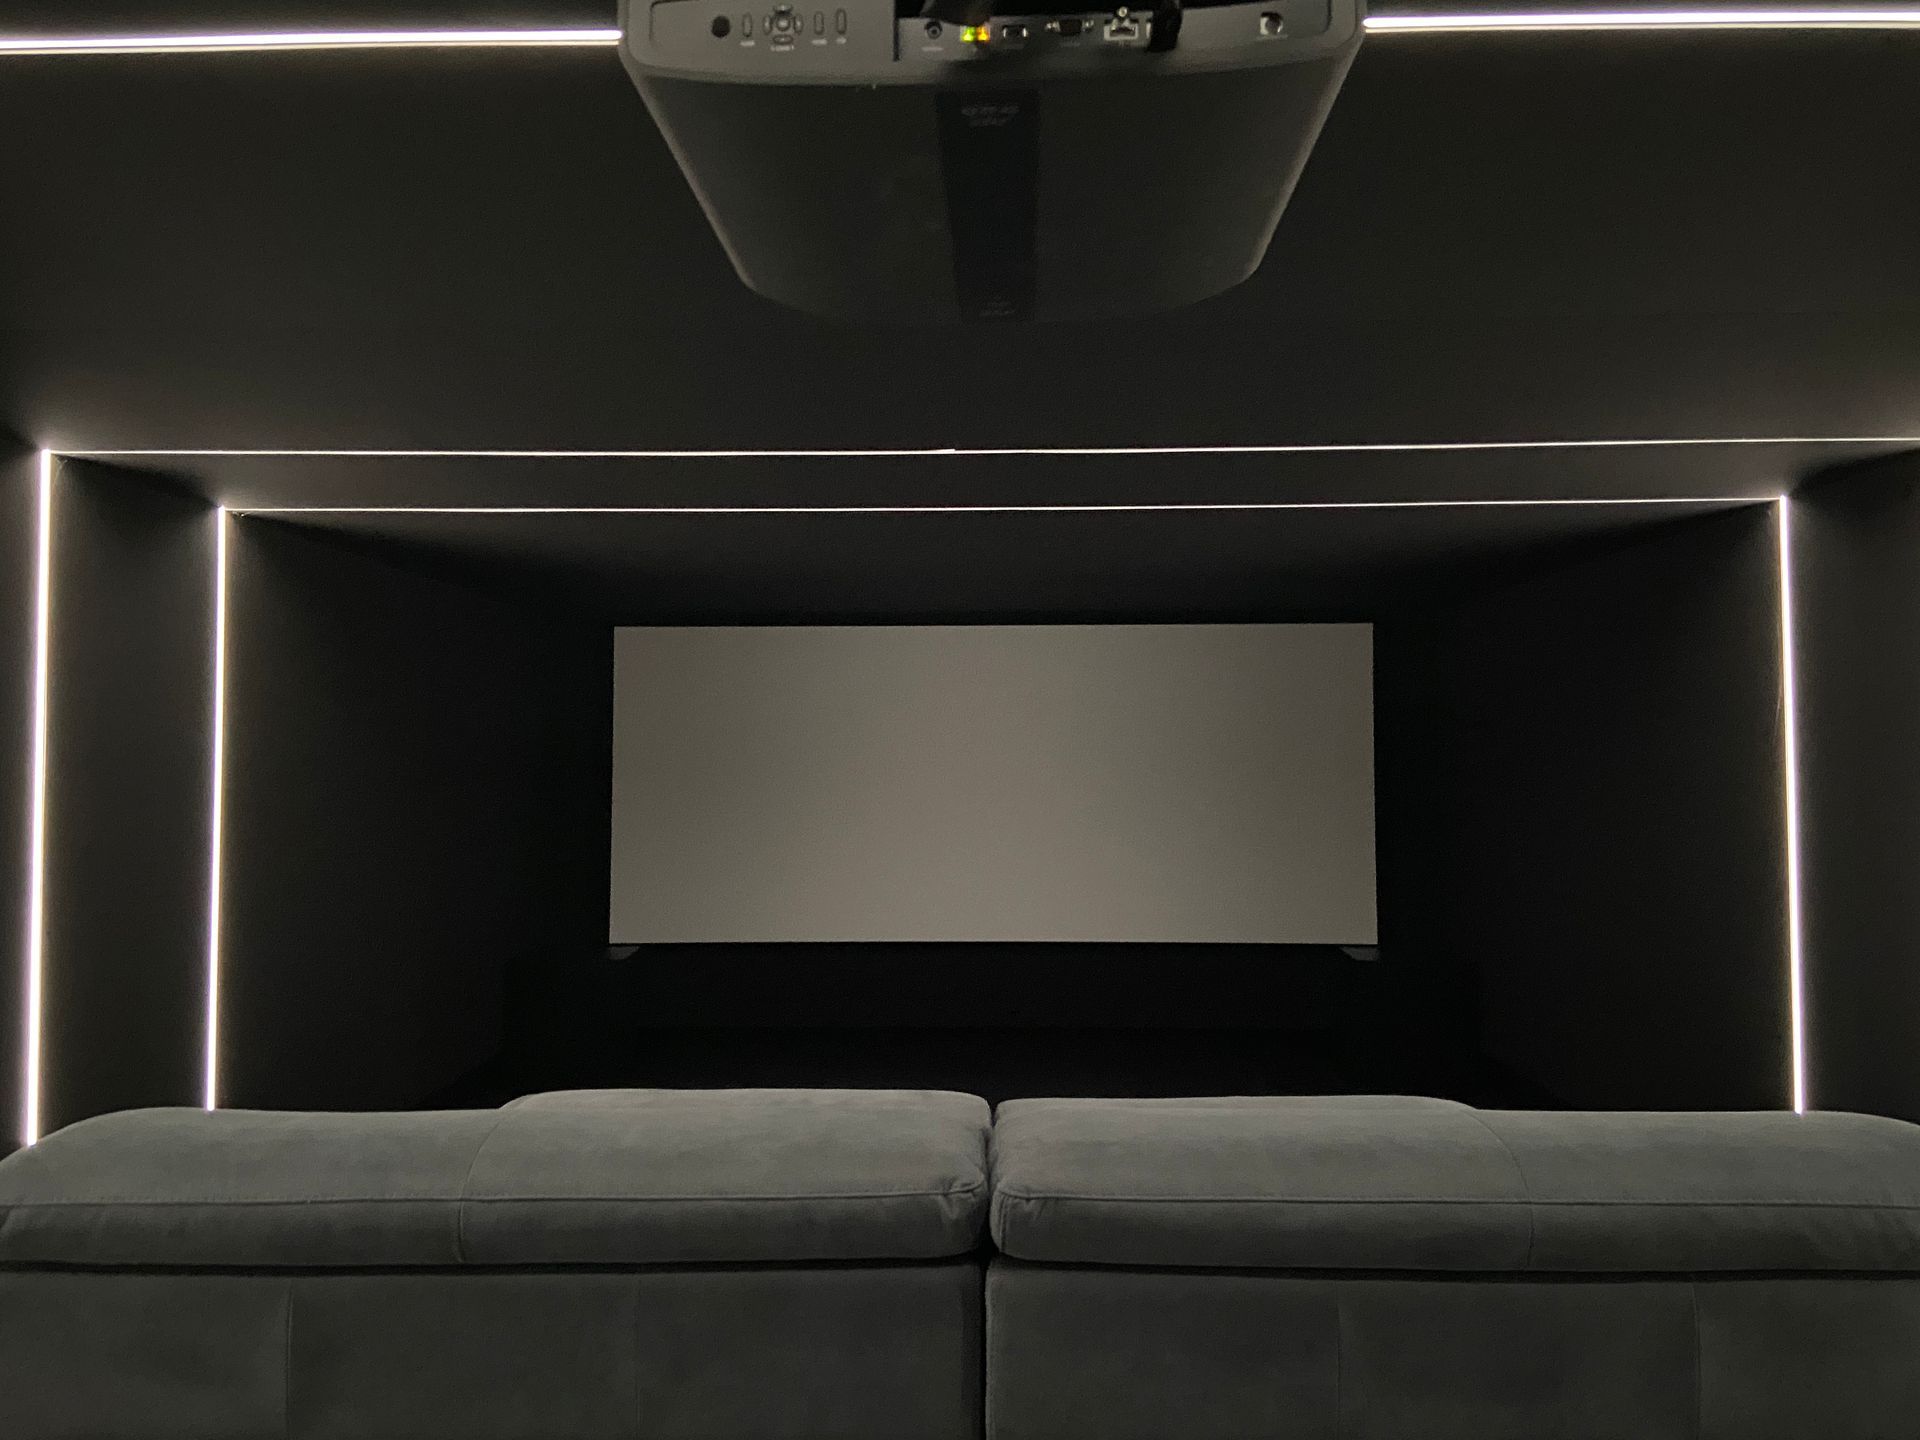
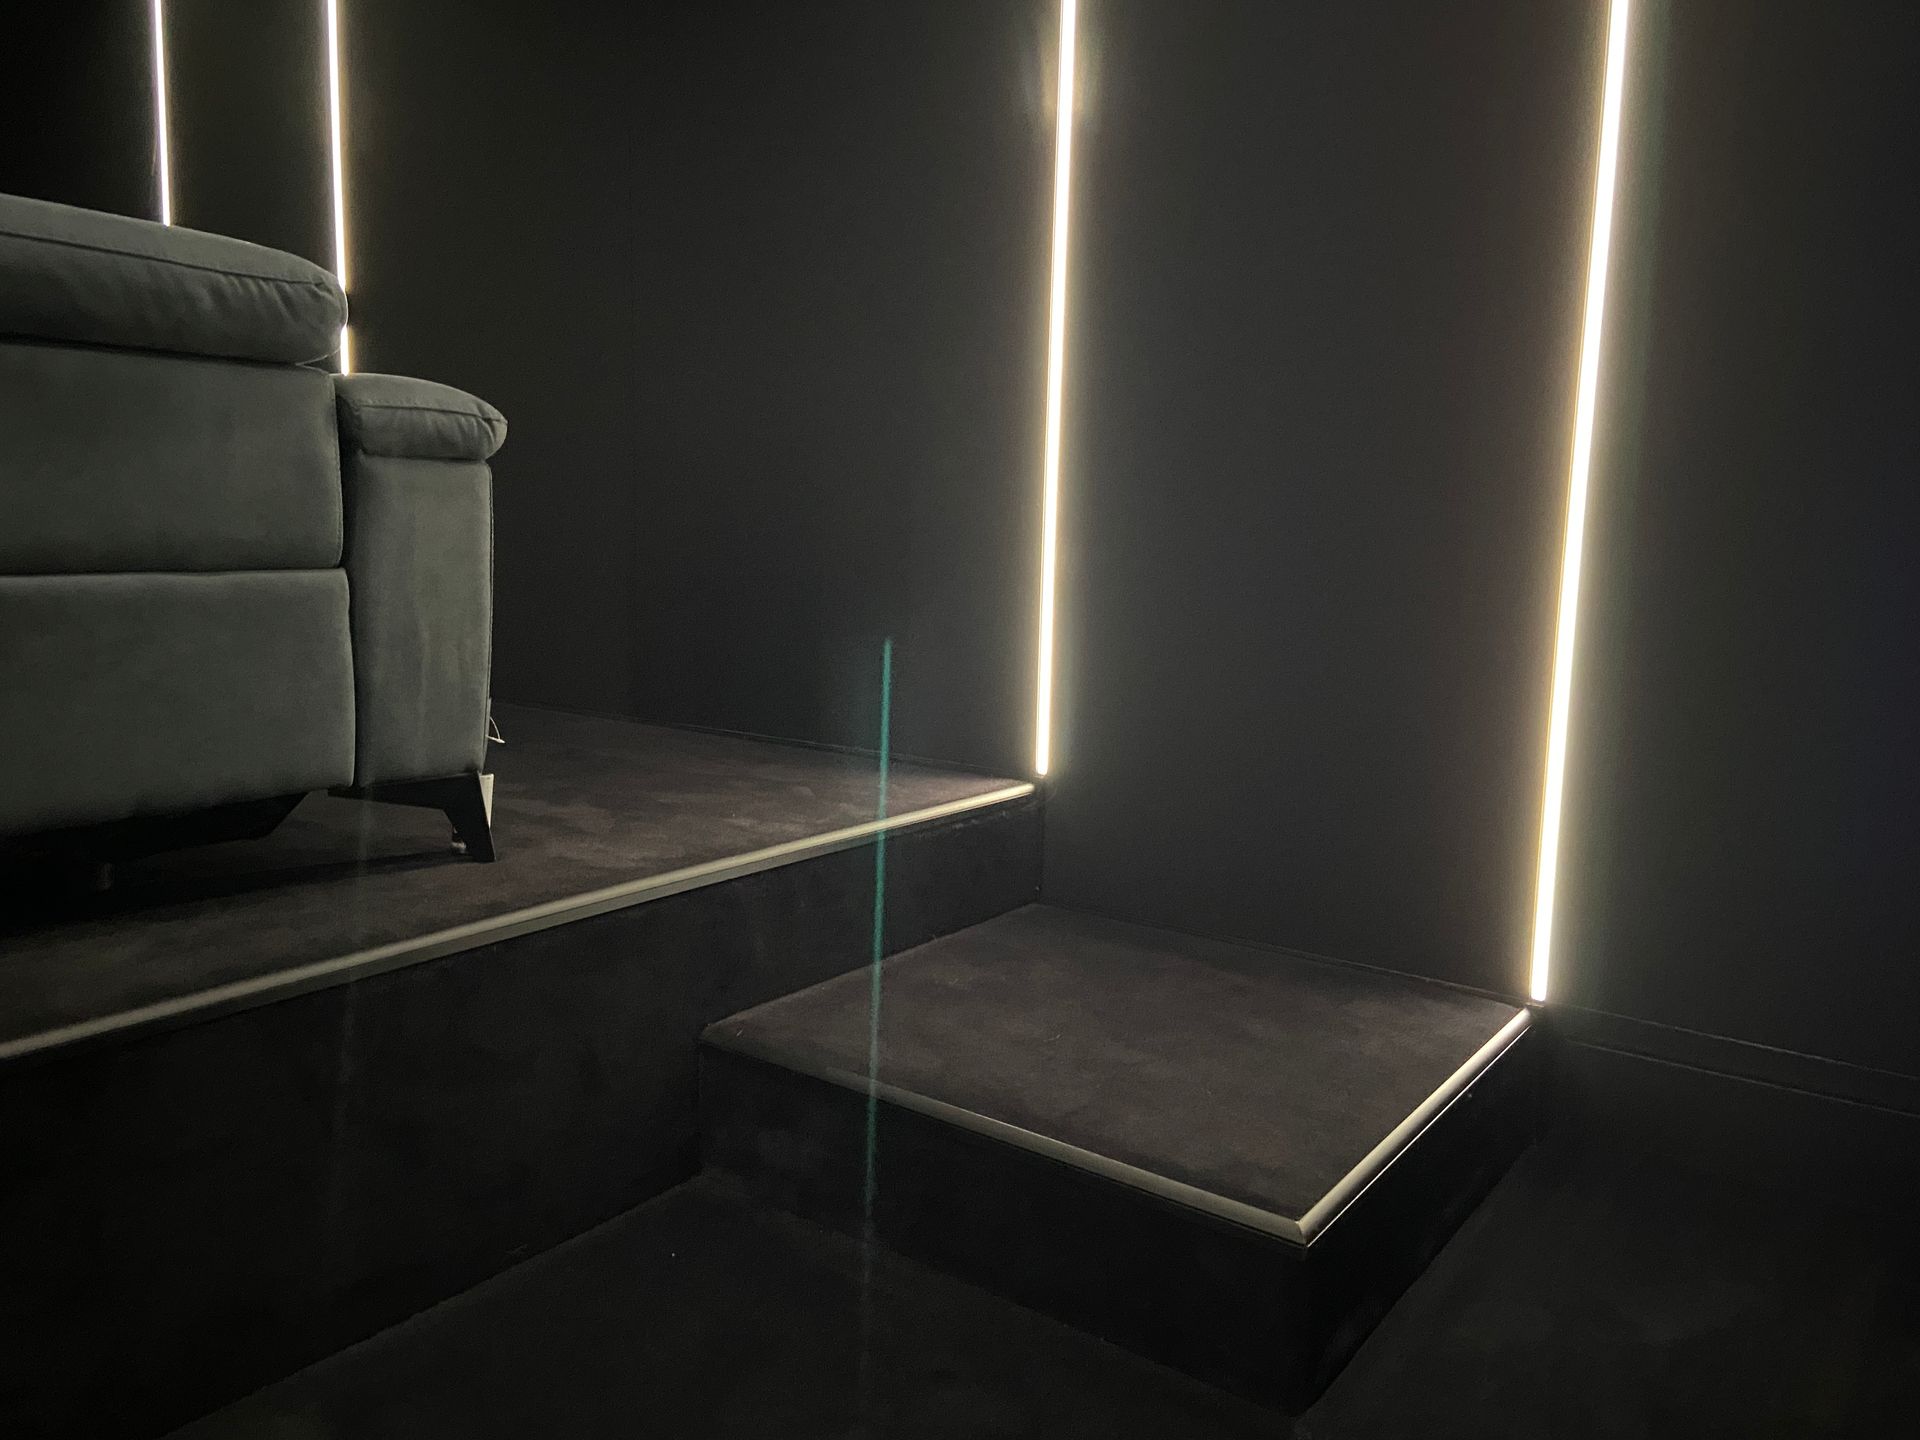
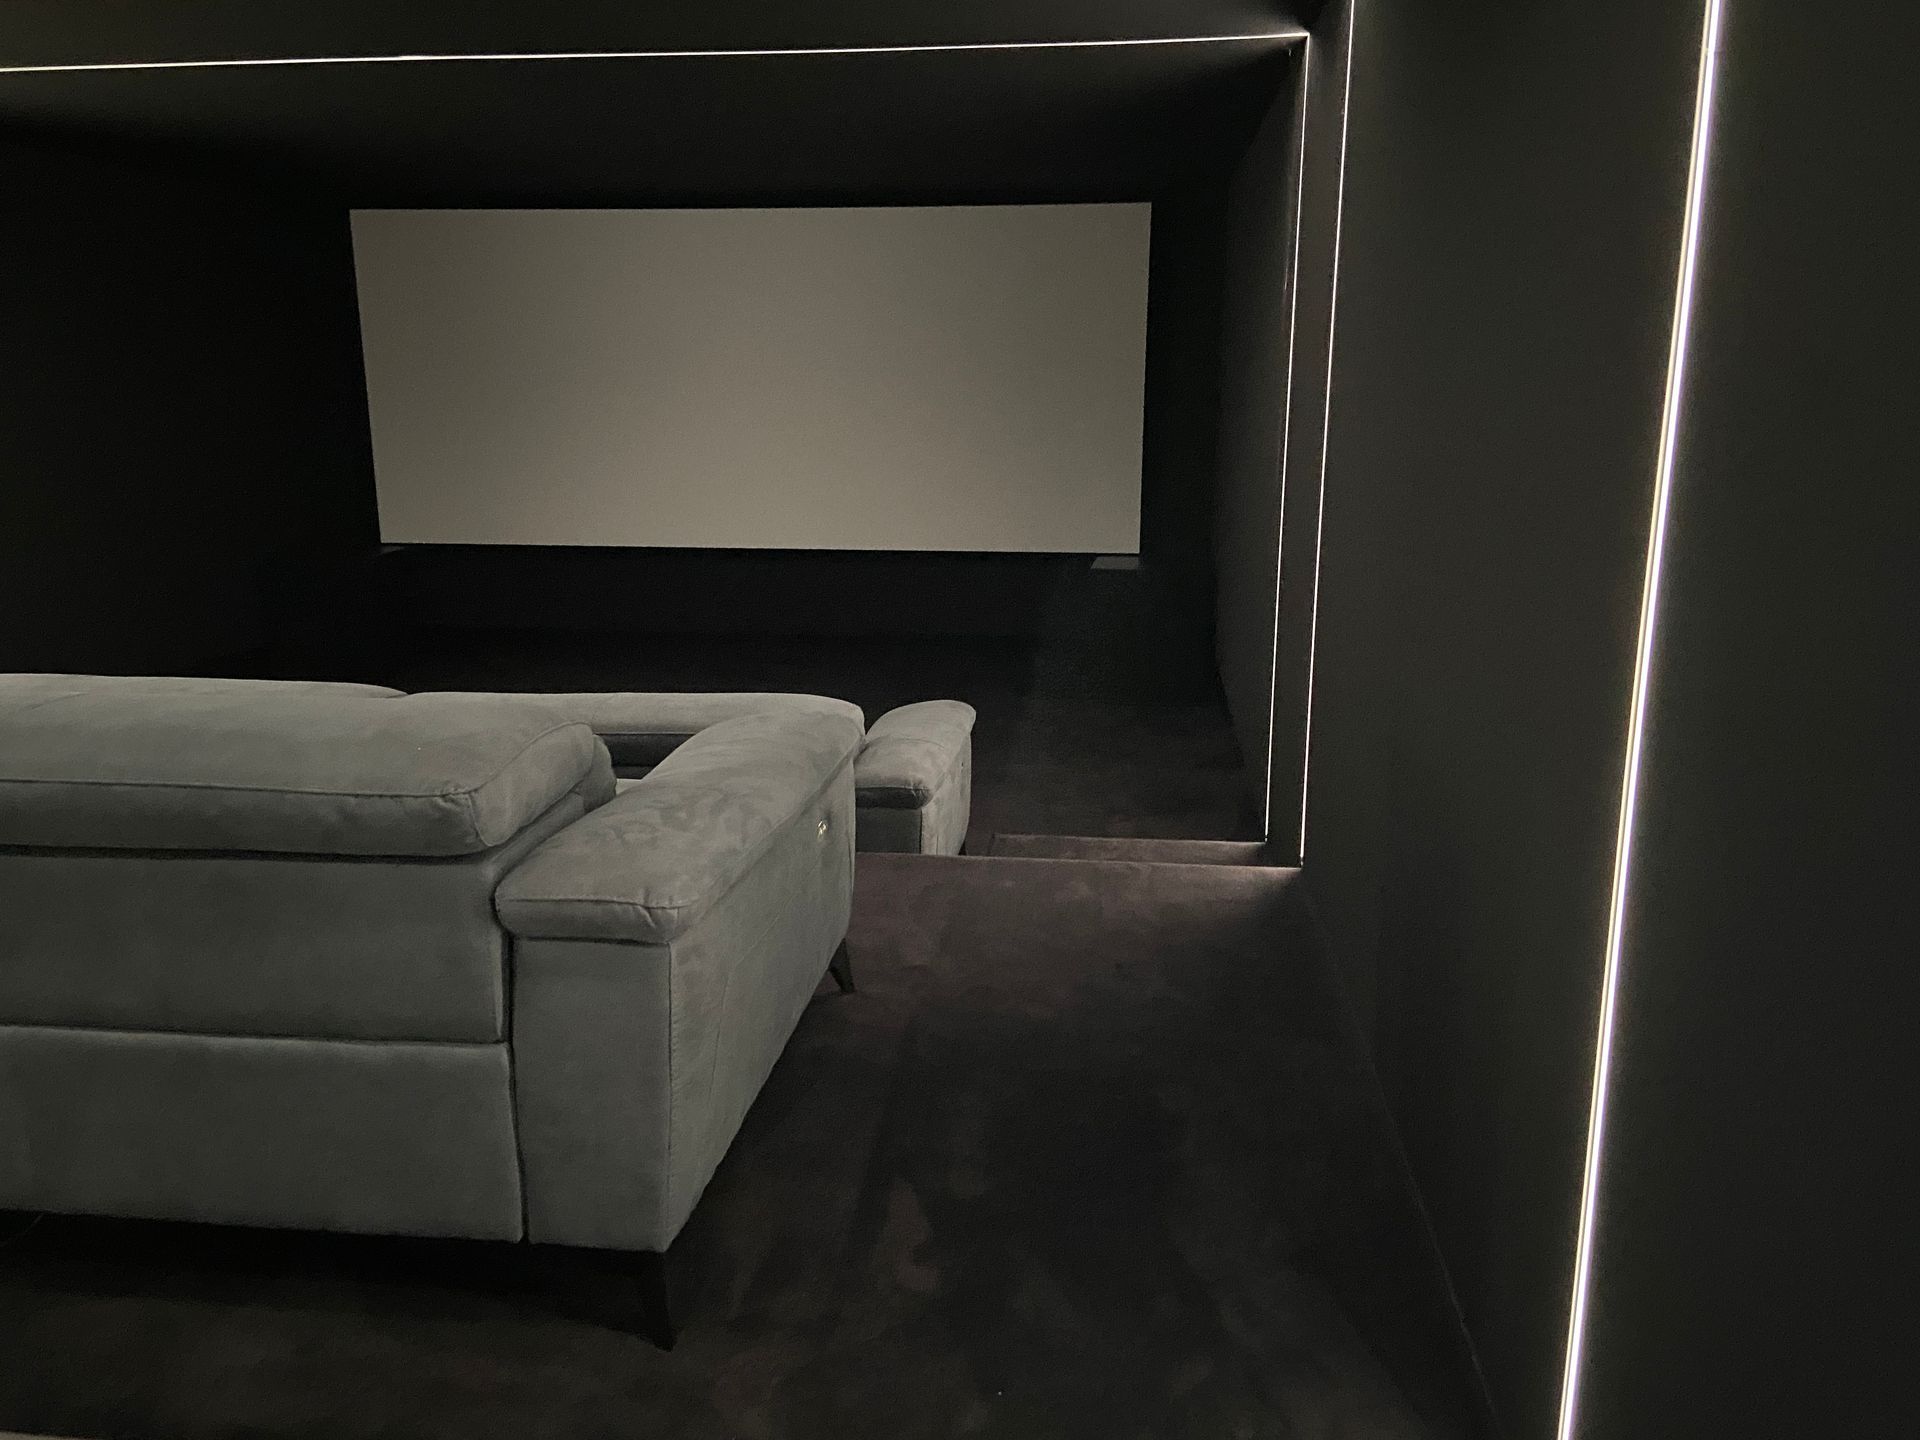
Finished cinema room
We hope you’ll agree that this room very much met with the client’s original brief that ‘The image and sound performance of the room was to take centre stage over the interior design features’.
We think the photographs and videos in this case study show case this performance over interior design approach (even though they were only taken on a mobile phone).
We’re very proud to have successfully delivered this project for the client, on budget and to the performance levels we had described to them during the initial design process.
We are sure the client will enjoy many hundreds of hours of entertainment in this amazing private home cinema room.
360 degree sweep around finished home cinema room
The video below shows a 360 degree sweep around the finished home cinema room
Smart lighting programmed sequence in home cinema room
The video below shows some of the smart lighting programming we created in the cinema room
Finished cinema room (professional photographs)
We will be soon having a professional photographer take some photograph of the finished cinema room...check back to see some amazing photographs

Summary of installed equipment
Home Entertainment
- Home Cinema Room - 9.1.6 - Dolby Atmos:
- 3 x Triad® LCR Speakers
- 4 x Triad® Surround Speakers
- 2 x Triad® Wide Speakers
- 4 x Triad® Subwoofer Speakers
- 6 x Triad® Height Speakers
- 1 x Arcam AV Processor
- 2 x Arcam Power Amplifiers
- 1 x Parasound Power Amplifier
- 1 x JVC 4K Projector
- 1 x Panasonic 4K Blu-Ray Player
- 1 x Roku 4K Streaming Media Player
- 1 x Cinema Build Systems – 4m wide 2.4:1 Halo Projection Screen
- Cinema Build Systems Space Frame System
- Cinema Build Systems Acoustic Treatment Panels
- Camira Stretch Fabric Wall Fit Out
- THX Calibration
Smart Lighting
- LED strip lights
- 4 x Up and over strips in walls and ceiling
- 2 Circuits of strip lights shining down from base of fabric wall
- Control4® Centralised Lighting Panels:
- Dimmer Modules to control LED strip lights in room
- 8 x Lighting LED Drivers
- 1 x Control4® Wired Keypads
- 1 x Faradite Motion Sensor to activate lights
Comfort & Convenience
- Integration with Client’s Daikin Air Conditioning
Smart Home Control System
- Control4® Smart Home Scenes
Intelligent Networking
- 1 x 42U Racks
- 1 x Wireless Access Point
- 2 fibre optic HDMI cables
Book a Free of Charge & No Obligation Initial Consultation
Use the form below to book a Free of Charge & No Obligation Initial Consultation...to discuss how we could help you with your specific project.
Note: Search for a suitable date and time. Next complete the relevant details in the form to provisionally book your consultation. We will then get in touch with you to confirm your consultation.
Click here to book using our online scheduling tool

View our other projects
Click the button below to visit the Portfolio section of our website to view our other projects